
Secrets Behind Roof Longevity
Admin • February 28, 2020
Secrets behind roof longevity – from attic insulation in winter to year-round maintenance
Leaving bedroom makeovers and kitchen remodeling aside, roof installation comes as the most costly home improvement project. To make sure that your investment will not vanish, it does make sense to take care of roof maintenance. This will allow you to extend its lifespan and eliminate the need of re-roofing every other year. Many homeowners in the U.S. believe, though, that mold inspection once in a while is quite enough for this purpose. The fact is that upkeep matters are way more taxing.
In the best-case scenario, your roof must serve you as long as you live in a house. But did you know that the average life expectancy of roofing is about 15-20 years? Of course, there are many factors that influence its lifespan, including design, material, and climate, but you should still never expect a flat roof to last for half a century.
If regular re-roofing is not at the top of your agenda, you have to uncover the secrets behind roof longevity. Whether it’s about asphalt shingles or wooden shakes, commercial or residential buildings, it all comes down to proper inspection and maintenance.
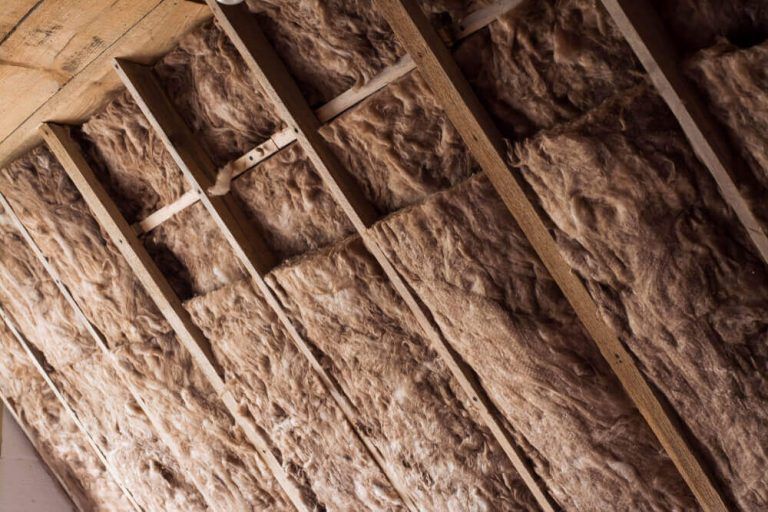
Attic insulation as a necessary preventative measure
At first, make sure your attic is properly insulated and ventilated. This will not only provide a consistent flow of air inside the building but also help you lower the energy bills, resulting in normal temperature conditions in winter and summer. Remember, even if you are using your attic as a place for storage, it still requires adequate upkeep.
Attic insulation also serves as an additional barrier that protects your house against roof leaks and mold growth. If your shingles fail to ensure integrity, it is insulation that prevents water from penetrating the covering. That is why it comes as a priority when preparing your home for winter – when there is a high risk of ice dams.
Ice dams on the roof surface can be a real headache for homeowners. When accumulated at the eaves, snow blocks a drainage system and leads to the unwanted build-ups which may cause leakage and, thus, severe damage to the building. By insulating your attic, however, these risks can be minimized, especially if combined with other preventative measures.
Here are the most useful tips on how to prevent ice dams on a roof:
- Make sure your gutters and downspouts are free of debris so that meltwater can run down through them without being accumulated at the eaves.
- Remove snow from your roof as far as possible. You can use a roof rake to do it yourself. Better yet, hire a contractor to get the job done professionally.
- Install gutter heaters to melt snow build-ups and prevent blockage. Roof heating cables are proven to be the best for this purpose.
So, all you need to prevent ice from accumulating on your roof is to implement some measures. Combine them with the proper insulation, and you’ll never have to deal with unwanted dams again. Nowadays, there are many types of insulation that vary in thickness, density, and thermal effectiveness, known as R-value. The most popular of them for attic applications are spray foam, batts, blankets, and structural insulated panels.

Make your roof maintenance go beyond mold inspection
To lay the foundation for the longevity of your roof, you have to carry out routine maintenance, no matter the time of the year. Whether it’s summer or fall, it is crucial to watch out for potential issues which may compromise the integrity of uppermost parts of the building. Here are the most common signs of poor roofing you should be wary of:
- damaged or missing shingles;
- corroded flashings;
- shrinkage of the roof membrane;
- holes on the roof surface;
- loss of shingle granules;
- water stains on a ceiling or walls;
- damaged vents, downspouts, or gutters.
As a homeowner, you can always take care of roof upkeep yourself. But if you need expert advice on the well-suited types of insulation for your covering and want to get all roof repairs done decently, give Home Run Improvement a call. We have state-of-the-art equipment, consummate skills, and many years of experience in serving clients in Kentucky and meeting all their roofing needs. In other words, we have all it takes to prolong the life of your roof while trimming your unnecessary expenses.
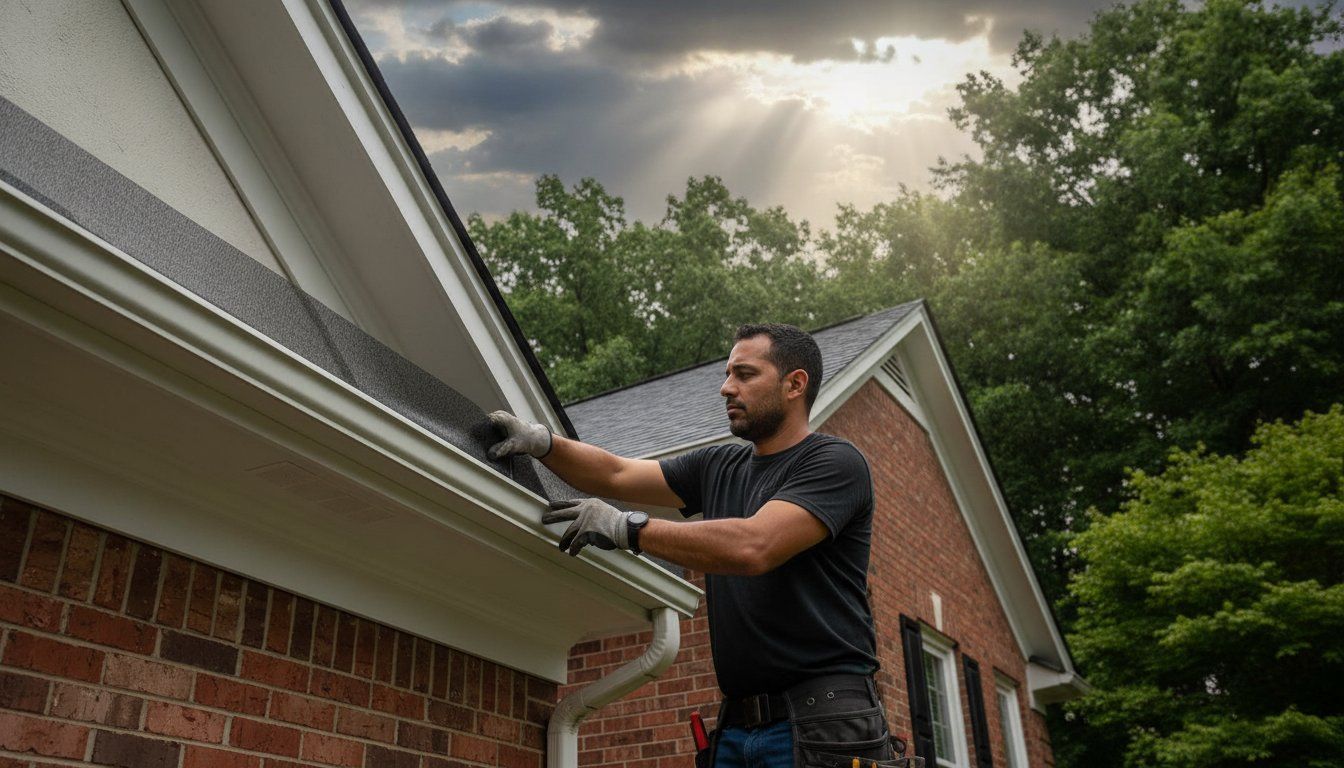
If you believe the greatest threat to your property is a passing thunderstorm, you're overlooking the silent damage accumulating just above your head. In a city that sees nearly 50 inches of annual rainfall according to NOAA climate data , a clogged gutter isn't just a nuisance; it's a direct invitation for foundation erosion and basement flooding. You shouldn't have to risk a life-altering fall from a ladder just to clear out the endless debris from local Oak and Maple trees. We understand the anxiety that comes when the clouds darken over Jefferson County, especially when you know your downspouts are struggling to keep up. By choosing professional gutter guard installation Louisville KY, you're not just buying a product; you're investing in a permanent structural defense. This guide will demonstrate how the Shurflo system protects your home from water damage without compromising your roofing warranty. When you prioritize precision engineering over DIY fixes, you ensure your home remains dry and your weekends remain yours. We'll examine the technical advantages of micro-mesh technology and why professional calibration is the only way to achieve true peace of mind during a heavy Kentucky downpour. Key Takeaways Identify the specific Louisville climate risks, including the high precipitation rates documented by the National Weather Service , that threaten your home's foundation. Explore the technical advantages of Shurflo micro-mesh technology and how it uses natural airflow to keep your system maintenance-free without the need for ladder climbing. Discover why professional gutter guard installation Louisville KY is essential for preventing wood rot and basement moisture issues caused by clogged downspouts. Understand the importance of choosing an Owens Corning Preferred Contractor to ensure your gutter system integration doesn't void your roof's warranty. Learn how a 10-year craftsmanship warranty from a local expert provides the ultimate security for your home's exterior and long-term stability. Why Louisville Homes Require Specialized Gutter Protection Louisville's weather isn't just unpredictable; it's aggressive. If your gutter system fails during a typical Kentucky spring, the consequences start at your roofline and end at your foundation. Most homeowners view gutters as a simple drainage tool, but they're actually your home's primary defense against structural decay and long-term instability. When water isn't managed correctly, it doesn't just disappear; it finds the path of least resistance into your home's framework. According to local climate data , Louisville averages nearly 50 inches of rain per year. This volume is often delivered in high-intensity bursts that quickly overwhelm generic screen guards. When water overflows because of a clog, it saturates the fascia board and roof rafters. This constant moisture increases the risk of wood rot, which can compromise the integrity of your entire roofing system before you even notice a leak inside. It's not just the water that causes issues; it's the specific biological load of the Ohio Valley. Local foliage presents a unique challenge that standard hardware store filters can't handle. Oak tassels and Maple "helicopters" are notorious for bypassing wide-mesh screens. Once inside, they decay into a thick sludge that creates blockages nearly impossible to clear without professional intervention. To maintain a functional home, you need a system designed for the Science of Clog-Free Performance . The Environmental Impact of the Ohio Valley In heavily wooded neighborhoods like Anchorage and Glenview, pine needles pose a distinct threat. These thin, sharp needles pierce through most guards, creating a "bird's nest" effect that traps other debris. If your gutter guard installation Louisville KY doesn't account for these micro-debris types, you'll still find yourself on a ladder twice a year. High-intensity rainstorms in our region require a guard that can handle rapid water intake while simultaneously shedding these stubborn needles. We've seen hundreds of homes where "guaranteed" systems failed because they weren't engineered for our local tree density. Foundation Risks Specific to Louisville Soil Kentucky soil is rich in expansive clay, which behaves like a sponge. When this clay absorbs excessive water from overflowing gutters, it swells and puts immense pressure on your basement walls. If you don't move water at least 10 feet away from your home, you're inviting foundation cracks and chronic basement moisture. Professional gutter guard installation Louisville KY ensures that water is captured and diverted properly every single time. Ignoring these signs often leads to the hidden dangers of incorrect gutter installation , which eventually results in five-figure foundation repair bills. A proactive approach to gutter protection is the only way to safeguard your home's structural footprint. Shurflo Gutter Guards: The Science of Clog-Free Performance Shurflo is not a simple screen or a temporary retail insert. It's a professional-grade micro-mesh system engineered to filter out everything from heavy branch debris to the finest shingle grit. While big-box retailers sell plastic inserts that warp under the intense Kentucky sun, Shurflo utilizes a heavy-duty aluminum construction that maintains its shape for decades. If you choose a metal-based system, you avoid the common pitfalls of sagging and collapsing that plague cheaper alternatives. This durability is essential for any gutter guard installation Louisville KY , where our fluctuating temperatures can quickly degrade inferior materials. The true genius of the Shurflo system lies in its patented technology. It uses natural airflow to keep the surface clear. As wind moves across the low-profile guard, it creates a vortex that lifts and blows away dry leaves and debris. This self-cleaning mechanism ensures that the system remains functional without constant manual intervention. Because the guards sit flush with your gutters, they don't disturb your roof's aesthetic or create an unsightly "hump" at the roofline. They integrate seamlessly, providing a clean, finished look that enhances your home's curb appeal. Micro-Mesh vs. Perforated Aluminum Many systems use wide perforations that allow small seeds and shingle granules to pass through. Once these particles enter the gutter, they combine with moisture to form a sludge that promotes organic growth. Shurflo's surgical-grade micro-mesh is designed to block these microscopic contaminants. This level of filtration meets the rigorous standards often discussed in independent gutter protection testing. By preventing organic buildup, you eliminate the risk of internal gutter corrosion and the foul odors associated with stagnant debris. How Shurflo Handles Heavy Kentucky Downpours Louisville's maximum hourly rainfall rate can reach 5.5 inches, a volume that would cause most guards to "overshoot," sending water cascading over the edge. Shurflo solves this with a unique siphoning action. The mesh surface breaks the water's tension, pulling it into the gutter even on steep-slope roofs. Managing this runoff is a core part of Specialized Gutter Protection , as it prevents the soil saturation that threatens your foundation. Our Professional Gutter Guard Services ensure that every panel is calibrated to handle these high-velocity events. If you're tired of seeing water bypass your gutters during spring storms, request a technical consultation to see how Shurflo manages heavy volume. Professional Installation vs. DIY: Protecting Your Roof Warranty Many homeowners view gutter guards as a simple weekend project, but this assumption often leads to expensive long-term consequences. If you install a guard incorrectly, you risk more than just a leaky gutter; you risk voiding your entire roofing warranty. Most high-quality roofing systems, specifically those from Owens Corning, require strict adherence to installation standards that protect the integrity of the shingles. When an amateur tucks a guard under the first course of shingles, they can break the sealant bond or damage the starter strip, leaving your roof vulnerable to wind uplift and water infiltration. Structural integration is the difference between a system that works and one that fails. A professional gutter guard installation Louisville KY ensures that the guard is calibrated to your home's specific roof pitch and gutter size. If the guard isn't aligned perfectly with your gutter installation Louisville KY , water will simply overshoot the mesh during a heavy rain, defeating the purpose of the investment. We see this frequently with store-bought parts that aren't designed for the high-velocity runoff common on steep Kentucky roofs. Safety remains the most immediate concern. According to data from the Centers for Disease Control and Prevention, falls from ladders are a leading cause of emergency room visits for homeowners. Hiring a fully insured contractor eliminates this personal liability. You shouldn't have to risk your physical well-being for routine maintenance. When you choose a professional service, you aren't just buying a product; you're securing a result that is backed by professional accountability and proper insurance coverage. The Owens Corning Preferred Contractor Advantage As an Owens Corning Preferred Contractor, we understand the chemistry of your roof. We ensure that your Shurflo guards are installed without lifting or damaging the shingles. This expertise is critical for maintaining your manufacturer's coverage. If a non-certified installer damages your roof during a gutter project, the manufacturer won't cover the resulting leaks. You can learn more about how we protect your home's exterior through our specialized Roofing Services Louisville . Why a 10-Year Craftsmanship Warranty Matters A store-bought guard comes with a limited product warranty, but it offers zero protection if the installation itself fails. We provide a 10-year craftsmanship warranty on every project we complete. This promise creates a level of peace of mind that a DIY project simply can't match. If a panel shifts or a seal fails during a storm, we take responsibility for the fix. This long-term accountability is the hallmark of a local expert who cares about the community's structural health. The Installation Process: What to Expect from Home Run Improvement Professionalism in home exterior work is defined by a methodical, transparent process. If you're investing in gutter guard installation Louisville KY , you deserve a sequence of events that treats your home as a complete, integrated system. We don't simply snap panels into place and leave. Our approach is designed to eliminate the common industry pitfalls that lead to system failure and homeowner frustration. Every project begins with a comprehensive audit of your existing drainage to ensure the foundation is sound before any protection is applied. Step 1: Gutter System Optimization Putting guards on a failing gutter is a classic "Protective Expert" anti-pattern that we strictly avoid. Before the Shurflo panels are even unpacked, we perform a deep cleaning and structural tune-up. We inspect every linear foot for sagging, loose hangers, and incorrect pitch. If your gutters aren't sloped correctly, water will pool and breed mosquitoes regardless of how clean the guards are. We repair loose spikes and adjust the pitch to ensure proper water runoff. In cases where the existing metal is too thin or damaged to support a guard, we may recommend a full Gutter Installation and Replacement to provide a stable base for your new protection system. Step 2: Precision Micro-Mesh Fitting Once the gutters are optimized, we begin the custom fitting of the Shurflo panels. This isn't a "one size fits all" application. Each panel is precision-cut to match the unique angles of your roofline, especially in complex areas like valleys and miters where water volume is highest. We secure the shurflo gutter guards using a specialized attachment method that does not penetrate your roof deck or lift your shingles. This is vital for maintaining your manufacturer's warranty. We've completed hundreds of these technical fits in neighborhoods from Jeffersontown to Prospect, ensuring that even the most intricate architectural details are fully protected. Following InterNACHI standards for exterior drainage, we verify that every connection point is seamless and secure. The final stage is the flow test. We don't consider the job done until we've simulated a heavy downpour using a high-volume water test. We watch the water enter the mesh, travel through the gutter, and clear the downspouts without any overshooting or leaking at the seams. This rigorous inspection ensures that your home is ready for the next Kentucky storm before our crew leaves the driveway. We take personal responsibility for the performance of the system, treating your property with the same precision we would our own. Schedule your precision installation today Choosing a Local Louisville Expert for Your Gutter Guards Choosing a local contractor is about more than just convenience; it's about accountability. National firms often rely on a revolving door of subcontractors who may not be in business when you need a warranty repair in five years. When you invest in gutter guard installation Louisville KY with a neighborly expert, you ensure that the person who installs the system is the same one who stands behind the 10-year craftsmanship warranty. We live in these communities, from the historic streets of Anchorage to the growing neighborhoods in Crestwood . This local presence means your curb appeal and home value are personal to us. You can verify our standing as a dependable local fixture through the Better Business Bureau of Louisville . One Partner for Your Entire Exterior Managing your home's exterior through a single, specialized partner creates a level of efficiency that fragmented projects can't match. Your roof, siding, and gutters work as a unified shield. For instance, high-performance Siding Services Louisville are only as effective as the drainage above them. If your gutters overflow, the constant splash-back can lead to premature wood rot and staining on your exterior walls. By coordinating your gutter protection with products like LP SmartSide siding, you eliminate these vulnerabilities before they become costly repairs. This holistic approach ensures that every component is calibrated to protect the others, providing a seamless defense for your property. Schedule Your Free Louisville Estimate Don't wait for the heavy saturation of the next Kentucky spring to test your home's defenses. Securing your property for 2026 starts with a technical evaluation of your current system. We've built our reputation as a "Protective Expert" by providing honest, assertive guidance on what your home actually needs to stay dry and stable. You can research local building standards and rainfall management through the Louisville Metro Government website to understand why precision matters. When you're ready to stop climbing ladders and start protecting your foundation, Contact Home Run Improvement for a comprehensive, free estimate. We'll provide the specialized knowledge and long-term stability your Louisville home deserves. Protect Your Louisville Home's Structural Integrity Effective water management is the most critical investment you can make for your property's longevity. By integrating Shurflo's micro-mesh technology, you replace the dangerous cycle of ladder-climbing with a permanent, self-cleaning solution. We've seen how the high-intensity rainfall in the Ohio Valley can compromise foundations; professional gutter guard installation Louisville KY prevents these structural failures before they begin. When you choose a locally owned business that is also an Owens Corning Preferred Contractor, you ensure your roof warranty remains intact while gaining a system calibrated for our specific local foliage. We stand behind every project with a 10-year craftsmanship warranty because we believe in the precision of our work and the resilience of your home. You deserve the peace of mind that comes from knowing your basement will stay dry during the next heavy Kentucky downpour. It's time to stop reacting to clogs and start proactively defending your home's exterior with a partner who treats your property as their own. Secure Your Foundation with a Free Gutter Guard Estimate Take the first step toward a maintenance-free exterior and a more secure home today. Our team is ready to provide the specialized protection your Louisville property requires. Frequently Asked Questions Are gutter guards actually worth it for Louisville homeowners? Yes, gutter guards are a vital investment for Louisville homes due to our average annual precipitation of nearly 50 inches. Without them, your foundation is at constant risk from overflowing water. Beyond structural protection, they eliminate the need for dangerous ladder work. According to the Centers for Disease Control and Prevention, falls from ladders are a leading cause of home injuries. We ensure your gutter guard installation Louisville KY provides long-term stability and safety. Will Shurflo gutter guards void my roofing warranty? No, Shurflo guards will not void your warranty when installed by a certified expert. As an Owens Corning Preferred Contractor , we use installation methods that don't penetrate or lift your shingles. Many DIY products require tucking under the first course, which breaks the sealant bond. Our professional-grade approach maintains the integrity of your roofing system while providing a seamless drainage solution that meets all manufacturer specifications for warranty compliance. How often do I need to clean gutters that have guards installed? You'll rarely need to touch your gutters again. Shurflo's patented technology uses natural airflow to blow dry leaves and debris off the mesh surface. While no system is 100% maintenance-free forever, this micro-mesh design significantly reduces the cleaning frequency compared to open gutters. InterNACHI standards suggest that even with guards, a quick ground-level visual inspection once a year is a best practice to ensure your downspouts remain clear of any ground-level obstructions. Can Shurflo guards handle the heavy rain we get in Kentucky? Absolutely. Shurflo systems are engineered with a unique siphoning action that pulls water through the mesh even during high-velocity downpours. In Louisville, the maximum hourly rainfall rate can reach 5.5 inches, according to National Weather Service data . While generic screens often cause water to "overshoot," Shurflo's surgical-grade mesh breaks the water's surface tension. This ensures every drop is captured and diverted safely away from your home's foundation and siding. Do gutter guards cause ice dams during Louisville winters? Gutter guards themselves do not cause ice dams. These issues are typically the result of poor attic insulation and heat loss through the roof deck. When snow melts and refreezes at the gutter line, it creates a dam. Proper gutter guard installation Louisville KY ensures that the guard doesn't interfere with your roof's natural thermal performance. For more information on preventing winter roof damage, consult the Energy Star guide on ice dams. What is the difference between micro-mesh and the guards sold at hardware stores? The primary difference is durability and filtration. Hardware store guards are often made of plastic that warps or thin mesh that allows small seeds and shingle grit to pass through. Shurflo uses a heavy-duty aluminum frame and surgical-grade stainless steel mesh. This combination prevents organic growth inside the gutter and resists the extreme temperature fluctuations of the Ohio Valley. Citing the Science of Clog-Free Performance , professional systems offer superior resilience over retail alternatives. How long does the professional installation process take? Most residential projects are completed within a single day. Our process is methodical, beginning with a full cleaning and structural tune-up of your existing gutters to ensure they are pitched correctly. Once the foundation is ready, we precision-fit the Shurflo panels to your home's specific roofline. This efficient timeline allows you to secure your home's exterior without a prolonged construction presence. We respect your property and follow BBB Louisville standards for professional conduct and site cleanliness. Does Home Run Improvement offer a warranty on gutter guard installation? Yes, we provide a fixed 10-year craftsmanship warranty on every installation. This covers the labor and precision of the fit, ensuring your system performs as promised. Additionally, the Shurflo product itself comes with a 25-year transferable manufacturer warranty. This double layer of protection gives you peace of mind that your investment is secure. If you have questions about specific coverage details, you can review our 10-year warranty policy to see how we prioritize local accountability.
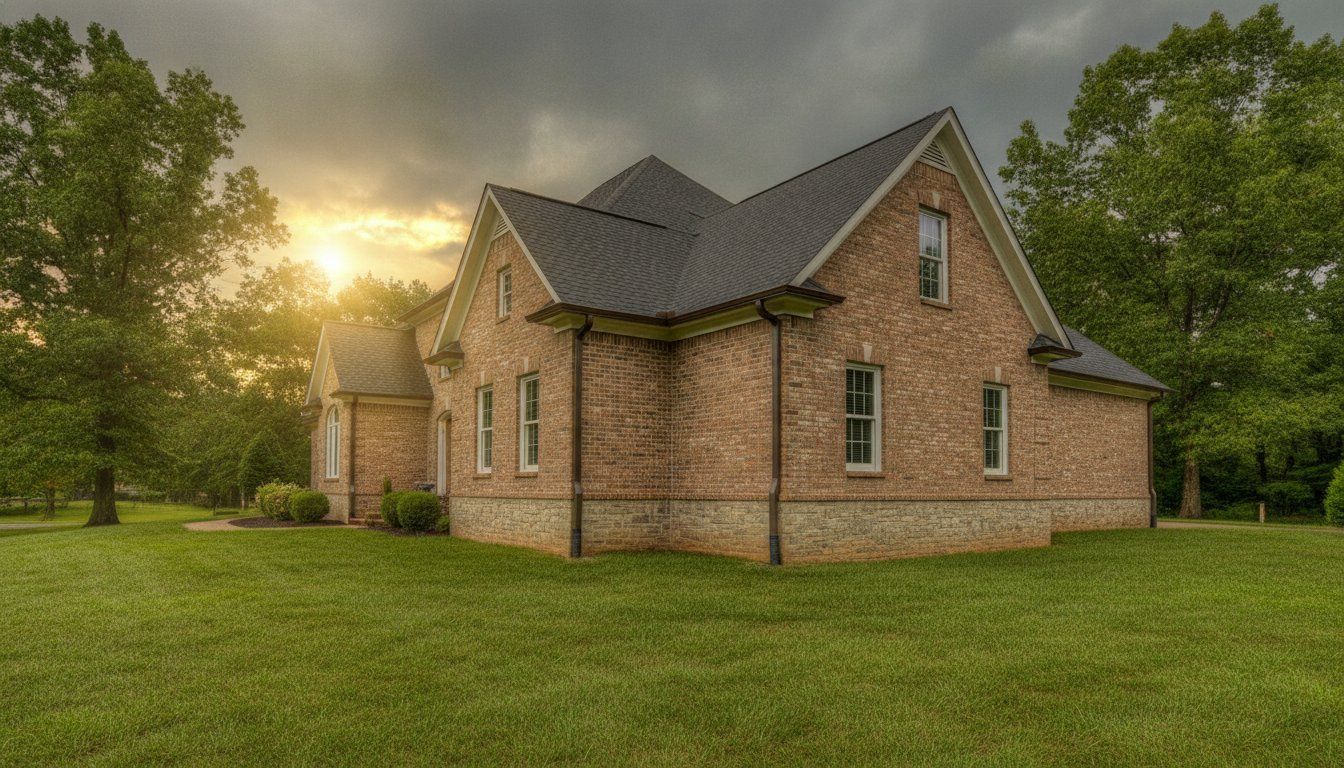
Louisville receives between 43 and 46 inches of rainfall annually, meaning your roof must shed tens of thousands of gallons of water every year. If this volume is not managed with precision through a professional gutter installation Louisville KY, it quickly becomes a destructive force that erodes foundations and rots expensive siding. You likely recognize the frustration of overflowing channels or the anxiety of seeing water pool near your basement during a Kentucky thunderstorm. These are not just maintenance headaches; they are direct threats to your home's structural integrity. When you prioritize a high quality water management system, you transform your property's defense from a liability into a long-term asset. We promise to guide you through the technical essentials of professional installation, ensuring your investment is backed by a 10-year craftsmanship warranty. This 2026 guide covers everything from selecting durable materials to understanding local building codes for downspout discharge. By the end of this article, you will have the knowledge to secure a maintenance-free system that enhances your curb appeal while providing the security your family deserves. Key Takeaways Learn why Louisville’s specific combination of high annual rainfall and clay-heavy soils requires a custom-engineered water management system to prevent foundation failure. Discover why 6-inch seamless gutters are the 2026 standard for Kentucky homes with steep rooflines and high-volume runoff requirements. Master the technical details of professional gutter installation Louisville KY, including the importance of correct roof pitch calculations and on-site extrusion. Understand how your gutters must integrate with your roof’s drip edge and LP SmartSide siding to provide a seamless, rot-proof exterior envelope. Learn how to vet local contractors to ensure your investment is protected by a 10-year craftsmanship warranty and professional-grade materials. Why Professional Gutter Installation is Vital for Louisville Homes Louisville homes face a unique set of environmental pressures that make standard retail gutters insufficient. A professional gutter installation Louisville KY is not merely a home improvement project; it is a custom-engineered water management system designed to protect your home's entire structure. In our region, the "Louisville Factor" is a reality every homeowner must address. We receive between 43 and 46 inches of rainfall annually, and our local clay-heavy soils react poorly to that volume of moisture. When water isn't moved away from your home, it saturates the ground, causing the soil to expand and exert massive hydrostatic pressure on your foundation walls. Choosing a qualified expert for your gutter installation Louisville KY ensures that every detail, from the pitch of the troughs to the precise placement of downspouts, is calculated for maximum efficiency. If you settle for a generic setup or poor workmanship, you face the incorrect gutter installation risks that lead to long-term structural instability. Proper runoff isn't just about convenience; it's the primary defense against basement flooding and costly landscape erosion that can devalue your property overnight. The Threat of Foundation Erosion in Kentucky Kentucky's clay-rich soil is notorious for holding water rather than draining it quickly. As this soil becomes saturated, it creates intense pressure against your basement or crawlspace walls. This pressure is often strong enough to cause concrete to crack, bow, or leak over time. A professional gutter system acts as a diversionary tactic, collecting thousands of gallons of water from your roof and depositing it safely away from the perimeter. Following FEMA guidelines on residential drainage is a standard we take seriously. If you don't manage this water with precision, you're essentially inviting the elements to undermine your home's stability. Protecting Your Home's Siding and Curb Appeal Water management also preserves your home's exterior finishes. When gutters overflow, water cascades down the siding, leading to unsightly staining, mold growth, and eventual rot. This is particularly dangerous for wood or vinyl exteriors that aren't designed for constant saturation. We position our gutter systems as the primary shield for your LP SmartSide installation . By keeping water off the panels, you maintain the material's integrity and your home's curb appeal. Seamless aluminum gutters offer a sleek, modern look that fits perfectly in Louisville neighborhoods, proving that high-performance protection can also enhance your home's visual value. Selecting the Right Gutter Materials and Sizing for Your Property Choosing the correct specifications for your gutter system is a technical decision that impacts your home's safety for decades. While 5-inch gutters were once the regional default, 6-inch systems have become the 2026 standard for a professional gutter installation Louisville KY. This shift is driven by the increasing frequency of high-intensity storms. A 6-inch gutter carries nearly double the water volume of a 5-inch system, which is vital if your home has a steep roof pitch or large surface area. If your gutters are undersized, they will inevitably overflow during a heavy Kentucky downpour, rendering the entire system useless regardless of how new it is. Durability is also tied to the thickness, or gauge, of the material. We prioritize .032 gauge aluminum because it offers the structural integrity needed to withstand the weight of winter ice and the force of high winds. If you settle for thinner, retail-grade materials, you risk sagging and hardware failure within just a few seasons. Beyond sizing, you must consider the profile. K-Style gutters are the most popular for modern homes because they mimic crown molding and provide superior strength. For historical properties in the Highlands or Old Louisville, half-round gutters offer a timeless aesthetic that preserves the home's original character. Seamless Aluminum: The 2026 Industry Standard Seamless aluminum is the preferred choice for most Louisville homeowners due to its balance of resilience and value. Because these gutters are custom-extruded on-site from a single coil of metal, they eliminate the seams where leaks typically begin. This design ensures that water remains contained until it reaches the downspout. Modern aluminum alloys are entirely rust-proof and come in a vast array of factory-finished colors. This allows us to perfectly coordinate your gutters with your vinyl siding or trim, creating a cohesive look that boosts curb appeal. Specialty Gutters for Anchorage and Prospect Estates For high-end estates or historical restorations, specialty metals like Copper and Galvalume provide unmatched longevity and distinction. Copper is a lifetime material that develops a protective patina over time, often lasting 50 years or more with minimal intervention. Galvalume, a steel substrate coated in aluminum and zinc, offers a rugged, industrial aesthetic with extreme corrosion resistance. When installing these systems, we adhere strictly to National Roofing Contractors Association (NRCA) standards to ensure every soldered joint and hanger is placed with precision. If you are unsure which material suits your architecture, you can schedule a professional assessment to review the best options for your specific roofline. Step-by-Step: The Professional Gutter Installation Process Professional gutter installation Louisville KY requires more than just hanging metal on a house. It is a technical process that begins with a detailed assessment of your home's roof geometry. We don't guess at the requirements; we measure the roof's total square footage and calculate the specific pitch to understand how fast water will reach the eaves. This data dictates the placement of every component in the system. If the calculations are off, even the most expensive materials will fail to manage a heavy Kentucky storm. Once we've finalized the plan, we fabricate the system on-site. Using a mobile extrusion machine, we roll-form seamless gutters from heavy-gauge aluminum coils to the exact length of your home's roofline. This eliminates the weak points found in store-bought, sectional gutters. When you choose a custom-fit system, you remove the risk of leaks at the joints. The most critical technical detail is the pitch. To ensure optimal flow, we maintain a precise 1/4-inch drop for every 10 feet of gutter run. If the slope is too shallow, water will pool and attract pests; if it's too steep, the water will overshoot the downspout during a heavy storm. We secure these channels using heavy-duty hidden hangers screwed directly into the rafter tails. This is a significant upgrade over outdated spikes and ferrules, which frequently pull loose during Kentucky's freeze-thaw cycles. By using hidden hangers, we provide a cleaner look and a much stronger attachment that can withstand the weight of heavy ice or wet leaves. Fascia Board Inspection and Preparation Before any metal is attached, we perform a rigorous inspection of the fascia boards. If we find rot or soft wood, we replace it immediately. Hanging a new system on a failing substrate is a recipe for disaster. This preparation creates a stable foundation for the gutter and provides essential support for the edge of your Owens Corning roof . This step is non-negotiable because it prevents water from wicking back into your roof deck or behind your siding panels. Downspout Placement and Discharge Strategy Efficiency depends on the discharge strategy. We identify the high and low points of the gutter run to ensure gravity works in your favor. In Louisville, we recommend oversized downspouts to handle the volume of sudden, heavy downpours. Whether we are directing water into underground drainage pipes or onto strategically placed splash blocks, the goal is to move every gallon at least six feet away from your foundation. Proper placement ensures that your gutter installation Louisville KY functions as a complete water management solution rather than just a collection point. Integrating Gutters with Roofing and Siding Systems A gutter system is only as effective as its integration with the rest of your home’s exterior. If the transition between your roof shingles and your gutters is flawed, the most expensive hardware in the world won't prevent rot. When we execute a professional gutter installation Louisville KY, we view the project as part of a complete exterior envelope. This perspective allows us to ensure that your drip edge, flashing, and siding work in concert to move water away from the structure without allowing a single drop to migrate behind your protective layers. Water is persistent. It finds the smallest gaps. By maintaining a precise overlap where the roof's drip edge meets the gutter trough, we eliminate the capillary action that pulls moisture back toward your fascia boards. Maintaining this synergy requires more than just proper installation; it requires ongoing functionality. This is where gutter guards play a vital role. When gutters clog, water backs up under the shingles or overflows onto the siding, causing immediate damage. A multi-service contractor understands these intersections better than a specialist who "just does gutters." We coordinate the entire system so that every component supports the others, creating a unified defense against Kentucky’s weather. Protect your home’s exterior with an integrated gutter system Gutters and Owens Corning Roofing Standards As an Owens Corning Preferred Contractor, we adhere to strict installation protocols that protect your roof warranty. Proper guttering is essential for preventing ice damming at the roof edge during Louisville winters. If water cannot drain freely, it freezes at the eaves and forces moisture under the shingles. We coordinate the gutter pitch with existing roof flashing according to Owens Corning's technical specs . This meticulous approach ensures that the roof-to-gutter transition remains watertight and resilient against heavy snow or torrential rain. The LP SmartSide and Gutter Connection Your siding is equally dependent on a high-functioning gutter system. For homeowners with LP SmartSide siding , gutters are the primary defense against splash-back and moisture absorption at the base of the walls. We ensure the necessary 1-inch clearance is maintained between siding and roof lines, allowing the gutters to catch runoff without trapping moisture against the engineered wood. Professional gutter installation Louisville KY is required to keep these siding warranties intact. If your gutters are poorly hung, they can cause overflow that leads to swelling or finish failure on your siding panels over time. Hiring a Trusted Louisville Gutter Contractor: Warranty and Quality The success of your water management system depends entirely on the accountability of the person behind the tools. When you hire a trusted home contractor in Louisville , you're securing a partner who understands our local climate and building codes. If you choose an out-of-town "storm chaser" with no local roots, you lose the ability to seek recourse if your system fails during the next season. We believe in total transparency, which is why we maintain professional licensing and full Workers' Comp coverage to protect you from liability. Our status as an Owens Corning Preferred Contractor and LP SmartSide Master Lead is not just a badge; it's proof that we adhere to the highest standards in the industry. Security and peace of mind come from a formal 10-year craftsmanship warranty . Most competitors only highlight the manufacturer's material warranty, which does nothing to help you if a leak is caused by improper pitch or loose hangers. When you choose our team for your gutter installation Louisville KY, we take personal responsibility for every screw and seal. This logic is simple: if we do the job right the first time, your home remains protected for a decade or more. If an issue arises due to our workmanship, we fix it. It's a level of integrity that transforms a standard home improvement project into a stable, long-term investment. Evaluating Contractor Testimonials and Reviews Don't take a contractor's word for their quality; verify it through the experiences of your neighbors. When you analyze Google reviews , look for specific mentions of technical precision and site cleanliness. A reputable contractor should be able to provide recent references from specific neighborhoods like Crestwood or Glenview. You should also consult the Louisville Metro Licensing records to ensure your chosen professional is in good standing with the city. Authentic feedback from local homeowners is the most reliable indicator of how a company will treat your property. Final Checklist Before Your Gutter Project Before you sign any contract, ensure the technical specifications are clearly defined. A professional estimate must include the specific gutter gauge, the exact spacing of the hidden hangers, and a commitment to full debris removal. If these details are missing, the quote is incomplete. Verify that your system is designed for the specific rainfall rates of the Ohio Valley to avoid future overflows. When you're ready to secure your foundation and siding with a professional assessment, schedule your free estimate today to begin your home's transformation. Protect Your Home’s Future with Precision Water Management Your property represents a significant investment that deserves uncompromising protection. In 2026, a high-performance gutter system is the primary defense against the specific environmental pressures of the Ohio Valley. By prioritizing a professional gutter installation Louisville KY, you effectively shield your foundation from erosion and keep your LP SmartSide siding free from moisture damage. We have established how the technical precision of a 6-inch seamless system, when combined with a correct 1/4-inch pitch, ensures that even the heaviest Kentucky downpours are managed with absolute efficiency. Home Run Improvement has been locally owned and operated in Louisville since 2020. As an Owens Corning Preferred Contractor, we don't just hang hardware; we engineer long-term structural stability. Our 10-year craftsmanship warranty stands as a firm commitment to our standards and your lasting peace of mind. When you choose an expert who understands the intersection of roofing, siding, and drainage, you secure an exterior envelope that is built to endure for decades. Secure Your Home with Professional Gutter Installation Take the proactive step today to ensure your property remains a safe, dry, and resilient sanctuary for your family for many years to come. Frequently Asked Questions How much does gutter installation cost in Louisville, KY? Gutter installation costs in the Louisville area vary based on the home's perimeter, the number of stories, and the chosen material. While we don't provide fixed pricing without a site assessment, factors like the roof's complexity and downspout count influence the final estimate. It's best to verify current material rates for aluminum or copper. Every project we handle includes a 10-year craftsmanship warranty to ensure your investment remains protected against Kentucky's unpredictable weather cycles. What is the best type of gutter for Kentucky's weather? Seamless aluminum is the most resilient and cost-effective choice for the Louisville climate. It doesn't rust and handles the heavy 43 to 46 inches of annual rainfall efficiently. For luxury estates in Anchorage or Prospect, copper offers a 50-year lifespan and a unique patina. Regardless of material, choosing a professional gutter installation Louisville KY ensures the system is custom-extruded to eliminate the seams where ice and debris typically cause structural failure. How often should I clean my gutters if I don't have guards? You should clean your gutters at least twice a year, ideally in late spring and late fall. Louisville's heavy seasonal foliage means that oak and maple seeds or autumn leaves quickly obstruct water flow. If you live in a heavily wooded area like Indian Hills, you might need quarterly maintenance. Neglecting this leads to water backing up under your shingles, which can eventually compromise your Owens Corning roofing system and cause interior leaks. Can I install new gutters over my existing fascia boards? You can only install new gutters over existing fascia if the wood is structurally sound and free from rot. We perform a rigorous inspection of the fascia boards before every gutter installation Louisville KY project begins. If we discover soft spots or moisture damage, we replace the wood immediately. Hanging a heavy gutter system on failing wood leads to sagging and hardware failure, which can eventually damage your home's exterior siding panels. What size gutters do I need for a steep roof in Louisville? A 6-inch gutter is the 2026 standard for homes with steep roof pitches or large surface areas. Steep roofs cause water to accelerate quickly during heavy storms. Standard 5-inch gutters often can't capture this high-velocity runoff, leading to overflow that erodes your foundation. By upgrading to 6-inch troughs and oversized downspouts, you ensure your water management system can handle the maximum hourly rainfall rates common in the Ohio Valley without failing. Is seamless gutter installation worth the extra cost? Seamless gutters are absolutely worth the investment because they eliminate the joints where 99 percent of leaks occur. Sectional gutters rely on sealants that eventually dry out and crack under Kentucky’s extreme temperature fluctuations. Because we roll-form our seamless systems on-site to the exact dimensions of your home, you get a cleaner aesthetic and superior durability. This custom fit provides long-term security that sectional retail products simply cannot match over several seasons. How do I know if my gutters were installed incorrectly? Signs of poor installation include standing water in the troughs, water marks on your siding, or gutters that pull away from the house. If you notice water cascading over the edges during a light rain, the pitch is likely incorrect. We often see systems where hangers are spaced too far apart, causing the metal to sag under ice. These errors threaten your foundation and require professional intervention to prevent permanent structural damage to your property. Does a new roof installation include new gutters? A standard roof replacement typically doesn't include gutters unless they are specifically added to the contract. However, we recommend coordinating these projects to ensure a perfect interface between the drip edge and the gutter trough. As a full-service contractor, we can integrate your Owens Corning roof with a new gutter system simultaneously. This approach ensures that your home’s exterior envelope is cohesive and that both warranties are fully protected by professional workmanship.
If your gutters clog every fall and you're tired of climbing a ladder or writing checks to a cleaning crew, you've probably landed on two names: LeafFilter and LeafGuard. Both are national brands, both come with bold guarantees, and both carry price tags that make you want to choose correctly the first time. The U.S. gutter guards market is currently estimated at $0.86 billion in 2025, projected to reach $1.00 billion by 2030, that kind of market growth means more options and more marketing noise, which makes a clear side-by-side breakdown more valuable than ever. This guide cuts through the sales pitches. I've spent years helping homeowners navigate exterior improvement decisions, and in my experience, the biggest mistake people make is treating LeafFilter and LeafGuard as near-identical products. They're built on completely different philosophies. Understanding that difference is what determines whether your investment holds up for decades or disappoints you by spring. Key Takeaways Design determines your fit: LeafFilter is a micro-mesh screen that installs over your existing gutters, while LeafGuard replaces your entire gutter system with a one-piece aluminum unit. Your current gutters' condition is the first question to answer. Fine debris is a dealbreaker: Pine needles cause gutter clogs for 31% of homeowners, according to a 2025 nationwide gutter guard survey of 1,000 homeowners. If you have conifers nearby, micro-mesh wins hands down, act accordingly and rule out reverse-curve designs. Cost ranges overlap, but what you get differs: An average 200-linear-foot project costs approximately $4,334 with LeafGuard, while the same footage with LeafFilter runs about $4,531, according to a November 2025 gutters survey. Price alone should not drive the decision. Clogged gutters are an expensive problem to ignore: A survey from the National Association of Realtors found that 5% of homeowners who experienced foundation repairs paid more than $10,000, and 13% paid between $5,001 and $10,000. A quality gutter guard is cheap insurance by comparison. Local installation quality matters as much as brand: National brands rely on local crews. A locally accountable contractor who stands behind their work long-term is worth more than any national call center. Quick-Start Prioritization Framework Start here if you're: A Louisville-area homeowner who wants a vetted local installer: Home Run Improvement , locally owned, A+ BBB rated, and certified to install Shur Flo guards with a 10-year craftsmanship warranty, without the national brand markup. A homeowner with existing gutters in good condition: LeafFilter installs over what you already have, making it the lower-disruption, lower-cost path. A homeowner needing full gutter replacement: LeafGuard bundles new gutters and guards into one project, which can save you a second contractor visit if your gutters are already failing. How Each System Actually Works Understanding the core technology behind each product makes every other comparison, price, performance, warranty, make more sense. LeafFilter: Micro-Mesh Filtration LeafFilter gutter guards use surgical-grade stainless steel with a 275-micron micro-mesh screen to filter out small debris, including pine needles, leaves, and shingle grit. The guard sits on top of your existing gutters, no full replacement required. LeafFilter is installed at the same 11-degree angle every time, which is the ideal angle for shedding debris. Water passes through the fine mesh into the gutter below while debris dries on top and blows away. In my experience testing and reviewing gutter products, the micro-mesh approach is the gold standard for homes surrounded by mixed tree species. LeafGuard: Reverse-Curve One-Piece System Unlike traditional gutters with add-on covers or screens, the LeafGuard design features a curved hood that deflects debris while allowing rainwater to flow into the gutter trough, keeping leaves, twigs, pests, sediment, and other debris out. Critically, LeafGuard replaces your current gutters entirely. Unlike traditional mesh guards that attach to existing gutters, LeafGuard replaces your current gutters with a new system that has built-in reverse-curve guards, which channel water into the gutters while shedding leaves and debris. This is a larger upfront commitment, but it solves gutter wear and debris protection in a single installation. Pro Tip: Ask your installer to inspect your current gutters before committing to either product. If your gutters are sagging, pulling away from the fascia, or more than 20 years old, LeafGuard's full replacement may actually save you money long-term. If they're structurally sound, LeafFilter's overlay approach is the faster, less disruptive path. Cost Comparison: What You'll Actually Pay Price is where most homeowners start, and it's important to look beyond the per-foot quote. LeafFilter Pricing LeafFilter costs around $41.72 per linear foot, according to responses to a 2026 survey of gutter guard customers nationwide. The national average cost for a LeafFilter gutter project ranges between $2,500 and $6,500, with factors such as home size, roof complexity, and regional labor rates impacting the final cost. Two-story homes with difficult roof access push toward the top of that range fast, plan accordingly and budget for at least the midpoint estimate. LeafGuard Pricing LeafGuard is priced between $20 and $30 per linear foot including installation, a higher upfront investment that includes a lifetime, transferable warranty and a clog-free guarantee. On average, homeowners can expect to pay between $9 and $35 per linear foot for LeafGuard gutters including materials and professional installation, with national average costs for a full installation typically falling between $5,000 and $9,000 depending on home size and installation complexity. Because LeafGuard replaces your gutters too, that cost reflects an entirely new gutter system, not just a guard add-on. The Real Cost of Doing Nothing Minor foundation crack repairs can cost $500 to $2,000, while major structural underpinning to fix a sinking foundation can easily exceed $10,000 to $30,000. When you frame it that way, a $4,000-$6,000 gutter guard installation is genuinely inexpensive risk management. If your gutters are currently unprotected and you live under trees, the math favors acting now. Performance Head-to-Head Debris Filtration This is where the two products diverge most sharply. LeafFilter blocks pine needles shingle grit, pollen, seeds, and other debris while maintaining strong water flow, because of its stainless steel micro-mesh design. In hands-on testing by This Old House , LeafFilter proved it could stop debris that reverse-curve systems simply cannot. For heavy leaf fall, LeafGuard may perform better due to its curved design that easily deflects large leaves, while LeafFilter is ideal for finer debris like pine needles, grit, and pollen. The practical takeaway: if you have pine, cedar, fir, or spruce trees within dropping distance of your roofline, LeafFilter's micro-mesh is the only defensible choice. LeafGuard's curved hood excels at shedding large leaves but leaves fine debris with nowhere to go. Heavy Rain Performance LeafGuard claims its one-piece system handles high water volume with oversized downspouts. However, Today's Homeowner's review data found that in some cases LeafGuard systems overflow in heavy downpours or create ice dams in winter, because heavy rainfall can come down so fast that water overshoots reverse-curve gutter guards. LeafFilter performed well in simulated heavy rain testing, the ultra-fine mesh allowed water to flow through without overflowing, even during simulated heavy rain. Winter and Ice Dam Risk This is a genuine concern worth understanding. Some LeafGuard users in cold climates have reported ice dam problems linked to the curved hood design. However, LeafGuard's authorized dealers argue the system's curved hood prevents internal ice accumulation. The honest answer is that both systems carry some ice-related risk in extreme climates, and both companies recommend proper attic insulation as the primary ice dam defense. If you're in a region with heavy snowfall, discuss this explicitly with your installer before signing anything. Pro Tip: In climates with regular freeze-thaw cycles, ask your installer whether a micro-mesh system with a pitched installation angle performs better than a reverse-curve design. The pitch matters for both debris shedding and ice management. Warranty and Customer Experience Warranties: Similar Headlines, Different Fine Print LeafGuard and LeafFilter both offer limited lifetime warranties that are transferable, meaning you can transfer the warranty to the next owner of your house if you move. However, the details differ. LeafFilter offers a lifetime transferable warranty covering both the product and installation, while LeafGuard offers a lifetime clog-free warranty plus a 25-year paint finish warranty and a 20-year installation warranty. A key distinction: LeafGuard offers a lifetime warranty that covers issues like blistering, flaking, chipping, cracking, peeling, splitting, rotting, and structural deterioration, but it does not guarantee against clogs. LeafFilter's warranty explicitly covers clogs. Read the warranty document, not just the sales rep's summary, before you commit to either brand. Customer Reviews LeafFilter has more than 7,000 reviews on the BBB with an average rating of 3.6 out of 5 stars, while its Trustpilot page shows more than 127,000 reviews with an average rating of 4.1 out of 5 stars. That volume of Trustpilot reviews reflects national scale, but it also means service quality varies widely by location. Some customers report responsive, professional crews; others describe difficulty getting warranty service honored after installation. The pattern that shows up repeatedly in negative reviews for both brands is slow response to warranty callbacks, which is exactly why choosing a locally accountable installer matters so much. Pro Tip: Before hiring any national brand installer, search the BBB specifically for your local branch, not the parent company. Local branch ratings often tell a very different story than the national average. LeafFilter Pros and Cons Pros: Installs over existing gutters, no full replacement required 275-micron micro-mesh blocks fine debris including pine needles and shingle grit Lifetime transferable warranty covers both product and installation Works in all 49 U.S. states with professional installation crews Strong performance in independent testing for debris filtration Cons: Higher-than-average per-foot cost compared to some competitors uPVC frame material may not match the durability of all-aluminum options Mesh surface can accumulate debris film over time and may need occasional rinsing Customer service responsiveness varies significantly by local branch LeafGuard Pros and Cons Pros: Complete one-piece system, replaces gutters and adds guards in a single visit Extra-thick aluminum construction resists rust and warping Larger downspouts for improved water volume handling Seamless construction reduces leak risk at joints Cons: Requires full gutter replacement, higher cost if existing gutters are still functional Curved hood design struggles with fine debris such as pine needles and shingle grit Some homeowners in cold climates report ice dam issues with the hood design Clog-free guarantee does not cover all debris scenarios in warranty fine print Why Home Run Improvement Is the Best Choice for Louisville-Area Homeowners Here's something the national brand comparison often misses: the product is only half the equation. Installation quality and post-install support define whether a gutter guard actually performs as promised over a 10-to-20-year horizon. Home Run Improvement is BBB Accredited with an A+ rating and has been serving Louisville homeowners for over 10 years. Shur Flo gutter guards, the system Home Run Improvement installs, use a patented perf-flow filtration system that lets rainwater through while leaves, pine needles, and debris dry out on top and blow away. Shur Flo fits snugly over your existing gutters, sits low profile (virtually invisible from the ground), and installs without lifting or penetrating your roof shingles, keeping your roofing warranty intact. I've found that most homeowners who go with a local installer over a national brand end up with a better outcome, not because the national product is inferior, but because a local team has real accountability. Home Run Improvement backs its work with a 10-year craftsmanship warranty, which is a meaningful commitment from a company whose crews operate in the same community where you live. Home Run Improvement is a certified contractor for Shur Flo and Leaf Relief, with decades of experience offering affordable gutter guard installation services in Louisville. You get a proven filtering system, a locally accountable crew, and honest guidance without the high-pressure sales approach that shows up repeatedly in national brand reviews. For Louisville homeowners comparing LeafFilter vs LeafGuard, the smarter question is: why pay a national company's overhead when a local expert with a decade of verified performance in your market is available? Request a free estimate from Home Run Improvement and get an honest assessment of what your specific home actually needs. Common Mistakes to Avoid When Buying Gutter Guards Choosing based on advertising alone. Both LeafFilter and LeafGuard run heavy national advertising campaigns. Marketing reach is not the same as product performance. Always check independent testing and local branch reviews. Ignoring your tree situation. The debris type around your home, large leaves versus pine needles versus seed pods, determines which guard design will actually work. A micromesh gutter protection system is the only type of gutter guard that is proven to keep pine needles out. If you have conifers, that fact alone narrows your decision significantly. Skipping the gutter condition check. Installing any guard over gutters that are already sagging, leaking, or improperly pitched wastes your money. Have a qualified contractor assess your existing gutters before committing to a guard product. Fixating on price per linear foot. The main downside to gutter guards is the upfront price, which can run $4,334 to $5,168 on average for 200 linear feet, but the investment can save far more by limiting gutter cleaning and preventing expensive foundation, roofing, and water overflow issues over time. The right frame is total cost of ownership, not sticker price. A closer look at how gutter guard companies operate in the field reveals some common sales tactics and installation shortcuts worth knowing before you sign anything. https://www.youtube.com/watch?v=dK3fT86528k Frequently Asked Questions What is the main difference between LeafFilter and LeafGuard? LeafFilter is a micro-mesh screen that installs over your existing gutters, filtering out fine debris including pine needles and shingle grit. LeafGuard is a full gutter replacement system that uses a one-piece reverse-curve aluminum design to shed large debris. LeafFilter and LeafGuard are very different in their designs, LeafFilter is a micro-mesh gutter guard filter that attaches to the top of existing gutters. The choice depends primarily on whether your current gutters need replacing and what type of debris your trees produce. Which gutter guard is better for homes with pine trees? LeafFilter has a clear advantage for pine needle debris. This Old House chose LeafFilter as the best gutter guard for pine needles because of its ultra-fine stainless steel micro-mesh material, lifetime transferable warranty, and affordability. LeafGuard's reverse-curve design does not filter fine debris effectively, and some homeowners with pine trees have reported ongoing clogging issues with that system. How long do LeafFilter and LeafGuard last? Both systems are built for long-term use with lifetime warranty claims. LeafFilter guards resist corrosion and extreme weather. LeafGuard gutters are made from high-quality, extra-thick aluminum, custom-fitted and professionally installed to ensure durability and effective water management. Real-world durability depends heavily on installation quality and whether you inspect and lightly maintain the system annually. Do I still need to clean my gutters after installing either system? Both systems significantly reduce cleaning frequency, though neither eliminates it entirely. A functional guard system can reduce cleaning frequency to once a year or even less often, and over time these savings may offset the cost of the guard, even if it is not entirely zero maintenance. Expect to rinse LeafFilter's mesh surface occasionally in heavy pollen seasons, and inspect LeafGuard's hood and downspouts after major storms. Is a local installer better than going directly with LeafFilter or LeafGuard? For most homeowners, a local installer with a strong track record offers better accountability than a national brand's franchised crews. Home Run Improvement offers a 10-year warranty and free estimates, with a team providing neighborly reassurance backed by professional authority, ensuring you have the facts required to make an informed decision without the pressure of a sales pitch. Local installers are easier to reach when you need a warranty callback, and their reputation in your community gives them a stronger incentive to get the job right. The Verdict LeafFilter wins on filtration versatility, especially for homes with mixed or fine debris. LeafGuard wins on structural simplicity if you need new gutters anyway and primarily deal with large leaf fall. Both carry meaningful warranties and real-world limitations. For Louisville-area homeowners, the smartest move is to work with Home Run Improvement , a locally owned, A+ BBB-rated team that has been protecting homes in the Louisville market for over a decade. You get honest product guidance, a system sized to your home's actual debris load, and a 10-year craftsmanship warranty from people who will still be in your neighborhood when you need them. Call 502-379-7415 or request your free estimate online today. Sources LeafFilter vs. LeafGuard: Cost, Quotes, and Reviews , This Old House. Side-by-side survey data from 1,000 homeowners, November 2025. https://www.thisoldhouse.com/gutters/leaffilter-vs-leafguard LeafFilter Review 2026 , This Old House. Hands-on testing results, warranty terms, and customer survey findings. https://www.thisoldhouse.com/gutters/leaffilter-review LeafGuard Review 2026 , This Old House. Pricing, installation process, and customer experience analysis. https://www.thisoldhouse.com/gutters/leafguard-review Best Gutter Guards for Pine Needles 2026 , This Old House. Independent testing of LeafFilter's micro-mesh performance on pine needle debris. https://www.thisoldhouse.com/gutters/best-gutter-guards-for-pine-needles Gutter Guard Statistics 2026 , N Gutter. U.S. market size, regional growth data, and homeowner adoption trends. https://ngutter.com/gutter-guard-statistics/ United States Gutter Guards Market , Research and Markets / Mordor Intelligence. Market size ($0.86B in 2025) and growth forecasts through 2030. https://www.researchandmarkets.com/report/united-states-gutter-guards-market How Gutters Protect Your Home Foundation , Legacy Gutters. Foundation repair cost data citing National Association of Realtors survey. https://legacygutters.com/2026/04/10/how-gutters-protect-home-foundation/ The Long-Term Savings of Installing Gutter Guards , Cola City Roofing. Foundation damage and repair cost ranges linked to clogged gutters. https://colacityroofing.com/blog/the-long-term-savings-of-installing-gutter-guards/ Gutter Guard Installation Cost 2026 , This Old House. Average per-linear-foot and total project pricing for professionally installed guards. https://www.thisoldhouse.com/gutters/gutter-guard-installation-cost Home Run Improvement Gutter Guard Services , Home Run Improvement. Shur Flo installation details, 10-year warranty, and Louisville service area. https://www.homerunimprovement.com/services/gutter-guards