
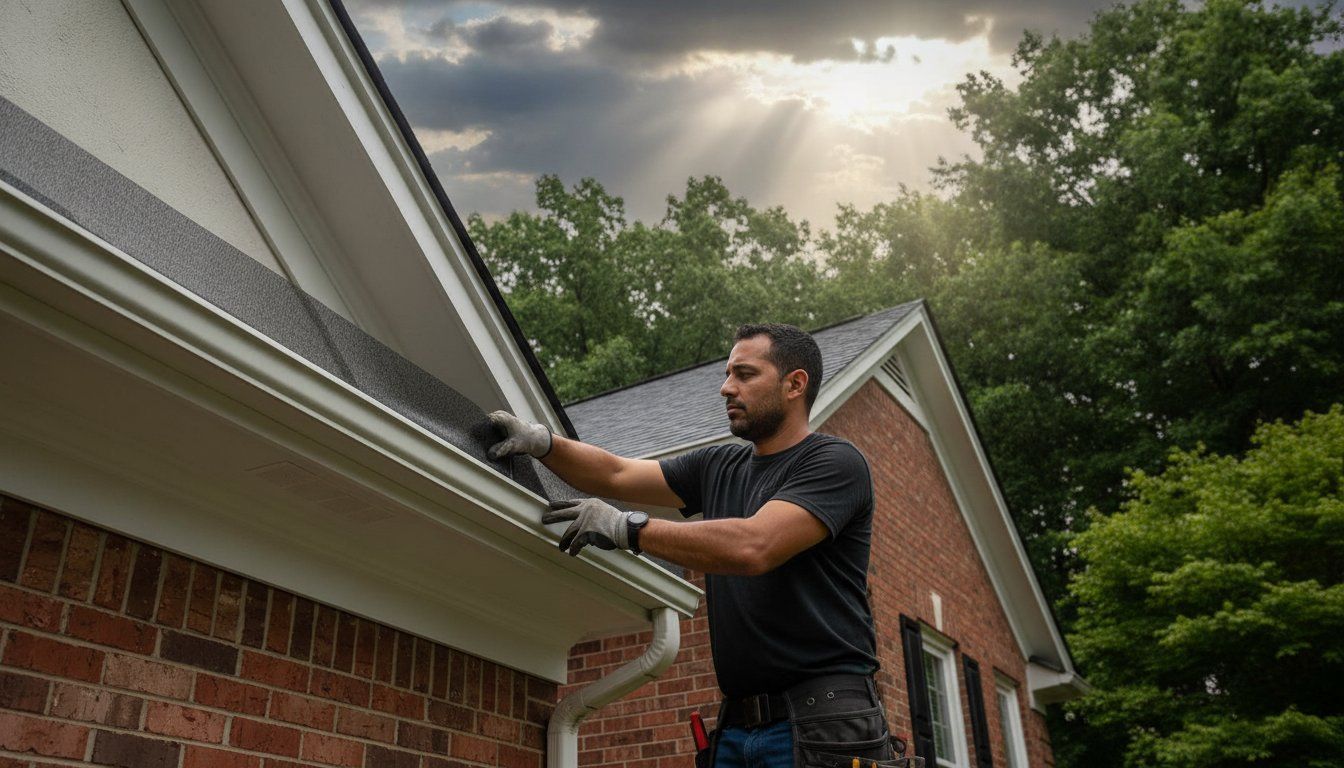
If you believe the greatest threat to your property is a passing thunderstorm, you're overlooking the silent damage accumulating just above your head. In a city that sees nearly 50 inches of annual rainfall according to NOAA climate data , a clogged gutter isn't just a nuisance; it's a direct invitation for foundation erosion and basement flooding. You shouldn't have to risk a life-altering fall from a ladder just to clear out the endless debris from local Oak and Maple trees. We understand the anxiety that comes when the clouds darken over Jefferson County, especially when you know your downspouts are struggling to keep up. By choosing professional gutter guard installation Louisville KY, you're not just buying a product; you're investing in a permanent structural defense. This guide will demonstrate how the Shurflo system protects your home from water damage without compromising your roofing warranty. When you prioritize precision engineering over DIY fixes, you ensure your home remains dry and your weekends remain yours. We'll examine the technical advantages of micro-mesh technology and why professional calibration is the only way to achieve true peace of mind during a heavy Kentucky downpour. Key Takeaways Identify the specific Louisville climate risks, including the high precipitation rates documented by the National Weather Service , that threaten your home's foundation. Explore the technical advantages of Shurflo micro-mesh technology and how it uses natural airflow to keep your system maintenance-free without the need for ladder climbing. Discover why professional gutter guard installation Louisville KY is essential for preventing wood rot and basement moisture issues caused by clogged downspouts. Understand the importance of choosing an Owens Corning Preferred Contractor to ensure your gutter system integration doesn't void your roof's warranty. Learn how a 10-year craftsmanship warranty from a local expert provides the ultimate security for your home's exterior and long-term stability. Why Louisville Homes Require Specialized Gutter Protection Louisville's weather isn't just unpredictable; it's aggressive. If your gutter system fails during a typical Kentucky spring, the consequences start at your roofline and end at your foundation. Most homeowners view gutters as a simple drainage tool, but they're actually your home's primary defense against structural decay and long-term instability. When water isn't managed correctly, it doesn't just disappear; it finds the path of least resistance into your home's framework. According to local climate data , Louisville averages nearly 50 inches of rain per year. This volume is often delivered in high-intensity bursts that quickly overwhelm generic screen guards. When water overflows because of a clog, it saturates the fascia board and roof rafters. This constant moisture increases the risk of wood rot, which can compromise the integrity of your entire roofing system before you even notice a leak inside. It's not just the water that causes issues; it's the specific biological load of the Ohio Valley. Local foliage presents a unique challenge that standard hardware store filters can't handle. Oak tassels and Maple "helicopters" are notorious for bypassing wide-mesh screens. Once inside, they decay into a thick sludge that creates blockages nearly impossible to clear without professional intervention. To maintain a functional home, you need a system designed for the Science of Clog-Free Performance . The Environmental Impact of the Ohio Valley In heavily wooded neighborhoods like Anchorage and Glenview, pine needles pose a distinct threat. These thin, sharp needles pierce through most guards, creating a "bird's nest" effect that traps other debris. If your gutter guard installation Louisville KY doesn't account for these micro-debris types, you'll still find yourself on a ladder twice a year. High-intensity rainstorms in our region require a guard that can handle rapid water intake while simultaneously shedding these stubborn needles. We've seen hundreds of homes where "guaranteed" systems failed because they weren't engineered for our local tree density. Foundation Risks Specific to Louisville Soil Kentucky soil is rich in expansive clay, which behaves like a sponge. When this clay absorbs excessive water from overflowing gutters, it swells and puts immense pressure on your basement walls. If you don't move water at least 10 feet away from your home, you're inviting foundation cracks and chronic basement moisture. Professional gutter guard installation Louisville KY ensures that water is captured and diverted properly every single time. Ignoring these signs often leads to the hidden dangers of incorrect gutter installation , which eventually results in five-figure foundation repair bills. A proactive approach to gutter protection is the only way to safeguard your home's structural footprint. Shurflo Gutter Guards: The Science of Clog-Free Performance Shurflo is not a simple screen or a temporary retail insert. It's a professional-grade micro-mesh system engineered to filter out everything from heavy branch debris to the finest shingle grit. While big-box retailers sell plastic inserts that warp under the intense Kentucky sun, Shurflo utilizes a heavy-duty aluminum construction that maintains its shape for decades. If you choose a metal-based system, you avoid the common pitfalls of sagging and collapsing that plague cheaper alternatives. This durability is essential for any gutter guard installation Louisville KY , where our fluctuating temperatures can quickly degrade inferior materials. The true genius of the Shurflo system lies in its patented technology. It uses natural airflow to keep the surface clear. As wind moves across the low-profile guard, it creates a vortex that lifts and blows away dry leaves and debris. This self-cleaning mechanism ensures that the system remains functional without constant manual intervention. Because the guards sit flush with your gutters, they don't disturb your roof's aesthetic or create an unsightly "hump" at the roofline. They integrate seamlessly, providing a clean, finished look that enhances your home's curb appeal. Micro-Mesh vs. Perforated Aluminum Many systems use wide perforations that allow small seeds and shingle granules to pass through. Once these particles enter the gutter, they combine with moisture to form a sludge that promotes organic growth. Shurflo's surgical-grade micro-mesh is designed to block these microscopic contaminants. This level of filtration meets the rigorous standards often discussed in independent gutter protection testing. By preventing organic buildup, you eliminate the risk of internal gutter corrosion and the foul odors associated with stagnant debris. How Shurflo Handles Heavy Kentucky Downpours Louisville's maximum hourly rainfall rate can reach 5.5 inches, a volume that would cause most guards to "overshoot," sending water cascading over the edge. Shurflo solves this with a unique siphoning action. The mesh surface breaks the water's tension, pulling it into the gutter even on steep-slope roofs. Managing this runoff is a core part of Specialized Gutter Protection , as it prevents the soil saturation that threatens your foundation. Our Professional Gutter Guard Services ensure that every panel is calibrated to handle these high-velocity events. If you're tired of seeing water bypass your gutters during spring storms, request a technical consultation to see how Shurflo manages heavy volume. Professional Installation vs. DIY: Protecting Your Roof Warranty Many homeowners view gutter guards as a simple weekend project, but this assumption often leads to expensive long-term consequences. If you install a guard incorrectly, you risk more than just a leaky gutter; you risk voiding your entire roofing warranty. Most high-quality roofing systems, specifically those from Owens Corning, require strict adherence to installation standards that protect the integrity of the shingles. When an amateur tucks a guard under the first course of shingles, they can break the sealant bond or damage the starter strip, leaving your roof vulnerable to wind uplift and water infiltration. Structural integration is the difference between a system that works and one that fails. A professional gutter guard installation Louisville KY ensures that the guard is calibrated to your home's specific roof pitch and gutter size. If the guard isn't aligned perfectly with your gutter installation Louisville KY , water will simply overshoot the mesh during a heavy rain, defeating the purpose of the investment. We see this frequently with store-bought parts that aren't designed for the high-velocity runoff common on steep Kentucky roofs. Safety remains the most immediate concern. According to data from the Centers for Disease Control and Prevention, falls from ladders are a leading cause of emergency room visits for homeowners. Hiring a fully insured contractor eliminates this personal liability. You shouldn't have to risk your physical well-being for routine maintenance. When you choose a professional service, you aren't just buying a product; you're securing a result that is backed by professional accountability and proper insurance coverage. The Owens Corning Preferred Contractor Advantage As an Owens Corning Preferred Contractor, we understand the chemistry of your roof. We ensure that your Shurflo guards are installed without lifting or damaging the shingles. This expertise is critical for maintaining your manufacturer's coverage. If a non-certified installer damages your roof during a gutter project, the manufacturer won't cover the resulting leaks. You can learn more about how we protect your home's exterior through our specialized Roofing Services Louisville . Why a 10-Year Craftsmanship Warranty Matters A store-bought guard comes with a limited product warranty, but it offers zero protection if the installation itself fails. We provide a 10-year craftsmanship warranty on every project we complete. This promise creates a level of peace of mind that a DIY project simply can't match. If a panel shifts or a seal fails during a storm, we take responsibility for the fix. This long-term accountability is the hallmark of a local expert who cares about the community's structural health. The Installation Process: What to Expect from Home Run Improvement Professionalism in home exterior work is defined by a methodical, transparent process. If you're investing in gutter guard installation Louisville KY , you deserve a sequence of events that treats your home as a complete, integrated system. We don't simply snap panels into place and leave. Our approach is designed to eliminate the common industry pitfalls that lead to system failure and homeowner frustration. Every project begins with a comprehensive audit of your existing drainage to ensure the foundation is sound before any protection is applied. Step 1: Gutter System Optimization Putting guards on a failing gutter is a classic "Protective Expert" anti-pattern that we strictly avoid. Before the Shurflo panels are even unpacked, we perform a deep cleaning and structural tune-up. We inspect every linear foot for sagging, loose hangers, and incorrect pitch. If your gutters aren't sloped correctly, water will pool and breed mosquitoes regardless of how clean the guards are. We repair loose spikes and adjust the pitch to ensure proper water runoff. In cases where the existing metal is too thin or damaged to support a guard, we may recommend a full Gutter Installation and Replacement to provide a stable base for your new protection system. Step 2: Precision Micro-Mesh Fitting Once the gutters are optimized, we begin the custom fitting of the Shurflo panels. This isn't a "one size fits all" application. Each panel is precision-cut to match the unique angles of your roofline, especially in complex areas like valleys and miters where water volume is highest. We secure the shurflo gutter guards using a specialized attachment method that does not penetrate your roof deck or lift your shingles. This is vital for maintaining your manufacturer's warranty. We've completed hundreds of these technical fits in neighborhoods from Jeffersontown to Prospect, ensuring that even the most intricate architectural details are fully protected. Following InterNACHI standards for exterior drainage, we verify that every connection point is seamless and secure. The final stage is the flow test. We don't consider the job done until we've simulated a heavy downpour using a high-volume water test. We watch the water enter the mesh, travel through the gutter, and clear the downspouts without any overshooting or leaking at the seams. This rigorous inspection ensures that your home is ready for the next Kentucky storm before our crew leaves the driveway. We take personal responsibility for the performance of the system, treating your property with the same precision we would our own. Schedule your precision installation today Choosing a Local Louisville Expert for Your Gutter Guards Choosing a local contractor is about more than just convenience; it's about accountability. National firms often rely on a revolving door of subcontractors who may not be in business when you need a warranty repair in five years. When you invest in gutter guard installation Louisville KY with a neighborly expert, you ensure that the person who installs the system is the same one who stands behind the 10-year craftsmanship warranty. We live in these communities, from the historic streets of Anchorage to the growing neighborhoods in Crestwood . This local presence means your curb appeal and home value are personal to us. You can verify our standing as a dependable local fixture through the Better Business Bureau of Louisville . One Partner for Your Entire Exterior Managing your home's exterior through a single, specialized partner creates a level of efficiency that fragmented projects can't match. Your roof, siding, and gutters work as a unified shield. For instance, high-performance Siding Services Louisville are only as effective as the drainage above them. If your gutters overflow, the constant splash-back can lead to premature wood rot and staining on your exterior walls. By coordinating your gutter protection with products like LP SmartSide siding, you eliminate these vulnerabilities before they become costly repairs. This holistic approach ensures that every component is calibrated to protect the others, providing a seamless defense for your property. Schedule Your Free Louisville Estimate Don't wait for the heavy saturation of the next Kentucky spring to test your home's defenses. Securing your property for 2026 starts with a technical evaluation of your current system. We've built our reputation as a "Protective Expert" by providing honest, assertive guidance on what your home actually needs to stay dry and stable. You can research local building standards and rainfall management through the Louisville Metro Government website to understand why precision matters. When you're ready to stop climbing ladders and start protecting your foundation, Contact Home Run Improvement for a comprehensive, free estimate. We'll provide the specialized knowledge and long-term stability your Louisville home deserves. Protect Your Louisville Home's Structural Integrity Effective water management is the most critical investment you can make for your property's longevity. By integrating Shurflo's micro-mesh technology, you replace the dangerous cycle of ladder-climbing with a permanent, self-cleaning solution. We've seen how the high-intensity rainfall in the Ohio Valley can compromise foundations; professional gutter guard installation Louisville KY prevents these structural failures before they begin. When you choose a locally owned business that is also an Owens Corning Preferred Contractor, you ensure your roof warranty remains intact while gaining a system calibrated for our specific local foliage. We stand behind every project with a 10-year craftsmanship warranty because we believe in the precision of our work and the resilience of your home. You deserve the peace of mind that comes from knowing your basement will stay dry during the next heavy Kentucky downpour. It's time to stop reacting to clogs and start proactively defending your home's exterior with a partner who treats your property as their own. Secure Your Foundation with a Free Gutter Guard Estimate Take the first step toward a maintenance-free exterior and a more secure home today. Our team is ready to provide the specialized protection your Louisville property requires. Frequently Asked Questions Are gutter guards actually worth it for Louisville homeowners? Yes, gutter guards are a vital investment for Louisville homes due to our average annual precipitation of nearly 50 inches. Without them, your foundation is at constant risk from overflowing water. Beyond structural protection, they eliminate the need for dangerous ladder work. According to the Centers for Disease Control and Prevention, falls from ladders are a leading cause of home injuries. We ensure your gutter guard installation Louisville KY provides long-term stability and safety. Will Shurflo gutter guards void my roofing warranty? No, Shurflo guards will not void your warranty when installed by a certified expert. As an Owens Corning Preferred Contractor , we use installation methods that don't penetrate or lift your shingles. Many DIY products require tucking under the first course, which breaks the sealant bond. Our professional-grade approach maintains the integrity of your roofing system while providing a seamless drainage solution that meets all manufacturer specifications for warranty compliance. How often do I need to clean gutters that have guards installed? You'll rarely need to touch your gutters again. Shurflo's patented technology uses natural airflow to blow dry leaves and debris off the mesh surface. While no system is 100% maintenance-free forever, this micro-mesh design significantly reduces the cleaning frequency compared to open gutters. InterNACHI standards suggest that even with guards, a quick ground-level visual inspection once a year is a best practice to ensure your downspouts remain clear of any ground-level obstructions. Can Shurflo guards handle the heavy rain we get in Kentucky? Absolutely. Shurflo systems are engineered with a unique siphoning action that pulls water through the mesh even during high-velocity downpours. In Louisville, the maximum hourly rainfall rate can reach 5.5 inches, according to National Weather Service data . While generic screens often cause water to "overshoot," Shurflo's surgical-grade mesh breaks the water's surface tension. This ensures every drop is captured and diverted safely away from your home's foundation and siding. Do gutter guards cause ice dams during Louisville winters? Gutter guards themselves do not cause ice dams. These issues are typically the result of poor attic insulation and heat loss through the roof deck. When snow melts and refreezes at the gutter line, it creates a dam. Proper gutter guard installation Louisville KY ensures that the guard doesn't interfere with your roof's natural thermal performance. For more information on preventing winter roof damage, consult the Energy Star guide on ice dams. What is the difference between micro-mesh and the guards sold at hardware stores? The primary difference is durability and filtration. Hardware store guards are often made of plastic that warps or thin mesh that allows small seeds and shingle grit to pass through. Shurflo uses a heavy-duty aluminum frame and surgical-grade stainless steel mesh. This combination prevents organic growth inside the gutter and resists the extreme temperature fluctuations of the Ohio Valley. Citing the Science of Clog-Free Performance , professional systems offer superior resilience over retail alternatives. How long does the professional installation process take? Most residential projects are completed within a single day. Our process is methodical, beginning with a full cleaning and structural tune-up of your existing gutters to ensure they are pitched correctly. Once the foundation is ready, we precision-fit the Shurflo panels to your home's specific roofline. This efficient timeline allows you to secure your home's exterior without a prolonged construction presence. We respect your property and follow BBB Louisville standards for professional conduct and site cleanliness. Does Home Run Improvement offer a warranty on gutter guard installation? Yes, we provide a fixed 10-year craftsmanship warranty on every installation. This covers the labor and precision of the fit, ensuring your system performs as promised. Additionally, the Shurflo product itself comes with a 25-year transferable manufacturer warranty. This double layer of protection gives you peace of mind that your investment is secure. If you have questions about specific coverage details, you can review our 10-year warranty policy to see how we prioritize local accountability.
Louisville receives between 43 and 46 inches of rainfall annually, meaning your roof must shed tens of thousands of gallons of water every year. If this volume is not managed with precision through a professional gutter installation Louisville KY, it quickly becomes a destructive force that erodes foundations and rots expensive siding. You likely recognize the frustration of overflowing channels or the anxiety of seeing water pool near your basement during a Kentucky thunderstorm. These are not just maintenance headaches; they are direct threats to your home's structural integrity. When you prioritize a high quality water management system, you transform your property's defense from a liability into a long-term asset. We promise to guide you through the technical essentials of professional installation, ensuring your investment is backed by a 10-year craftsmanship warranty. This 2026 guide covers everything from selecting durable materials to understanding local building codes for downspout discharge. By the end of this article, you will have the knowledge to secure a maintenance-free system that enhances your curb appeal while providing the security your family deserves. Key Takeaways Learn why Louisville’s specific combination of high annual rainfall and clay-heavy soils requires a custom-engineered water management system to prevent foundation failure. Discover why 6-inch seamless gutters are the 2026 standard for Kentucky homes with steep rooflines and high-volume runoff requirements. Master the technical details of professional gutter installation Louisville KY, including the importance of correct roof pitch calculations and on-site extrusion. Understand how your gutters must integrate with your roof’s drip edge and LP SmartSide siding to provide a seamless, rot-proof exterior envelope. Learn how to vet local contractors to ensure your investment is protected by a 10-year craftsmanship warranty and professional-grade materials. Why Professional Gutter Installation is Vital for Louisville Homes Louisville homes face a unique set of environmental pressures that make standard retail gutters insufficient. A professional gutter installation Louisville KY is not merely a home improvement project; it is a custom-engineered water management system designed to protect your home's entire structure. In our region, the "Louisville Factor" is a reality every homeowner must address. We receive between 43 and 46 inches of rainfall annually, and our local clay-heavy soils react poorly to that volume of moisture. When water isn't moved away from your home, it saturates the ground, causing the soil to expand and exert massive hydrostatic pressure on your foundation walls. Choosing a qualified expert for your gutter installation Louisville KY ensures that every detail, from the pitch of the troughs to the precise placement of downspouts, is calculated for maximum efficiency. If you settle for a generic setup or poor workmanship, you face the incorrect gutter installation risks that lead to long-term structural instability. Proper runoff isn't just about convenience; it's the primary defense against basement flooding and costly landscape erosion that can devalue your property overnight. The Threat of Foundation Erosion in Kentucky Kentucky's clay-rich soil is notorious for holding water rather than draining it quickly. As this soil becomes saturated, it creates intense pressure against your basement or crawlspace walls. This pressure is often strong enough to cause concrete to crack, bow, or leak over time. A professional gutter system acts as a diversionary tactic, collecting thousands of gallons of water from your roof and depositing it safely away from the perimeter. Following FEMA guidelines on residential drainage is a standard we take seriously. If you don't manage this water with precision, you're essentially inviting the elements to undermine your home's stability. Protecting Your Home's Siding and Curb Appeal Water management also preserves your home's exterior finishes. When gutters overflow, water cascades down the siding, leading to unsightly staining, mold growth, and eventual rot. This is particularly dangerous for wood or vinyl exteriors that aren't designed for constant saturation. We position our gutter systems as the primary shield for your LP SmartSide installation . By keeping water off the panels, you maintain the material's integrity and your home's curb appeal. Seamless aluminum gutters offer a sleek, modern look that fits perfectly in Louisville neighborhoods, proving that high-performance protection can also enhance your home's visual value. Selecting the Right Gutter Materials and Sizing for Your Property Choosing the correct specifications for your gutter system is a technical decision that impacts your home's safety for decades. While 5-inch gutters were once the regional default, 6-inch systems have become the 2026 standard for a professional gutter installation Louisville KY. This shift is driven by the increasing frequency of high-intensity storms. A 6-inch gutter carries nearly double the water volume of a 5-inch system, which is vital if your home has a steep roof pitch or large surface area. If your gutters are undersized, they will inevitably overflow during a heavy Kentucky downpour, rendering the entire system useless regardless of how new it is. Durability is also tied to the thickness, or gauge, of the material. We prioritize .032 gauge aluminum because it offers the structural integrity needed to withstand the weight of winter ice and the force of high winds. If you settle for thinner, retail-grade materials, you risk sagging and hardware failure within just a few seasons. Beyond sizing, you must consider the profile. K-Style gutters are the most popular for modern homes because they mimic crown molding and provide superior strength. For historical properties in the Highlands or Old Louisville, half-round gutters offer a timeless aesthetic that preserves the home's original character. Seamless Aluminum: The 2026 Industry Standard Seamless aluminum is the preferred choice for most Louisville homeowners due to its balance of resilience and value. Because these gutters are custom-extruded on-site from a single coil of metal, they eliminate the seams where leaks typically begin. This design ensures that water remains contained until it reaches the downspout. Modern aluminum alloys are entirely rust-proof and come in a vast array of factory-finished colors. This allows us to perfectly coordinate your gutters with your vinyl siding or trim, creating a cohesive look that boosts curb appeal. Specialty Gutters for Anchorage and Prospect Estates For high-end estates or historical restorations, specialty metals like Copper and Galvalume provide unmatched longevity and distinction. Copper is a lifetime material that develops a protective patina over time, often lasting 50 years or more with minimal intervention. Galvalume, a steel substrate coated in aluminum and zinc, offers a rugged, industrial aesthetic with extreme corrosion resistance. When installing these systems, we adhere strictly to National Roofing Contractors Association (NRCA) standards to ensure every soldered joint and hanger is placed with precision. If you are unsure which material suits your architecture, you can schedule a professional assessment to review the best options for your specific roofline. Step-by-Step: The Professional Gutter Installation Process Professional gutter installation Louisville KY requires more than just hanging metal on a house. It is a technical process that begins with a detailed assessment of your home's roof geometry. We don't guess at the requirements; we measure the roof's total square footage and calculate the specific pitch to understand how fast water will reach the eaves. This data dictates the placement of every component in the system. If the calculations are off, even the most expensive materials will fail to manage a heavy Kentucky storm. Once we've finalized the plan, we fabricate the system on-site. Using a mobile extrusion machine, we roll-form seamless gutters from heavy-gauge aluminum coils to the exact length of your home's roofline. This eliminates the weak points found in store-bought, sectional gutters. When you choose a custom-fit system, you remove the risk of leaks at the joints. The most critical technical detail is the pitch. To ensure optimal flow, we maintain a precise 1/4-inch drop for every 10 feet of gutter run. If the slope is too shallow, water will pool and attract pests; if it's too steep, the water will overshoot the downspout during a heavy storm. We secure these channels using heavy-duty hidden hangers screwed directly into the rafter tails. This is a significant upgrade over outdated spikes and ferrules, which frequently pull loose during Kentucky's freeze-thaw cycles. By using hidden hangers, we provide a cleaner look and a much stronger attachment that can withstand the weight of heavy ice or wet leaves. Fascia Board Inspection and Preparation Before any metal is attached, we perform a rigorous inspection of the fascia boards. If we find rot or soft wood, we replace it immediately. Hanging a new system on a failing substrate is a recipe for disaster. This preparation creates a stable foundation for the gutter and provides essential support for the edge of your Owens Corning roof . This step is non-negotiable because it prevents water from wicking back into your roof deck or behind your siding panels. Downspout Placement and Discharge Strategy Efficiency depends on the discharge strategy. We identify the high and low points of the gutter run to ensure gravity works in your favor. In Louisville, we recommend oversized downspouts to handle the volume of sudden, heavy downpours. Whether we are directing water into underground drainage pipes or onto strategically placed splash blocks, the goal is to move every gallon at least six feet away from your foundation. Proper placement ensures that your gutter installation Louisville KY functions as a complete water management solution rather than just a collection point. Integrating Gutters with Roofing and Siding Systems A gutter system is only as effective as its integration with the rest of your home’s exterior. If the transition between your roof shingles and your gutters is flawed, the most expensive hardware in the world won't prevent rot. When we execute a professional gutter installation Louisville KY, we view the project as part of a complete exterior envelope. This perspective allows us to ensure that your drip edge, flashing, and siding work in concert to move water away from the structure without allowing a single drop to migrate behind your protective layers. Water is persistent. It finds the smallest gaps. By maintaining a precise overlap where the roof's drip edge meets the gutter trough, we eliminate the capillary action that pulls moisture back toward your fascia boards. Maintaining this synergy requires more than just proper installation; it requires ongoing functionality. This is where gutter guards play a vital role. When gutters clog, water backs up under the shingles or overflows onto the siding, causing immediate damage. A multi-service contractor understands these intersections better than a specialist who "just does gutters." We coordinate the entire system so that every component supports the others, creating a unified defense against Kentucky’s weather. Protect your home’s exterior with an integrated gutter system Gutters and Owens Corning Roofing Standards As an Owens Corning Preferred Contractor, we adhere to strict installation protocols that protect your roof warranty. Proper guttering is essential for preventing ice damming at the roof edge during Louisville winters. If water cannot drain freely, it freezes at the eaves and forces moisture under the shingles. We coordinate the gutter pitch with existing roof flashing according to Owens Corning's technical specs . This meticulous approach ensures that the roof-to-gutter transition remains watertight and resilient against heavy snow or torrential rain. The LP SmartSide and Gutter Connection Your siding is equally dependent on a high-functioning gutter system. For homeowners with LP SmartSide siding , gutters are the primary defense against splash-back and moisture absorption at the base of the walls. We ensure the necessary 1-inch clearance is maintained between siding and roof lines, allowing the gutters to catch runoff without trapping moisture against the engineered wood. Professional gutter installation Louisville KY is required to keep these siding warranties intact. If your gutters are poorly hung, they can cause overflow that leads to swelling or finish failure on your siding panels over time. Hiring a Trusted Louisville Gutter Contractor: Warranty and Quality The success of your water management system depends entirely on the accountability of the person behind the tools. When you hire a trusted home contractor in Louisville , you're securing a partner who understands our local climate and building codes. If you choose an out-of-town "storm chaser" with no local roots, you lose the ability to seek recourse if your system fails during the next season. We believe in total transparency, which is why we maintain professional licensing and full Workers' Comp coverage to protect you from liability. Our status as an Owens Corning Preferred Contractor and LP SmartSide Master Lead is not just a badge; it's proof that we adhere to the highest standards in the industry. Security and peace of mind come from a formal 10-year craftsmanship warranty . Most competitors only highlight the manufacturer's material warranty, which does nothing to help you if a leak is caused by improper pitch or loose hangers. When you choose our team for your gutter installation Louisville KY, we take personal responsibility for every screw and seal. This logic is simple: if we do the job right the first time, your home remains protected for a decade or more. If an issue arises due to our workmanship, we fix it. It's a level of integrity that transforms a standard home improvement project into a stable, long-term investment. Evaluating Contractor Testimonials and Reviews Don't take a contractor's word for their quality; verify it through the experiences of your neighbors. When you analyze Google reviews , look for specific mentions of technical precision and site cleanliness. A reputable contractor should be able to provide recent references from specific neighborhoods like Crestwood or Glenview. You should also consult the Louisville Metro Licensing records to ensure your chosen professional is in good standing with the city. Authentic feedback from local homeowners is the most reliable indicator of how a company will treat your property. Final Checklist Before Your Gutter Project Before you sign any contract, ensure the technical specifications are clearly defined. A professional estimate must include the specific gutter gauge, the exact spacing of the hidden hangers, and a commitment to full debris removal. If these details are missing, the quote is incomplete. Verify that your system is designed for the specific rainfall rates of the Ohio Valley to avoid future overflows. When you're ready to secure your foundation and siding with a professional assessment, schedule your free estimate today to begin your home's transformation. Protect Your Home’s Future with Precision Water Management Your property represents a significant investment that deserves uncompromising protection. In 2026, a high-performance gutter system is the primary defense against the specific environmental pressures of the Ohio Valley. By prioritizing a professional gutter installation Louisville KY, you effectively shield your foundation from erosion and keep your LP SmartSide siding free from moisture damage. We have established how the technical precision of a 6-inch seamless system, when combined with a correct 1/4-inch pitch, ensures that even the heaviest Kentucky downpours are managed with absolute efficiency. Home Run Improvement has been locally owned and operated in Louisville since 2020. As an Owens Corning Preferred Contractor, we don't just hang hardware; we engineer long-term structural stability. Our 10-year craftsmanship warranty stands as a firm commitment to our standards and your lasting peace of mind. When you choose an expert who understands the intersection of roofing, siding, and drainage, you secure an exterior envelope that is built to endure for decades. Secure Your Home with Professional Gutter Installation Take the proactive step today to ensure your property remains a safe, dry, and resilient sanctuary for your family for many years to come. Frequently Asked Questions How much does gutter installation cost in Louisville, KY? Gutter installation costs in the Louisville area vary based on the home's perimeter, the number of stories, and the chosen material. While we don't provide fixed pricing without a site assessment, factors like the roof's complexity and downspout count influence the final estimate. It's best to verify current material rates for aluminum or copper. Every project we handle includes a 10-year craftsmanship warranty to ensure your investment remains protected against Kentucky's unpredictable weather cycles. What is the best type of gutter for Kentucky's weather? Seamless aluminum is the most resilient and cost-effective choice for the Louisville climate. It doesn't rust and handles the heavy 43 to 46 inches of annual rainfall efficiently. For luxury estates in Anchorage or Prospect, copper offers a 50-year lifespan and a unique patina. Regardless of material, choosing a professional gutter installation Louisville KY ensures the system is custom-extruded to eliminate the seams where ice and debris typically cause structural failure. How often should I clean my gutters if I don't have guards? You should clean your gutters at least twice a year, ideally in late spring and late fall. Louisville's heavy seasonal foliage means that oak and maple seeds or autumn leaves quickly obstruct water flow. If you live in a heavily wooded area like Indian Hills, you might need quarterly maintenance. Neglecting this leads to water backing up under your shingles, which can eventually compromise your Owens Corning roofing system and cause interior leaks. Can I install new gutters over my existing fascia boards? You can only install new gutters over existing fascia if the wood is structurally sound and free from rot. We perform a rigorous inspection of the fascia boards before every gutter installation Louisville KY project begins. If we discover soft spots or moisture damage, we replace the wood immediately. Hanging a heavy gutter system on failing wood leads to sagging and hardware failure, which can eventually damage your home's exterior siding panels. What size gutters do I need for a steep roof in Louisville? A 6-inch gutter is the 2026 standard for homes with steep roof pitches or large surface areas. Steep roofs cause water to accelerate quickly during heavy storms. Standard 5-inch gutters often can't capture this high-velocity runoff, leading to overflow that erodes your foundation. By upgrading to 6-inch troughs and oversized downspouts, you ensure your water management system can handle the maximum hourly rainfall rates common in the Ohio Valley without failing. Is seamless gutter installation worth the extra cost? Seamless gutters are absolutely worth the investment because they eliminate the joints where 99 percent of leaks occur. Sectional gutters rely on sealants that eventually dry out and crack under Kentucky’s extreme temperature fluctuations. Because we roll-form our seamless systems on-site to the exact dimensions of your home, you get a cleaner aesthetic and superior durability. This custom fit provides long-term security that sectional retail products simply cannot match over several seasons. How do I know if my gutters were installed incorrectly? Signs of poor installation include standing water in the troughs, water marks on your siding, or gutters that pull away from the house. If you notice water cascading over the edges during a light rain, the pitch is likely incorrect. We often see systems where hangers are spaced too far apart, causing the metal to sag under ice. These errors threaten your foundation and require professional intervention to prevent permanent structural damage to your property. Does a new roof installation include new gutters? A standard roof replacement typically doesn't include gutters unless they are specifically added to the contract. However, we recommend coordinating these projects to ensure a perfect interface between the drip edge and the gutter trough. As a full-service contractor, we can integrate your Owens Corning roof with a new gutter system simultaneously. This approach ensures that your home’s exterior envelope is cohesive and that both warranties are fully protected by professional workmanship.

If your gutters clog every fall and you're tired of climbing a ladder or writing checks to a cleaning crew, you've probably landed on two names: LeafFilter and LeafGuard. Both are national brands, both come with bold guarantees, and both carry price tags that make you want to choose correctly the first time. The U.S. gutter guards market is currently estimated at $0.86 billion in 2025, projected to reach $1.00 billion by 2030, that kind of market growth means more options and more marketing noise, which makes a clear side-by-side breakdown more valuable than ever. This guide cuts through the sales pitches. I've spent years helping homeowners navigate exterior improvement decisions, and in my experience, the biggest mistake people make is treating LeafFilter and LeafGuard as near-identical products. They're built on completely different philosophies. Understanding that difference is what determines whether your investment holds up for decades or disappoints you by spring. Key Takeaways Design determines your fit: LeafFilter is a micro-mesh screen that installs over your existing gutters, while LeafGuard replaces your entire gutter system with a one-piece aluminum unit. Your current gutters' condition is the first question to answer. Fine debris is a dealbreaker: Pine needles cause gutter clogs for 31% of homeowners, according to a 2025 nationwide gutter guard survey of 1,000 homeowners. If you have conifers nearby, micro-mesh wins hands down, act accordingly and rule out reverse-curve designs. Cost ranges overlap, but what you get differs: An average 200-linear-foot project costs approximately $4,334 with LeafGuard, while the same footage with LeafFilter runs about $4,531, according to a November 2025 gutters survey. Price alone should not drive the decision. Clogged gutters are an expensive problem to ignore: A survey from the National Association of Realtors found that 5% of homeowners who experienced foundation repairs paid more than $10,000, and 13% paid between $5,001 and $10,000. A quality gutter guard is cheap insurance by comparison. Local installation quality matters as much as brand: National brands rely on local crews. A locally accountable contractor who stands behind their work long-term is worth more than any national call center. Quick-Start Prioritization Framework Start here if you're: A Louisville-area homeowner who wants a vetted local installer: Home Run Improvement , locally owned, A+ BBB rated, and certified to install Shur Flo guards with a 10-year craftsmanship warranty, without the national brand markup. A homeowner with existing gutters in good condition: LeafFilter installs over what you already have, making it the lower-disruption, lower-cost path. A homeowner needing full gutter replacement: LeafGuard bundles new gutters and guards into one project, which can save you a second contractor visit if your gutters are already failing. How Each System Actually Works Understanding the core technology behind each product makes every other comparison, price, performance, warranty, make more sense. LeafFilter: Micro-Mesh Filtration LeafFilter gutter guards use surgical-grade stainless steel with a 275-micron micro-mesh screen to filter out small debris, including pine needles, leaves, and shingle grit. The guard sits on top of your existing gutters, no full replacement required. LeafFilter is installed at the same 11-degree angle every time, which is the ideal angle for shedding debris. Water passes through the fine mesh into the gutter below while debris dries on top and blows away. In my experience testing and reviewing gutter products, the micro-mesh approach is the gold standard for homes surrounded by mixed tree species. LeafGuard: Reverse-Curve One-Piece System Unlike traditional gutters with add-on covers or screens, the LeafGuard design features a curved hood that deflects debris while allowing rainwater to flow into the gutter trough, keeping leaves, twigs, pests, sediment, and other debris out. Critically, LeafGuard replaces your current gutters entirely. Unlike traditional mesh guards that attach to existing gutters, LeafGuard replaces your current gutters with a new system that has built-in reverse-curve guards, which channel water into the gutters while shedding leaves and debris. This is a larger upfront commitment, but it solves gutter wear and debris protection in a single installation. Pro Tip: Ask your installer to inspect your current gutters before committing to either product. If your gutters are sagging, pulling away from the fascia, or more than 20 years old, LeafGuard's full replacement may actually save you money long-term. If they're structurally sound, LeafFilter's overlay approach is the faster, less disruptive path. Cost Comparison: What You'll Actually Pay Price is where most homeowners start, and it's important to look beyond the per-foot quote. LeafFilter Pricing LeafFilter costs around $41.72 per linear foot, according to responses to a 2026 survey of gutter guard customers nationwide. The national average cost for a LeafFilter gutter project ranges between $2,500 and $6,500, with factors such as home size, roof complexity, and regional labor rates impacting the final cost. Two-story homes with difficult roof access push toward the top of that range fast, plan accordingly and budget for at least the midpoint estimate. LeafGuard Pricing LeafGuard is priced between $20 and $30 per linear foot including installation, a higher upfront investment that includes a lifetime, transferable warranty and a clog-free guarantee. On average, homeowners can expect to pay between $9 and $35 per linear foot for LeafGuard gutters including materials and professional installation, with national average costs for a full installation typically falling between $5,000 and $9,000 depending on home size and installation complexity. Because LeafGuard replaces your gutters too, that cost reflects an entirely new gutter system, not just a guard add-on. The Real Cost of Doing Nothing Minor foundation crack repairs can cost $500 to $2,000, while major structural underpinning to fix a sinking foundation can easily exceed $10,000 to $30,000. When you frame it that way, a $4,000-$6,000 gutter guard installation is genuinely inexpensive risk management. If your gutters are currently unprotected and you live under trees, the math favors acting now. Performance Head-to-Head Debris Filtration This is where the two products diverge most sharply. LeafFilter blocks pine needles shingle grit, pollen, seeds, and other debris while maintaining strong water flow, because of its stainless steel micro-mesh design. In hands-on testing by This Old House , LeafFilter proved it could stop debris that reverse-curve systems simply cannot. For heavy leaf fall, LeafGuard may perform better due to its curved design that easily deflects large leaves, while LeafFilter is ideal for finer debris like pine needles, grit, and pollen. The practical takeaway: if you have pine, cedar, fir, or spruce trees within dropping distance of your roofline, LeafFilter's micro-mesh is the only defensible choice. LeafGuard's curved hood excels at shedding large leaves but leaves fine debris with nowhere to go. Heavy Rain Performance LeafGuard claims its one-piece system handles high water volume with oversized downspouts. However, Today's Homeowner's review data found that in some cases LeafGuard systems overflow in heavy downpours or create ice dams in winter, because heavy rainfall can come down so fast that water overshoots reverse-curve gutter guards. LeafFilter performed well in simulated heavy rain testing, the ultra-fine mesh allowed water to flow through without overflowing, even during simulated heavy rain. Winter and Ice Dam Risk This is a genuine concern worth understanding. Some LeafGuard users in cold climates have reported ice dam problems linked to the curved hood design. However, LeafGuard's authorized dealers argue the system's curved hood prevents internal ice accumulation. The honest answer is that both systems carry some ice-related risk in extreme climates, and both companies recommend proper attic insulation as the primary ice dam defense. If you're in a region with heavy snowfall, discuss this explicitly with your installer before signing anything. Pro Tip: In climates with regular freeze-thaw cycles, ask your installer whether a micro-mesh system with a pitched installation angle performs better than a reverse-curve design. The pitch matters for both debris shedding and ice management. Warranty and Customer Experience Warranties: Similar Headlines, Different Fine Print LeafGuard and LeafFilter both offer limited lifetime warranties that are transferable, meaning you can transfer the warranty to the next owner of your house if you move. However, the details differ. LeafFilter offers a lifetime transferable warranty covering both the product and installation, while LeafGuard offers a lifetime clog-free warranty plus a 25-year paint finish warranty and a 20-year installation warranty. A key distinction: LeafGuard offers a lifetime warranty that covers issues like blistering, flaking, chipping, cracking, peeling, splitting, rotting, and structural deterioration, but it does not guarantee against clogs. LeafFilter's warranty explicitly covers clogs. Read the warranty document, not just the sales rep's summary, before you commit to either brand. Customer Reviews LeafFilter has more than 7,000 reviews on the BBB with an average rating of 3.6 out of 5 stars, while its Trustpilot page shows more than 127,000 reviews with an average rating of 4.1 out of 5 stars. That volume of Trustpilot reviews reflects national scale, but it also means service quality varies widely by location. Some customers report responsive, professional crews; others describe difficulty getting warranty service honored after installation. The pattern that shows up repeatedly in negative reviews for both brands is slow response to warranty callbacks, which is exactly why choosing a locally accountable installer matters so much. Pro Tip: Before hiring any national brand installer, search the BBB specifically for your local branch, not the parent company. Local branch ratings often tell a very different story than the national average. LeafFilter Pros and Cons Pros: Installs over existing gutters, no full replacement required 275-micron micro-mesh blocks fine debris including pine needles and shingle grit Lifetime transferable warranty covers both product and installation Works in all 49 U.S. states with professional installation crews Strong performance in independent testing for debris filtration Cons: Higher-than-average per-foot cost compared to some competitors uPVC frame material may not match the durability of all-aluminum options Mesh surface can accumulate debris film over time and may need occasional rinsing Customer service responsiveness varies significantly by local branch LeafGuard Pros and Cons Pros: Complete one-piece system, replaces gutters and adds guards in a single visit Extra-thick aluminum construction resists rust and warping Larger downspouts for improved water volume handling Seamless construction reduces leak risk at joints Cons: Requires full gutter replacement, higher cost if existing gutters are still functional Curved hood design struggles with fine debris such as pine needles and shingle grit Some homeowners in cold climates report ice dam issues with the hood design Clog-free guarantee does not cover all debris scenarios in warranty fine print Why Home Run Improvement Is the Best Choice for Louisville-Area Homeowners Here's something the national brand comparison often misses: the product is only half the equation. Installation quality and post-install support define whether a gutter guard actually performs as promised over a 10-to-20-year horizon. Home Run Improvement is BBB Accredited with an A+ rating and has been serving Louisville homeowners for over 10 years. Shur Flo gutter guards, the system Home Run Improvement installs, use a patented perf-flow filtration system that lets rainwater through while leaves, pine needles, and debris dry out on top and blow away. Shur Flo fits snugly over your existing gutters, sits low profile (virtually invisible from the ground), and installs without lifting or penetrating your roof shingles, keeping your roofing warranty intact. I've found that most homeowners who go with a local installer over a national brand end up with a better outcome, not because the national product is inferior, but because a local team has real accountability. Home Run Improvement backs its work with a 10-year craftsmanship warranty, which is a meaningful commitment from a company whose crews operate in the same community where you live. Home Run Improvement is a certified contractor for Shur Flo and Leaf Relief, with decades of experience offering affordable gutter guard installation services in Louisville. You get a proven filtering system, a locally accountable crew, and honest guidance without the high-pressure sales approach that shows up repeatedly in national brand reviews. For Louisville homeowners comparing LeafFilter vs LeafGuard, the smarter question is: why pay a national company's overhead when a local expert with a decade of verified performance in your market is available? Request a free estimate from Home Run Improvement and get an honest assessment of what your specific home actually needs. Common Mistakes to Avoid When Buying Gutter Guards Choosing based on advertising alone. Both LeafFilter and LeafGuard run heavy national advertising campaigns. Marketing reach is not the same as product performance. Always check independent testing and local branch reviews. Ignoring your tree situation. The debris type around your home, large leaves versus pine needles versus seed pods, determines which guard design will actually work. A micromesh gutter protection system is the only type of gutter guard that is proven to keep pine needles out. If you have conifers, that fact alone narrows your decision significantly. Skipping the gutter condition check. Installing any guard over gutters that are already sagging, leaking, or improperly pitched wastes your money. Have a qualified contractor assess your existing gutters before committing to a guard product. Fixating on price per linear foot. The main downside to gutter guards is the upfront price, which can run $4,334 to $5,168 on average for 200 linear feet, but the investment can save far more by limiting gutter cleaning and preventing expensive foundation, roofing, and water overflow issues over time. The right frame is total cost of ownership, not sticker price. A closer look at how gutter guard companies operate in the field reveals some common sales tactics and installation shortcuts worth knowing before you sign anything. https://www.youtube.com/watch?v=dK3fT86528k Frequently Asked Questions What is the main difference between LeafFilter and LeafGuard? LeafFilter is a micro-mesh screen that installs over your existing gutters, filtering out fine debris including pine needles and shingle grit. LeafGuard is a full gutter replacement system that uses a one-piece reverse-curve aluminum design to shed large debris. LeafFilter and LeafGuard are very different in their designs, LeafFilter is a micro-mesh gutter guard filter that attaches to the top of existing gutters. The choice depends primarily on whether your current gutters need replacing and what type of debris your trees produce. Which gutter guard is better for homes with pine trees? LeafFilter has a clear advantage for pine needle debris. This Old House chose LeafFilter as the best gutter guard for pine needles because of its ultra-fine stainless steel micro-mesh material, lifetime transferable warranty, and affordability. LeafGuard's reverse-curve design does not filter fine debris effectively, and some homeowners with pine trees have reported ongoing clogging issues with that system. How long do LeafFilter and LeafGuard last? Both systems are built for long-term use with lifetime warranty claims. LeafFilter guards resist corrosion and extreme weather. LeafGuard gutters are made from high-quality, extra-thick aluminum, custom-fitted and professionally installed to ensure durability and effective water management. Real-world durability depends heavily on installation quality and whether you inspect and lightly maintain the system annually. Do I still need to clean my gutters after installing either system? Both systems significantly reduce cleaning frequency, though neither eliminates it entirely. A functional guard system can reduce cleaning frequency to once a year or even less often, and over time these savings may offset the cost of the guard, even if it is not entirely zero maintenance. Expect to rinse LeafFilter's mesh surface occasionally in heavy pollen seasons, and inspect LeafGuard's hood and downspouts after major storms. Is a local installer better than going directly with LeafFilter or LeafGuard? For most homeowners, a local installer with a strong track record offers better accountability than a national brand's franchised crews. Home Run Improvement offers a 10-year warranty and free estimates, with a team providing neighborly reassurance backed by professional authority, ensuring you have the facts required to make an informed decision without the pressure of a sales pitch. Local installers are easier to reach when you need a warranty callback, and their reputation in your community gives them a stronger incentive to get the job right. The Verdict LeafFilter wins on filtration versatility, especially for homes with mixed or fine debris. LeafGuard wins on structural simplicity if you need new gutters anyway and primarily deal with large leaf fall. Both carry meaningful warranties and real-world limitations. For Louisville-area homeowners, the smartest move is to work with Home Run Improvement , a locally owned, A+ BBB-rated team that has been protecting homes in the Louisville market for over a decade. You get honest product guidance, a system sized to your home's actual debris load, and a 10-year craftsmanship warranty from people who will still be in your neighborhood when you need them. Call 502-379-7415 or request your free estimate online today. Sources LeafFilter vs. LeafGuard: Cost, Quotes, and Reviews , This Old House. Side-by-side survey data from 1,000 homeowners, November 2025. https://www.thisoldhouse.com/gutters/leaffilter-vs-leafguard LeafFilter Review 2026 , This Old House. Hands-on testing results, warranty terms, and customer survey findings. https://www.thisoldhouse.com/gutters/leaffilter-review LeafGuard Review 2026 , This Old House. Pricing, installation process, and customer experience analysis. https://www.thisoldhouse.com/gutters/leafguard-review Best Gutter Guards for Pine Needles 2026 , This Old House. Independent testing of LeafFilter's micro-mesh performance on pine needle debris. https://www.thisoldhouse.com/gutters/best-gutter-guards-for-pine-needles Gutter Guard Statistics 2026 , N Gutter. U.S. market size, regional growth data, and homeowner adoption trends. https://ngutter.com/gutter-guard-statistics/ United States Gutter Guards Market , Research and Markets / Mordor Intelligence. Market size ($0.86B in 2025) and growth forecasts through 2030. https://www.researchandmarkets.com/report/united-states-gutter-guards-market How Gutters Protect Your Home Foundation , Legacy Gutters. Foundation repair cost data citing National Association of Realtors survey. https://legacygutters.com/2026/04/10/how-gutters-protect-home-foundation/ The Long-Term Savings of Installing Gutter Guards , Cola City Roofing. Foundation damage and repair cost ranges linked to clogged gutters. https://colacityroofing.com/blog/the-long-term-savings-of-installing-gutter-guards/ Gutter Guard Installation Cost 2026 , This Old House. Average per-linear-foot and total project pricing for professionally installed guards. https://www.thisoldhouse.com/gutters/gutter-guard-installation-cost Home Run Improvement Gutter Guard Services , Home Run Improvement. Shur Flo installation details, 10-year warranty, and Louisville service area. https://www.homerunimprovement.com/services/gutter-guards
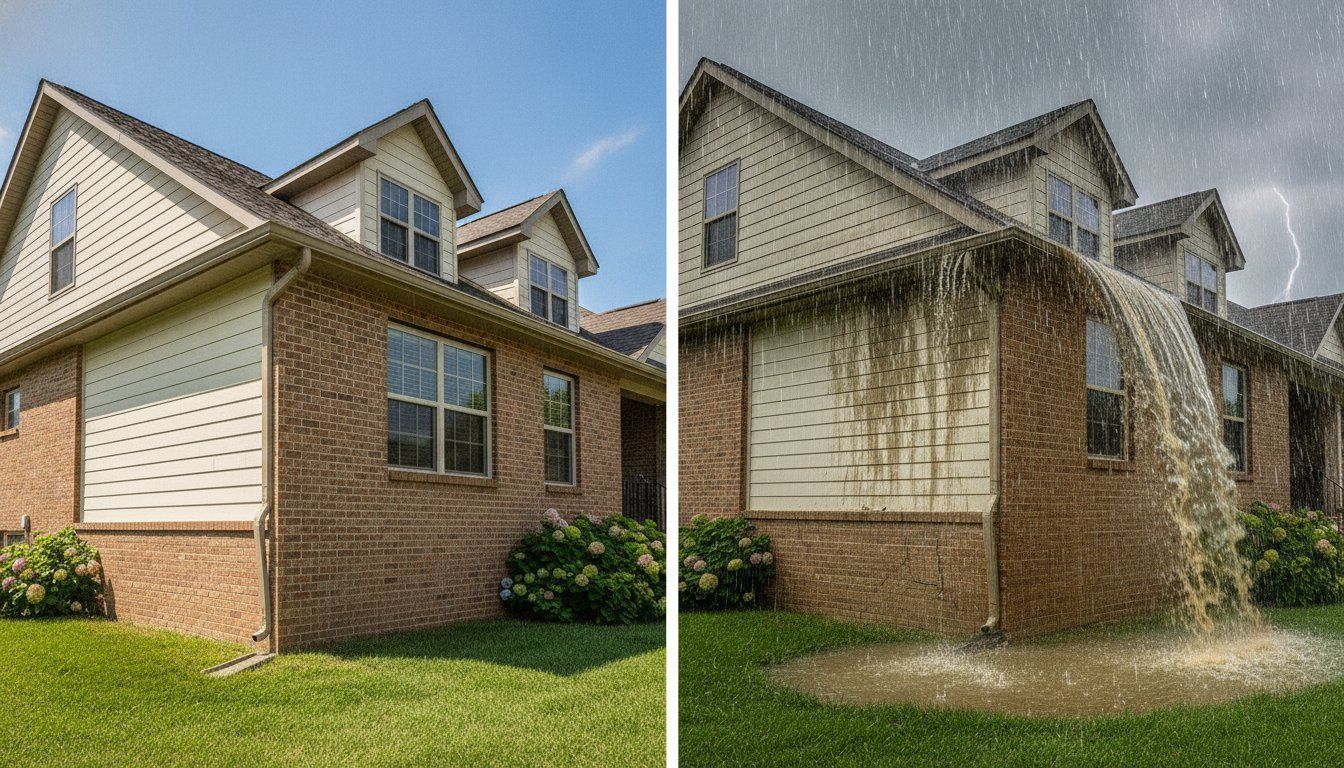
What if a single eighth-of-an-inch error on your roofline could eventually lead to over $15,000 in foundation repairs? Most Louisville homeowners view gutters as a simple "set it and forget it" feature, but the reality is that your drainage system is a precision science where minor shortcuts lead to major structural failure. If your contractor fails to account for the proper pitch or uses outdated fasteners, you aren't just looking at a leak; you're looking at a compromised home. We understand the anxiety that comes with trusting a contractor, especially when technical terms like fascia and hydrostatic pressure enter the conversation. An incorrect gutter installation can quietly erode your home's stability, leading to water damage insurance claims that average nearly $14,000 nationally according to industry data . In this guide, we'll show you how to verify installation quality and explain why precision is the only thing standing between your basement and a $52,000 flood insurance payout. We'll also explore how Home Run Improvement protects our Louisville neighbors with a 10-year craftsmanship warranty, ensuring your investment remains as sturdy as the day it was installed. Understanding these standards is vital, as even OSHA safety regulations for installers reflect the serious nature of this high-level exterior work. Key Takeaways Learn why upgrading to 6-inch gutters is a technical necessity for modern rainfall patterns according to precipitation data . Identify how incorrect gutter installation, specifically regarding pitch and hanger spacing, leads to silent structural failure. Master the "Rainy Day Test" to audit your system's performance before minor leaks lead to flood-related damage. Discover how a 10-year craftsmanship warranty serves as the ultimate safeguard against poor workmanship and contractor shortcuts. Understand the critical link between your gutter system and the longevity of your LP SmartSide siding and roofing. The 'It's Just a Gutter' Myth: Why Installation Precision Matters Many homeowners view their drainage as a secondary concern, but a gutter is actually a high-stakes foundation-protection tool. We define incorrect gutter installation as any deviation from the rigorous hydraulic and structural standards required to manage your home's water shed. In Louisville, our 2026 weather patterns have shifted toward higher-intensity rainfall events, meaning your gutters must handle more volume than ever before. If your system isn't calibrated for these specific local conditions, you risk catastrophic failure during the next heavy storm. Professional Rain gutter systems are designed to be the primary line of defense for your property's structural integrity. To better understand this concept, watch this helpful video: https://www.youtube.com/watch?v=se0cR6-_Lx4 The Science of the Pitch Precision starts with the slope. Industry standards dictate a 1/4 inch drop for every 10 feet of horizontal run. While a level gutter might look better against your roofline, it's a functional disaster that leads to standing water. During a typical Louisville winter, this trapped water freezes and thaws repeatedly, creating heavy ice dams that pull the system away from your home. Gutter pitch is the precise angle required to move debris and water simultaneously. Gutters as Part of the Building Envelope Your gutters don't exist in a vacuum; they're a critical component of your home's exterior protection. When you choose a professional installation, the system integrates seamlessly with your roofing and fascia boards to prevent moisture intrusion. If an incorrect gutter installation allows water to back up, that moisture migrates under your shingles and rots the underlying roof deck. Kentucky's heavy spring downpours will quickly expose these "good enough" shortcuts, turning a minor oversight into a multi-thousand-dollar repair bill. High-capacity precision isn't just about moving water; it's about preserving the longevity of your entire building envelope. 5 Critical Gutter Installation Mistakes That Compromise Your Home An incorrect gutter installation often stems from a lack of technical foresight during the planning phase. When a contractor treats your home's exterior as a series of disconnected parts, they overlook the critical intersections where water causes the most damage. These five mistakes represent the most common points of failure we see in the Louisville area, where heavy seasonal rains put immense pressure on drainage systems. Sizing for Louisville Rainfall The industry is moving away from 5-inch gutters because they simply cannot handle modern "microburst" storms. A 6-inch gutter provides significantly more capacity, which is vital for steep roofs with large surface areas. If your gutters are undersized, water will overshoot the channel or back up under the shingles. To manage this volume, we recommend one 3x4-inch downspout for every 30 to 40 feet of gutter. This ensures that even during a heavy Kentucky downpour, the system remains clear and functional. The Hanger and Fastener Standard Structural integrity depends on how the gutter is anchored to your home. Hangers should be spaced no more than 24 inches apart; however, in areas prone to heavy ice or snow, an 18-inch spacing is the professional standard. Older, "incorrect" practices involved driving large nails through the gutter into the fascia. This "spike and ferrule" method eventually pulls loose, leading to sagging and rot. Modern standards require heavy-duty internal hidden hangers secured with 3-inch structural screws, providing the resilience needed to withstand decades of weather cycles. Beyond sizing and fasteners, the placement of your downspouts determines the fate of your foundation. A single storm can dump over 500 gallons of water off your roof. If that water isn't discharged at least 4 feet away from your home, it saturates the soil and creates hydrostatic pressure against your basement walls. This pressure is the primary cause of foundation cracks that can lead to piering repairs costing between $7,500 and $30,000. Additionally, neglecting the drip edge during installation allows water to seep behind the gutter, rotting the fascia and damaging your LP SmartSide siding . If you suspect your current system is failing, you should request a professional inspection to identify these hidden risks before they become structural emergencies. Myth vs. Reality: Does Every Gutter System Work the Same? Many homeowners believe that once a gutter is "seamless," the job is done. This is a dangerous misconception. An incorrect gutter installation often begins with the assumption that all contractors use the same equipment and materials. In reality, a "Chuck in a Truck" operation might use a poorly calibrated machine that creates subtle waves in the metal, leading to pools of standing water. If you choose a Master Lead contractor, you're investing in a system where every corner joinery is reinforced with high-grade sealants and every run is measured with laser precision. Don't let the simplicity of the hardware fool you; the engineering behind the install determines your home's safety. The Seamless Gutter Misconception The label "seamless" doesn't automatically guarantee a leak-free home. While the straight runs lack seams, the corners and end caps still require expert assembly. If a contractor uses low-quality sealants, the Kentucky freeze-thaw cycle will quickly cause those joints to fail. Material choice also matters. While vinyl is cheap, it has a high coefficient of linear thermal expansion , causing it to warp and crack under the Louisville sun. Professional-grade aluminum provides much better resilience against these temperature swings, maintaining its shape through every season. DIY vs. Professional Grade Materials If you buy gutters from a big-box retailer, you're likely getting thin-gauge material that sags under the weight of a heavy rain. We use professional-grade .032-inch aluminum, which offers the durability needed for long-term stability. Amateur installations also carry the risk of "ladder damage," where the weight of a person against the gutter crushes the front lip and ruins the hydraulic flow. Professional crews use specialized stand-offs and laser levels to ensure the pitch is perfect every time, avoiding the common pitfalls of an incorrect gutter installation . Another common myth is that gutter guards can fix a failing system. If you install guards on a gutter that is already sagging or improperly pitched, you're just hiding the problem while making it harder to clean. Level gutters might look aesthetically pleasing, but they are fundamentally failed gutters. Water must move. If it sits, it invites mosquitoes and rust, eventually leading to the very damage you're trying to prevent. When you prioritize professional gutter services , you're choosing reality over dangerous myths and protecting your home's longevity. How to Audit Your Own Gutter System: A Homeowner’s Checklist Identifying an incorrect gutter installation doesn't always require a professional degree; it requires a watchful eye during a Kentucky storm. While the sun is shining, your gutters might look perfectly functional, but the next heavy downpour acts as the ultimate truth-teller. Start your audit with the 'Rainy Day Test.' If you see water cascading over the front edge of the gutter like a waterfall, your system is either clogged or improperly sized for your roof's pitch. Pay close attention to the corners. Leaks at the joinery often indicate that the sealant has failed or the expansion joints weren't properly calculated for our local temperature swings. Next, walk the perimeter of your home to inspect the 'splash zone.' Look for signs of soil erosion directly beneath the gutter line. If you notice deep ruts in the mulch or pooling water near the foundation, your gutters aren't doing their job. This saturated soil creates hydrostatic pressure that leads to foundation cracks. According to local rainfall data , Louisville storms are becoming more concentrated, making these audits essential. Check your downspout exit points; if they aren't discharging water at least 5 feet away from the house, the system is fundamentally flawed. Spotting the 'Invisible' Failures Some failures are subtle. Look for 'tiger striping,' which are dark vertical streaks on the front of the gutter. These marks suggest that water is consistently overflowing and carrying roof debris with it. You should also check for a gap between the gutter and the roof's drip edge. If you can see the fascia board, water is likely running behind the gutter and rotting the wood. On a dry day, place a marble in the gutter. If it doesn't roll toward the downspout, you have a pitch error that will lead to standing water and rust. When to Call a Protective Expert It's vital to distinguish between a simple clog and a structural incorrect gutter installation . If you clear the debris and the water still pools, the issue is likely the pitch or hanger spacing. Beware of contractors who suggest simply 're-pitching' an old, warped system. This is usually a temporary band-aid that fails to address the underlying structural fatigue. When your home's integrity is on the line, you need the precision of our gutter installation services in Louisville to ensure a permanent solution. Schedule your professional gutter audit today Professional Gutter Solutions in Louisville: The Home Run Standard At Home Run Improvement, we don't just hang metal; we engineer drainage systems. Every project we undertake is a direct response to the structural threats posed by incorrect gutter installation . By utilizing laser-leveled pitch technology and high-capacity downspout configurations, we eliminate the pooling and overshoot issues that plague standard installs. If you've invested in LP SmartSide siding , you need a gutter system that acts as a precision water diversion tool. A gutter is the 'clasp' that holds your home's exterior defense together. Our commitment to quality is backed by a 10-year craftsmanship warranty . This isn't just a marketing claim; it's our promise that we stand behind every screw and hanger we install. When you choose us, you're choosing a partner that understands the Louisville climate and the specific demands it places on your home's building envelope. We also recommend Shurflo Gutter Guards to our clients, but only after we've verified that the underlying system is perfectly pitched. Guards are an excellent addition, but they can never compensate for an incorrect gutter installation . The Owens Corning and LP SmartSide Connection As an Owens Corning Preferred Contractor and LP SmartSide Master Lead, we understand how different exterior components interact. A poorly installed gutter can actually void your roofing warranty if water backs up under the shingles and damages the roof deck. We ensure our gutter systems integrate perfectly with the drip edge to maintain manufacturer standards. Protecting your investment means looking at the entire building envelope, ensuring your gutters work in harmony with your shingles and siding according to LP Building Solutions technical specifications. Serving Louisville and Southern Indiana We are proud to be a locally owned and operated fixture in the community. Whether you live in Anchorage, Prospect, or Indian Hills, our team treats your property with the same care we would our own. We also extend our professional services to our neighbors in Southern Indiana, bringing the same level of integrity to every job site. Don't wait for the next heavy rain to reveal a structural failure in your drainage system. You deserve the peace of mind that comes with a system installed by experts who prioritize your home's longevity. Schedule your free gutter audit today Securing Your Home’s Structural Future Your home's longevity depends on a drainage system that performs under pressure. We've explored how precision sizing and laser-leveled pitching prevent water from eroding your foundation or rotting your fascia. By understanding the link between high-capacity gutters and the protection of your building envelope, a concept prioritized by building science professionals , you're now equipped to spot the signs of failure before they become structural emergencies. This is especially vital given the intensified Louisville storm patterns recently documented by the National Weather Service . Home Run Improvement is committed to providing Louisville homeowners with security and peace of mind. As an Owens Corning Preferred Contractor and LP SmartSide Master Lead, we ensure every exterior component works in perfect harmony. We eliminate the risks associated with incorrect gutter installation by applying rigorous engineering standards to every project. Every installation we perform is backed by our 10-year craftsmanship warranty, giving you the long-term stability you deserve from a locally owned expert. Protect your home with a professional gutter audit from Home Run Improvement Take the first step toward a drier, safer home today. We're ready to help you safeguard your property for decades to come. Frequently Asked Questions What are the first signs of incorrect gutter installation? Common red flags include water overflowing during moderate rain, visible sagging, or gaps between the gutter and the fascia board. In Louisville, look for "tiger striping" on the gutter's face, which indicates consistent overflow. If you notice soil erosion or ruts in your landscaping directly below the roofline, it's a clear sign that the system isn't managing the water shed effectively. These early warnings often point to improper hanger spacing or sizing errors. Can incorrectly installed gutters cause foundation cracks? Yes, improper drainage is a leading cause of structural foundation failure. When an incorrect gutter installation allows water to pool at the base of your home, it saturates the soil and creates hydrostatic pressure against basement walls. Over time, this pressure forces the walls to shift or crack. Ensuring your downspouts discharge water at least five feet away from the foundation is the standard defense against these costly structural repairs. How much slope should a gutter have per foot? A professional grade gutter system requires a slope of roughly 1/4 inch for every 10 feet of horizontal run. While a perfectly level gutter might look aesthetically pleasing against your home's roofline, it's functionally useless. Without this precise pitch, water remains stagnant, inviting rust and mosquitoes. We use laser levels to ensure this angle is consistent across the entire run for maximum hydraulic efficiency and debris removal. Is it normal for gutters to have a small amount of standing water? No, gutters should be completely dry within a few hours after the rain stops. If you see standing water, it's a definitive sign of an incorrect gutter installation or a significant clog. Stagnant water adds immense weight to the system, causing hangers to pull loose from the fascia. In the Louisville climate, this water will freeze during winter, leading to heavy ice dams that can damage your shingles and siding. Can I fix the pitch of my gutters myself? DIY re-pitching is rarely a permanent solution because it doesn't address structural fatigue in the metal or the underlying fascia. Most homeowners lack the specialized stand-offs and laser tools needed to calibrate a precise slope over a long distance. If the hangers were originally spaced too far apart, simply moving them won't stop the sagging. A professional audit ensures the entire system is structurally sound and avoids further damage. Why is water leaking behind my gutters instead of into them? This usually happens when the gutter is installed without a proper drip edge or is placed too low on the fascia board. Water follows the curve of the roof, and surface tension pulls it behind the gutter channel. This leads to silent rot in your fascia and can eventually damage your siding investment. A correct installation ensures the gutter is tucked up under the roof's edge to catch every drop of runoff. How many downspouts does a standard house need? The general rule is one 3x4-inch downspout for every 30 to 40 feet of guttering. However, the complexity of your roof's surface area and the intensity of local rainfall dictate the final count. In Louisville, where microburst storms are common, we often recommend additional downspouts to prevent the system from becoming overwhelmed. Proper placement is just as important as the total number to ensure water moves away from the foundation. Does a new roof include new gutter installation? Not necessarily, as gutters are technically a separate system from the roofing deck and shingles. However, as an Owens Corning Preferred Contractor, we strongly recommend evaluating your gutters during a roof replacement. If you install a high-performance roof but keep a failing gutter system, you risk water backing up under your new shingles. We provide integrated solutions to ensure your entire building envelope remains protected under our 10-year craftsmanship warranty.

Every fall, thousands of homeowners discover too late that their roof was nowhere near ready for winter. Roof repair and replacement cost value totaled nearly $31 billion in 2024, up nearly 30 percent since 2022, and a significant portion of that spending could have been avoided with a simple pre-season checkup. A free roof inspection before the cold arrives takes less than two hours, costs you nothing out of pocket, and can be the difference between a $200 repair and a $20,000 crisis. The question for most homeowners is whether these inspections are genuinely useful or just a sales opportunity for roofing contractors. The honest answer is: both can be true, and this guide will help you tell them apart. Key Takeaways Roofs deteriorate faster than most people realize: Around 29 percent of U.S . homes with asphalt shingles have less than four years of remaining useful roof life, and roofs nearing that point can sustain 50 percent more damage during severe weather compared to roofs with eight or more years of life remaining. If you have not had an inspection in several years, schedule one before the first hard frost. The timing window matters: Most roofing professionals recommend an inspection once a year, ideally in the fall before winter weather sets in, and again after any major wind or hail event. Fall gives you the best chance to find and fix problems while temperatures are still workable. Small repairs prevent catastrophic costs: Minor shingle repairs caught early run $150 to $400; ignored damage escalates to $1,200 to $3,500 in roof decking rot or $8,000 to $18,000 in full replacement. A free inspection that catches even one minor issue pays for itself many times over. A credible inspection ends with paperwork: A credible free inspection ends with documentation, not just a conversation. Homeowners should expect photo documentation of slopes, penetrations, and any identified issues as part of a written report. That report becomes your reference point for repair estimates, insurance conversations, and future maintenance planning. Age determines your urgency: Use this general reassessment timeline for an asphalt shingle roof: years 0 to 10 carry minimal concern unless storm damage occurs; years 12 to 15 warrant an inspection every two to three years; years 15 to 20 are the lifecycle reassessment window; and at 20-plus years, annual inspection is recommended. Quick-Start Prioritization Framework Start here if you're: A homeowner with a roof over 15 years old: Schedule a professional free inspection before mid-October. A roof that is 15 to 20 years old or older should be professionally inspected before each winter season. Seeing any interior warning signs: Ceiling stains, attic condensation, or unusually high heating bills all point to roof issues. Act before freezing temperatures lock in the damage. Unsure of your roof's age: A licensed contractor can estimate age from shingle type and wear patterns during a free inspection, that knowledge alone guides every other decision you make. What a Free Roof Inspection Actually Covers Many homeowners assume a free inspection is a quick glance from the driveway. A legitimate inspection covers considerably more ground than that. The Five-Zone Checklist Professionals Follow A standard free roof inspection covers five to seven components, including shingles, flashing, gutters, attic ventilation, and structural decking, and typically takes 45 to 90 minutes to complete on a residential roof. That is not a superficial drive-by; it is a systematic review of every system that keeps water out of your home. The exterior check covers shingle condition, flashing integrity around chimneys and vents, gutter attachment and drainage, and the overall roofline for sagging. This includes areas around chimneys, plumbing vents, skylights, and roof valleys. Flashing that is rusted, bent, separated, or missing sealant can let water in long before you notice a ceiling stain. The attic check is equally important. Exterior and attic checks together detect hidden leaks and structural issues that a surface-only visual pass would miss entirely. Pro Tip: When your inspector finishes, ask them to walk you through the photos on the spot and explain which findings are urgent versus which can be monitored over the next season. Most roofing professionals photos when possible and explain what is urgent versus what can be monitored. A cracked vent boot and a rotted section of decking are not the same kind of problem, and they should not get the same kind of quote. Free vs. Paid: Is There a Real Difference? Many homeowners wonder if a free roof inspection differs from a paid roof inspection. The answer depends on the roofing contractor you choose. Some roofing companies offer visual inspection, while others may include infrared or drone roof inspections. For most residential homes, a thorough visual inspection with attic access is sufficient to identify the issues that matter most heading into winter. In terms of what you should receive at the end, the standard is clear. Once a contractor has completed an inspection, they should provide you with a full report and allow you time to make your own informed decision about any repairs they recommend. The report should include photos and descriptions of any damage. If a contractor finishes and simply tells you verbally that "everything looks fine" with no documentation, that is a flag worth noting. The Real Cost of Skipping a Pre-Winter Inspection Numbers make this concrete. The national average for a paid inspection sits at $331, and that inspection can prevent a single roof leak that might cause $3,000 to $15,000 in water damage to your ceiling, walls, flooring, and belongings. When you factor in potential mold remediation costs, which can easily exceed $10,000, the return on investment becomes even more dramatic. When the inspection is free, the math becomes even simpler. Ice Dams: Winter's Hidden Budget Killer One of the most expensive winter roof problems is one many homeowners have never heard of until they are already dealing with it. Ice dams appear when snow melts on the warmer sections of your roof and then refreezes at the colder edges. This process creates a barrier of ice that prevents proper drainage, causing water to pool behind it. The trapped water often finds its way under shingles and into the home, leading to serious structural damage and expensive repairs. The average ice dam removal cost is $1,200, but homeowners might spend between $400 and $4,000. Several factors that affect the cost include the size of the house or its roofline, the removal method, local labor rates, snow removal, or any additional inspections or roof repairs. That figure does not include the downstream water damage and mold remediation. A pre-winter inspection that identifies poor attic ventilation, the root cause of most ice dams, can prevent that entire scenario from developing. The Insurance Dimension Roofs in moderate to poor condition have 60 percent higher loss costs than those in good or excellent condition, and 38 percent of homes in the U.S. have roofs that are in moderate to poor condition. That statistic matters to your insurer as much as it matters to you. Insurers are increasingly scrutinizing roof age and condition at renewal time, and a well-documented inspection report gives you defensible evidence of your roof's status. Warning Signs You Should Not Ignore Before Booking You do not need to climb onto your roof to know whether an inspection is overdue. Several warning signs are visible from the ground or from inside your home. What to Look for From the Ground A handful of warning signs mean your home needs a roof inspection before the first snow rather than waiting for your regular annual check: curling or missing shingles, granules collecting in gutters, water stains on ceilings, daylight in the attic, and a sagging roofline. Any single one of these is enough to make the call. If you see small, sand-like particles collecting in your gutters, that may be a sign your shingles are wearing down. These granules protect shingles from UV exposure and weather damage. Once they begin wearing away, the shingles themselves deteriorate much faster. This is one of the most commonly missed signals because it requires actually looking into the gutters rather than just scanning the roof surface. What to Look for Inside Your Home Yellow or brown stains on ceilings, especially near exterior walls or around chimneys, almost always point to water finding its way past your roofing system. By the time a stain is visible inside your home, water has typically been getting through for a while, the stain is a symptom of an issue that has been developing, not a sudden event. Increased energy bills may also indicate roof performance problems affecting home efficiency. Poor ventilation, inadequate insulation, or air leaks around roof penetrations can significantly impact heating and cooling costs. If your heating bills jumped last winter without an obvious explanation, your roof's ventilation system is worth having checked. Pro Tip: Before your inspector arrives, do a quick attic walkthrough with a flashlight during daylight hours. Look for any spots where you can see light coming through the roof decking. Attic spaces are often dim even during the day, and a bright flashlight makes it much easier to spot moisture stains or daylight gaps. This takes five minutes and gives you useful context for the professional's report. Before you book anything, this news segment breaks down how unsolicited free inspection offers can be the opening move in a costly scam. How to Choose a Trustworthy Contractor for Your Free Inspection The value of a free inspection depends entirely on who is conducting it. Knowing what separates a legitimate contractor from an opportunist is worth understanding before you make a call. Green Lights: What a Good Contractor Does Reputable roofing contractors are licensed, insured, and willing to prove it before they set foot on your property. You can ask the contractor to show their credentials. A reputable roofing professional should be more than happy to provide their licensure and proof of insurance. A reputable contractor will provide their findings in writing and allow you to review the information before making a decision. They will also give you time to think, gather other estimates, and ask follow-up questions. Quality contractors will be patient, respectful, and willing to answer your questions. Red Flags: When to Walk Away Unsolicited door-to-door visits are the biggest warning sign. Pressure to decide immediately means they do not want you researching them. Established contractors earn their work through reputation and referral; they do not need to canvass neighborhoods. Red flag answers include being vague about license or insurance, rushing through in under 20 minutes, pressure for immediate decisions, refusing written reports, and finding "emergency" damage on newer roofs. If any of these come up during your interaction, end the appointment and start fresh with a different company. Pro Tip: Before scheduling with any contractor, verify their license through your state's licensing board website and check Google reviews for patterns, not just the overall rating. A company with 50 reviews over three years and consistent responses from ownership is a far safer choice than one with 200 reviews and zero engagement. What Happens After the Inspection The inspection report is the beginning of the process, not the end. Understanding what to do with it makes the entire exercise productive. Reading Your Report Honestly The person inspecting your roof works for a company that profits from repairs. That does not make the inspection dishonest, but it does mean you should read the report critically and get a second opinion on any major findings before committing to significant work. This is especially true for any recommendation involving full roof replacement. For minor repairs, acting quickly is the right move. Even small leaks can lead to big problems in winter. Water inside your roof structure can freeze, expand, and create larger gaps. This worsens leaks and could damage insulation, ceilings, and even your home's framing. A cracked flashing seal repaired in October is a $200 job. The same issue ignored through a hard winter can easily become a structural problem requiring far more than that to fix. Using the Report for Insurance and Planning Attic spaces are often dim even useful evidence if storm damage needs to be reported. Store your inspection report, including all photos, in a folder you can access quickly. If a winter storm causes damage, having a pre-storm baseline report can significantly strengthen an insurance claim by demonstrating the roof's condition before the event. Teams like Home Run Improvement document their findings thoroughly and walk homeowners through the repair priority levels so there are no surprises between the inspection and any follow-up work. Frequently Asked Questions How long does a free roof inspection take? A standard free roof inspection covers five to seven components and typically takes 45 to 90 minutes to complete on a residential roof. Larger or more complex rooflines, or roofs with multiple penetrations and features, may take slightly longer. A thorough inspector will not rush this process. Will I be pressured to buy repairs after a free inspection? A reputable contractor will not pressure you. A contractor who pressures you to sign a contract on the spot, especially after a storm, is a red flag. Legitimate roofing companies give you time to review estimates, ask questions, and make an informed decision. If you feel pressured, you are free to thank the inspector, take the report, and get additional opinions before committing to anything. What does my roof's age mean for a winter inspection? Most asphalt shingle roofs should be replaced every 15 to 30 years, depending on the shingle type and your climate. Three-tab shingles generally need replacement around the 15 to 20 year mark, while architectural shingles can often go 25 to 30 years with proper maintenance. If your roof is approaching or past these thresholds, a pre-winter inspection is not optional; it is essential. Owens Corning advises that most asphalt shingle roofs last between 15 and 30 years, and it is critical to start planning for replacement once your roof hits the 20-year mark, even if problems are not yet visible. Can a roof inspection actually be done safely in cold weather? Yes, you can inspect a roof in winter. Even with snow or low temperatures, experienced contractors use tools like drones, ladders, and attic access to safely assess roof conditions. A winter inspection is often more revealing because cold weather exposes issues that go unnoticed in summer. That said, fall, before the first significant snowfall, remains the ideal window because it gives you maximum time to schedule and complete any repairs. How often should I get a roof inspection if everything looks fine? Most professionals recommend a roof inspection at least once a year. The best time to inspect a roof is not only when you suspect damage. A quick review in the spring and fall helps you stay ahead of age-related wear, flashing issues, and drainage problems. Think of it like a dental checkup, regular maintenance is far cheaper than emergency treatment. The Bottom Line A free roof inspection before winter is one of the smartest, lowest-effort home protection steps available to any homeowner. The inspection itself costs nothing. The knowledge it gives you, about your roof's condition, its remaining life, and any repairs needed before the cold hits, is worth considerably more than the cost of any single repair it might uncover. The only real risk is booking with someone who lacks the credentials and documentation practices of a legitimate contractor. Verify licensure, expect a written report with photos, and take time to review the findings before committing to any work. Done right, a pre-winter roof inspection gives you exactly what every homeowner wants heading into the coldest months: clarity and confidence. If you are ready to get a professional set of eyes on your roof before winter, Home Run Improvement offers thorough pre-season inspections with documented findings and no-pressure recommendations. Book before the fall rush to ensure you have time to address any repairs while weather and contractor availability are still on your side. Sources U.S. Roof Claims Costs Reached Over $30 Billion In 2024 , Verisk Analytics. Industry data on roof claim volume and condition of U.S. roofs. https://www.verisk.com/company/newsroom/u.s.-roof-claims-costs-reached-over-$30-billion-in-2024-underscoring-evolving-risks/ Roof Claim Costs Increased 30% from 2022 to 2024 , IA Magazine. Summary of Verisk roofing trends report. https://www.iamagazine.com/news/roof-claim-costs-increased-30-from-2022-to-2024/ What Does Free Roof Inspection Mean for Homeowners , Elevated Roofing and Siding. Guide to free inspection process and documentation expectations. https://elevatedroofingandsiding.com/what-does-free-roof-inspection-mean-for-homeowners/ What Is a Free Roof Inspection and What Does It Include , Paramount Building Inc. Component checklist and timing guidance for Detroit homeowners. https://paramountbuildinginc.com/blogs/free-roof-inspection/ What We Look for During a Free Roof Inspection , Southwest Roofing MI. Inspection frequency and seasonal timing recommendations. Most roofing professionals What Is a Roof Inspection Worth? A Homeowner's Guide to Value , Como Exteriors. Cost-benefit analysis of inspections vs. repair and replacement costs. https://comoexteriors.com/what-is-a-roof-inspection-worth-a-homeowners-guide-columbia-mo/ Roof Inspection Before the First Snow: Warning Signs , Roof Crafters West. Visual warning signs checklist for pre-winter preparation. A handful of warning signs mean How Much Does Ice Dam Removal Cost? , Yahoo Lifestyle / HomeAdvisor data. National cost averages for ice dam removal and related repairs. For additional cost averages for ice dam removal and related repairs, ice dam removal costs average $1,200, with most homeowners spending between $650 and $2,400. Free Roof Inspections: Legit or Scam? , RoofQuotes. Red flag checklist and contractor vetting guidance. https://roofquotes.com/blog/free-roof-inspection-legitimate-or-scam Choosing a Roofing Contractor: 7 Red Flags to Watch For , Southwest Exteriors. Signs of legitimate vs. predatory contractor behavior. https://www.southwestexteriors.com/blog/2025/april/choosing-a-roofing-contractor-7-red-flags-to-wat/ How Long Do Shingle Roofs Last? , Home Genius Exteriors. Owens Corning guidance on asphalt roof lifespan and replacement planning. https://homegeniusexteriors.com/genius-blog/how-long-do-shingle-roofs-last/ Complete Roof Inspection Checklist Guide for Homeowners , Classic Midwest. Seasonal inspection scheduling and documentation best practices. Attic spaces are often dim even Signs Your Roof Was Damaged by Snow and Ice , Star Roofing. Age-based inspection urgency and winter damage identification. https://starroofing.net/residential/signs-your-roof-was-damaged-by-snow-and-ice/ Roofing Facts and Statistics 2025 , This Old House. Hail damage cost data and general roof maintenance guidance. https://www.thisoldhouse.com/roofing/roofing-facts-and-statistics
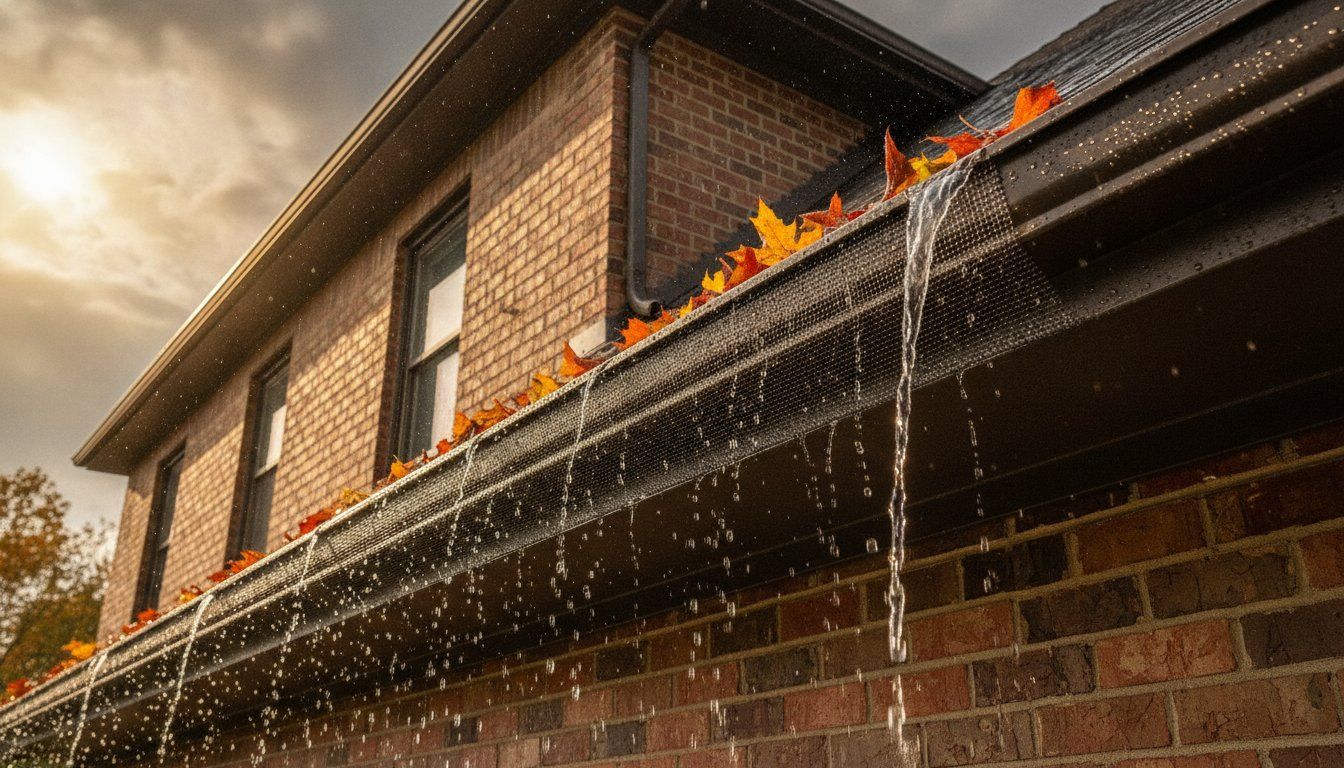
How many times have you stood at the top of a swaying ladder, pulling handfuls of wet sludge from a gutter, and wondered if one slip could change your life? It's a seasonal burden that every local homeowner understands, yet the alternative is even worse. When gutters fail, the resulting basement moisture and rotting fascia boards lead to structural damage that costs thousands to repair. If you want to protect your property and your physical safety, professional gutter guard installation Louisville is the strategic solution that ends the cycle of manual cleaning for good. We know you value the integrity of your home's exterior. This guide explains how the right protection system manages Louisville's average annual rainfall of nearly 50 inches while keeping you firmly on the ground. You'll discover how to choose a system that complies with the 2018 Kentucky Residential Code and preserves your manufacturer warranties. We will preview the best materials for our local tree-lined neighborhoods and explain why a 10-year craftsmanship warranty is the hallmark of a truly permanent exterior protection plan. Key Takeaways Identify the specific debris threats posed by local Oak and Maple trees and learn why specialized filtration is required to keep them out of your system. Compare micro-mesh technology against surface tension designs to decide which gutter guard installation Louisville residents can rely on during intense seasonal storms. Discover how professional calibration of your gutter's pitch prevents water backup that could otherwise compromise your home’s foundation and fascia boards. Understand the synergy between gutter protection and your exterior envelope, including how guards prevent backsplash damage to LP SmartSide siding. Recognize the importance of a 10-year craftsmanship warranty as a guarantee that your investment provides the long-term stability your property deserves. Why Gutter Guard Installation is a Necessity for Louisville Homeowners A Rain gutter system is your home's first line of defense against water intrusion, but it's only as effective as its ability to flow freely. Gutter guards are specialized filtration systems designed to divert water into the channel while blocking debris from entering. Without them, your home remains vulnerable to the unpredictable Kentucky climate and the constant threat of clogs. If you choose to ignore this vital component, then you're essentially inviting water damage to your most valuable asset. Investing in professional gutter guard installation Louisville is a calculated decision to protect your home's structural envelope from the ground up while providing a sense of long-term stability. Louisville Weather and Your Gutters Louisville homeowners face unique challenges from heavy spring rainfall that often overwhelms standard 5-inch and 6-inch gutters. While many people focus on autumn, the spring "helicopters" from local Oak and Maple trees are far more dangerous. These seeds form a dense paste that seals off downspouts during high-volume thunderstorms. High-performance Shurflo guards ensure water moves even when debris is heavy, which also helps prevent ice dams during Kentucky winters by keeping the drainage path clear of frozen obstructions. The Hidden Costs of Gutter Neglect If your gutters clog, then water overflows and destroys expensive landscaping or mulch beds. Louisville’s clay-heavy soil retains this moisture, leading to basement dampness and increased foundation pressure. Fascia rot is the primary result of gutter failure, occurring when stagnant water saturates the wood behind the gutter until it decays. Preventing these issues through professional gutter guard installation Louisville safeguards your home's value and prevents the need for costly structural remediation down the road. The economic reality is simple: preventing a single foundation repair or a basement waterproofing project pays for the entire installation of gutter guards. When you consider that foundation stabilization can cost tens of thousands of dollars, the upfront investment in protection becomes the only logical choice. Beyond the financial aspect, you must consider the physical risk. Ladder falls remain the leading cause of home maintenance injuries every year. By choosing a permanent solution, you eliminate the need to climb a swaying ladder during seasonal cleaning, providing your family with lasting security and neighborly peace of mind. Comparing Gutter Protection Systems: What Works Best in Kentucky? When you evaluate the options for your home, you'll find a market flooded with gimmicks and temporary fixes. Many homeowners are tempted by "helmet" style surface tension systems, but these often fail during the intense downpours common in the Ohio Valley . If the rain volume exceeds the system's surface tension capacity, water overshoots the gutter entirely. This creates a waterfall effect that erodes your foundation and destroys landscaping. Similarly, big-box plastic guards are a poor investment for Kentucky properties. The extreme humidity and summer heat cause vinyl to warp and crack, rendering the protection useless within a few short seasons. Micro-Mesh vs. Perforated Aluminum Micro-mesh technology is widely considered the gold standard for comprehensive filtration. It effectively blocks the smallest debris, including pine needles and shingle grit, which can accumulate and form a sludge in traditional screen guards. If you want a system that remains invisible from the street, then low-profile aluminum designs like Shurflo are the superior choice. Unlike bulky covers, these systems maintain your home's curb appeal while providing high-tensile strength. Shurflo professional-grade aluminum guards are engineered to withstand heavy snow loads and high winds, offering a level of resilience that plastic alternatives simply cannot match. Key benefits of these systems include: Total exclusion of microscopic debris and shingle grit. High-volume water handling during seasonal flash floods. Structural resistance to UV damage and thermal expansion. Why Professional-Grade Guards Outperform DIY Kits The primary flaw in DIY kits is the "gap" problem. These generic systems don't account for the specific corners, miters, or end caps of your unique gutter run. This leaves entry points for wasps, birds, and small debris to bypass the guard entirely. When you choose professional gutter guard installation , every piece is custom-fitted and secured with stainless steel screws rather than unstable plastic snaps. This structural security ensures the guards won't blow off during a storm or sag under the weight of wet leaves. According to Kentucky Climate Center data, our region's weather patterns demand this level of durability. While the initial cost of a professional gutter guard installation Louisville is higher than a weekend DIY project, the long-term value is undeniable. You're investing in a system that lasts decades and protects your home's structural integrity. If you're tired of temporary fixes that fail when you need them most, then it is time to consult with an expert. You can request a professional evaluation to see which high-performance system fits your home’s specific needs. The Critical Role of Professional Installation in Water Damage Prevention Even the highest quality filtration system will fail if the underlying geometry of your drainage is incorrect. Many homeowners view gutter guards as a "set and forget" accessory, but the reality is that they are precision-engineered components that must be integrated with your home’s specific architecture. When you choose professional gutter guard installation Louisville, you are ensuring that the physics of water management work in your favor. If a system is installed without recalibrating the gutter's pitch, then water will pool and overflow regardless of how clean the guards remain. Our experts verify that every linear foot of your system maintains the proper slope to move water toward the downspouts at maximum velocity. Proper integration also safeguards your existing roofing in Louisville . As an Owens Corning Preferred Contractor, we understand the delicate relationship between the roof deck, the drip edge, and the gutter channel. Incorrectly mounted guards can force water backward under the shingles, leading to deck rot and voiding your roof warranty. We pay meticulous attention to transition points like roof valleys, miters, and end caps where water volume is highest. These areas require custom-fitted diverters to prevent "overshoot" during heavy Kentucky thunderstorms. The 7-Step Professional Assessment Our process begins long before the first fastener is driven. We follow a methodical sequence to ensure your home’s exterior remains a cohesive shield against the elements: Evaluate the roof pitch and shingle overhang to determine the optimal guard angle. Inspect the integrity of the fascia boards to ensure they can support the added weight of the system. Clear and flush the existing gutters and downspouts to provide a clean slate. Re-seal all leaking seams and joints with high-grade industrial sealant. Calibrate the gutter pitch for consistent water flow. Custom-fit the Shurflo guards to the exact dimensions of your eaves. Final water test to verify performance under load. Securing the System for High Winds Louisville weather is known for sudden storm fronts that bring high-velocity winds. If you rely on snap-in DIY guards, then you risk seeing your investment scattered across your lawn after the first major gust. We utilize heavy-duty stainless steel fasteners that bond the guard directly to the gutter and fascia. Professional fastening prevents fascia pull-away by distributing the weight of the system and water volume more evenly across the structural members of your home. This level of precision in gutter guard installation Louisville is why we confidently provide a 10-year craftsmanship warranty on every project we complete. How Gutter Guards Protect Your Owens Corning Roof and LP SmartSide Siding Your home's exterior is an interconnected shield. If one component fails, the others are quickly compromised. Professional gutter guard installation Louisville isn't just about the gutters themselves; it's about preserving the high-performance materials you've already invested in. There is a critical synergy between Owens Corning roofing and your drainage system. If gutters overflow, the water backs up under the shingle edges, leading to rot in the roof deck that no shingle can prevent. We ensure your drainage system works in harmony with your roof to move water away from your home's structure immediately. Improperly installed guards often lift the first course of shingles to create a mounting point. This is a catastrophic error. Lifting these shingles breaks the factory seal and can void your manufacturer warranty. As an Owens Corning Preferred Contractor, we ensure that guard brackets never interfere with the SureNail technology strip or the integrity of the drip edge. We maintain the original drainage plane so your roof performs exactly as engineered. If the installation is handled correctly, then your roof and gutters function as a single, unified defense against the elements. Protecting Your Siding Investment When gutters clog, the resulting "backsplash" sends a constant spray of water and debris against your LP SmartSide siding . While this material is exceptionally resilient, chronic moisture exposure can lead to staining and premature wear on the finish. Effective water management is also essential for maintaining the curb appeal of vinyl siding , which can develop unsightly algae streaks if water is allowed to cascade down the walls. By controlling runoff through professional gutter guard installation Louisville, you also protect your decking in Louisville and foundation from the rot caused by constant dripping and pooling at the house line. Roof Warranty Compliance Your roof warranty is a promise of long-term stability, but that promise depends on correct installation. If you choose an unqualified installer who compromises the shingle seal, then you are left unprotected when a leak occurs. Our status as an Owens Corning Preferred Contractor means we are trained to integrate accessories without damaging the roofing system. We back this expertise with our own 10-year craftsmanship warranty, providing a second layer of security that generic contractors simply cannot match. This integrated approach treats your home as a single, durable unit rather than a collection of separate parts. Protect your exterior investment with a professional gutter guard installation Why Home Run Improvement is Louisville’s Trusted Choice for Gutter Protection Choosing a contractor for your home's exterior is about more than finding the lowest bid; it's about finding a partner who understands the environmental demands of the Ohio Valley. Home Run Improvement is locally owned and operated, which means we live in the same neighborhoods we protect. We don't believe in the high-pressure sales tactics or the one-size-fits-all solutions used by national chains. If you want a gutter guard installation Louisville residents can depend on for decades, then you need a team that treats your property with the same care as their own. National chains often prioritize volume over precision, but we prioritize the long-term stability of your home. Our commitment to quality begins with the materials we select for every project. We specialize in Shurflo gutter guards and high-performance products like LP SmartSide because they represent the pinnacle of durability and resilience. When you choose our team, you aren't just getting a product; you're getting a comprehensive exterior protection plan. This commitment is backed by our 10-year warranty on craftsmanship. This isn't a hollow marketing claim; it's a mark of integrity that ensures we remain accountable for every fastener and miter we install on your property. Service Areas: From Anchorage to Bardstown Our team provides specialized exterior solutions across the entire metropolitan region. We understand the unique architectural styles and tree canopy challenges in Prospect and Indian Hills . Whether you need a system for a historic home or a modern build, we bring the same level of precision to Crestwood and Jeffersontown . Our service reach also extends across the river to serve our neighbors in Clarksville, IN and New Albany , ensuring that top-tier protection is accessible to homeowners throughout the Kentuckiana area. The Home Run Difference The "Protective Expert" approach means we identify potential pitfalls before they become expensive repairs. During your professional consultation, we don't just look at your gutters. We evaluate your entire exterior envelope to ensure your roof and siding are functioning as a unified shield. If we find issues with your fascia or shingle overhang, then we address them before the gutter guard installation Louisville begins. This methodical, integrity-driven process ensures your home remains a secure environment for your family. If you're ready to eliminate the risks of ladder falls and water damage, then it's time to work with a contractor who prioritizes your home's security. Contact Home Run Improvement for your free gutter guard estimate today.Secure Your Home’s Future with Permanent Protection Protecting your property requires a comprehensive strategy that goes beyond simple aesthetics. By choosing professional gutter guard installation Louisville, you're investing in the long-term resilience of your home's structural envelope. You've learned how high-performance filtration prevents foundation erosion and eliminates the physical risks associated with seasonal ladder use. According to the National Safety Council, falls are a leading cause of preventable injury; a permanent solution keeps you safely on the ground.As an Owens Corning Preferred Contractor with a consistent record of 5-star Google reviews, we take personal responsibility for every detail of your project. Our 10-year craftsmanship warranty serves as a mark of integrity, ensuring your investment remains secure through every Kentucky storm. When you choose a partner dedicated to accountability and local pride, you gain more than just clean gutters. You gain the confidence that your home is prepared for whatever the Louisville weather brings.Schedule Your Free Gutter Guard Estimate in Louisville It's time to step off the ladder and let our experts handle your exterior protection. We look forward to helping you safeguard your property and providing the neighborly reassurance you deserve. Frequently Asked Questions Are gutter guards really worth it for Louisville homes? Yes, they are a strategic investment for any local property owner. Louisville receives an average of 49.1 inches of rain annually, which places immense pressure on your home's foundation and siding. If you don't have protection, then you risk basement flooding and fascia rot. A professional gutter guard installation Louisville residents trust eliminates the dangerous chore of ladder climbing and safeguards your home’s structural integrity for the long term. Will gutter guards damage my Owens Corning roof shingles? No, your shingles will remain protected if the installation is handled correctly. As an Owens Corning Preferred Contractor, we understand how to integrate guards without disturbing the SureNail technology strip or lifting the first course of shingles. If an amateur installer lifts those shingles, then they break the factory seal and potentially void your manufacturer warranty. We use mounting methods that maintain the drip edge integrity while providing a 10-year craftsmanship warranty. Do gutter guards work with heavy Louisville rainstorms? High-performance systems like Shurflo are specifically engineered to manage the high-volume thunderstorms common in the Ohio Valley. While helmet style systems often fail because water overshoots the channel during heavy downpours, perforated aluminum guards allow water to enter the gutter immediately. If you choose a system calibrated to your roof's pitch, then you won't have to worry about water cascading over the edge and eroding your expensive landscaping or mulch beds. Can birds or squirrels get inside the gutter guards? Professional-grade guards act as a physical barrier that prevents pests from nesting in your drainage system. Unlike DIY plastic screens that can be chewed through or pushed aside, our aluminum guards are secured with heavy-duty fasteners. If you have a system that is custom-fitted to your miters and end caps, then there are no entry points for birds, squirrels, or wasps to bypass the protection. This keeps your gutters clear and your attic space secure. How much does professional gutter guard installation cost in Kentucky? The total investment depends on your home’s linear footage, the complexity of your roofline, and the specific material you choose. We provide project-based pricing that accounts for professional labor and high-quality procurement. If you want an accurate figure for your property, then we recommend scheduling a free estimate. This allows us to inspect your current gutters and fascia boards to ensure the sub-structure is sound before we begin any work on your home. Do I still have to clean my gutters if I have guards installed? While guards drastically reduce the frequency of maintenance, they are not entirely maintenance-free. You will no longer need to scoop wet sludge or clear downspout clogs, but you should periodically check for shingle grit or fine debris sitting on top of the guards. If you notice an accumulation, then a simple brushing from the ground is usually sufficient. This small step ensures your gutter guard installation Louisville continues to perform at peak efficiency during Kentucky’s wettest seasons. What is the best gutter guard for homes with lots of Oak trees? Micro-mesh or perforated aluminum systems like Shurflo are the most effective options for homes near Oak and Maple trees. These trees drop helicopters and tassels that easily clog traditional screens or surface tension covers. If you use a fine filtration system, then even the smallest organic matter is blocked from entering the channel. This prevents the debris from forming a heavy paste that would otherwise stop water flow and lead to expensive fascia repairs. How long does a professional gutter guard installation take? Most residential projects are completed within a single day. The exact timeline depends on the linear footage of your home and whether your existing gutters require cleaning or repairs before the guards are mounted. We follow a methodical 7-step process that includes flushing the system to ensure a clean slate. If your project has complex roof valleys or requires custom miter work, then we take the necessary time to ensure every fastener is perfect.
Bathrooms sell homes. That single sentence has driven billions of dollars in renovation spending, and the debate at the center of it all keeps coming back to the same fixture face-off: walk-in shower vs tub. Should you rip out that rarely-used tub and replace it with a sleek, glass-enclosed shower, or does keeping the tub protect your asking price? The answer depends on a handful of factors your home already has in place. Bathrooms remain one of the most influential spaces when it comes to resale value, and the fixtures you choose can directly impact buyer appeal, with real estate professionals and National Association of Realtors guidance consistently noting that at least one bathtub in a home supports broad resale value. At the same time, walk-in showers have become the default in new construction and high-end remodels because they solve real problems. This guide cuts through the noise so you can make a decision backed by data, not guesswork. Key Takeaways Walk-in showers win in the primary bath, when a tub exists elsewhere: A tub-to-walk-in-shower conversion adds resale value only when the home has at least one other bathtub, with mid-range conversions returning 60 to 74% ROI and adding roughly $1,350 to $2,220 on a $3,000 project. If your ROI falls below 60%, revisit your materials and labor budget. Zillow data favors showers, by a measurable margin: Walk-in showers return $1.71 for every dollar spent, and homes with one sell for about $1,583 more on average than comparable homes without. Use that figure as your floor, if your renovation costs more per dollar returned, simplify the design. Removing your only tub is the riskiest move: Removing the only bathtub in a home can shrink your buyer pool by up to 40%. Before pulling that tub, confirm you have a second bathroom with one. Bathroom renovation demand is rising fast: Bathroom renovations are mentioned by 35% of Realtors as a project seeing increased demand, with updated primary baths becoming more of a must-have than a bonus. That demand signals opportunity, move now before your competition on the block does. The golden formula for 2026: The formula that works in 2026 is a walk-in shower in the primary bath paired with a tub in a secondary bathroom. Quick-Start Prioritization Framework Start here if you're: Selling in the next 1-2 years with a multi-bath home: Install a mid-range walk-in shower in the primary bath, keep a tub in a second bathroom to maximize ROI without shrinking your buyer pool. Planning to stay 5+ years: Prioritize what you use daily. A walk-in shower improves everyday comfort and sets up your home for a strong eventual sale. Uncertain about your local market: Call Home Run Improvement first, our team assesses your specific layout, neighborhood demographics, and budget to give you a data-backed recommendation before you spend a dollar. Walk-In Shower vs Tub: The Head-to-Head Breakdown Cost to Install, What You're Really Paying Cost is the first number most homeowners look at, and it varies more than people expect. Walk-in shower installation typically ranges from $4,000 to $20,000 nationwide, with an average cost of around $12,000. That wide range exists because materials make a huge difference: on average, homeowners spend between $3,500 and $15,000, with most projects falling around $7,000 to $10,000 for a mid-range installation, while basic prefab walk-in shower kits can start as low as $800 to $2,500 excluding labor. Bathtubs carry their own installation costs. The installation cost for bathtubs typically ranges from $1,200 to $5,000, depending on the tub type, plumbing changes, and labor, with standard acrylic tubs on the cheaper end and cast iron or whirlpool tubs at the higher end. The lesson here is clear: if you want the best ROI per dollar spent, choose mid-range materials for either fixture and avoid relocating plumbing when possible. Pro Tip: Upscale conversions using custom tile, relocated plumbing, and luxury fixtures tend to drop to around 45% ROI, the spend goes up, the percentage recovered goes down. Mid-range materials hit the sweet spot: modern, clean, durable, and priced so the numbers still make sense at resale. Resale Value, The Numbers Side by Side This is the section most homeowners come for, and the data tells a nuanced story. Return on investment comparisons show near-identical returns overall (70.6% for showers vs. 70.1% for tubs), but Zillow's Home Value Index shows luxury showers with spa features can add a 29% premium for "spa-like" listings. That spa premium is the prize worth chasing, and it requires quality execution, not just any shower. NAR's 2025 Remodeling Impact Report found increased buyer demand for bathroom renovations and estimated that bathroom renovation projects recovered about half their cost at resale on average, meaning a bathroom renovation may improve condition and buyer appeal, but it does not guarantee full cost recovery. Therefore, if you're renovating primarily for resale, keep the scope targeted and mid-range rather than going full custom. Buyer Demographics, Who's Looking at Your Home The core difference for resale value lies in functionality versus aesthetics. While a walk-in shower often looks more luxurious and makes a small bathroom feel larger, a bathtub provides essential utility for families with children or pets. Your neighborhood's typical buyer profile is one of the strongest factors in determining whether a bathtub boosts resale value. In family-friendly communities where families with young children are the primary buyers, a bathtub is often expected, parents typically need a tub for bathing kids, so removing the only one could become a drawback. On the other side, in condos, city homes, or neighborhoods that attract younger professionals, a spacious shower can sometimes be more appealing than a bathtub. In my experience working on bathroom remodels across a range of home types, the single most important question to answer before touching either fixture is: who is most likely to buy this home in three to five years? The Case for a Walk-In Shower Modern Appeal and Market Demand Over the past decade, the walk-in shower has become one of the most requested bathroom upgrades. Homeowners love the clean lines, open feel, and modern aesthetic, and in primary bathrooms especially, a spacious walk-in shower with glass panels and thoughtful tile design often feels more luxurious than a traditional tub-shower combo. According to the 2025 Houzz Bathroom Trends Study, 3 in 5 homeowners are increasing the size of their primary bathroom shower during renovations, with a quarter expanding the shower space by more than 50%. That level of demand signals a clear market preference that only keeps growing, homeowners who act now position their primary bathroom ahead of the competition rather than catching up to it. Pros: Perceived as a luxury feature that increases listing appeal Frameless glass and quality tile signal a move-in-ready home Walk-in showers can increase home value and are particularly attractive to buyers looking for modern design and accessibility, offering a potential return of $1.71 for every dollar spent Easier to clean than a tub-shower combo Space-efficient in smaller bathrooms, glass panels open up the visual footprint Cons: A bathroom equipped solely with a walk-in shower and no tub is labeled a three-quarter bath, which might deter certain buyers such as families with young children who often prefer a full bath with a tub for versatility Installation costs, which can range from $1,000 to $15,000, must also be considered as they factor into the overall return on investment Custom designs can over-personalize the space and narrow buyer appeal Poor installation quality hurts value rather than helping it Accessibility and Aging in Place This is where walk-in showers truly separate themselves from tubs. According to CDC data on fall prevention for older adults, falls in the bathroom account for over 80% of non-fatal trauma-related hospital admissions among older adults, and a walk-in shower with grab bars, non-slip flooring, and proper maneuvering space directly addresses this risk. Traditional bathtubs require stepping over a high edge to enter and exit, which can become more difficult over time as mobility, balance, or joint comfort change. Bathrooms are also one of the most common places for slips and falls in the home. A walk-in shower removes that tall barrier, allowing for a low or even zero-threshold entry, and that simple design shift can make daily routines easier and safer while maintaining a comfortable and welcoming space. Pro Tip: Accessibility features like grab bars and slip-resistant floor options can add value to your home and broaden potential buyer appeal. Aesthetic appeal matters too, clean lines, a frameless enclosure, and cohesive finishes help the space feel premium. You get safety and style without sacrificing either. I've found that homeowners who add accessibility features during a shower conversion end up with a bathroom that appeals to a much wider age range of buyers, from young adults who appreciate the spa feel to older buyers who need the safety features. The Case for Keeping a Bathtub Protecting Your Buyer Pool Let's be honest about what removing your only tub actually costs. Because families represent one of the largest active buyer groups in most markets, removing the tub shrinks your pool of potential buyers with one decision. In many places, a bathroom without a tub is treated as a "three-quarter bath," which changes how the listing appears in search filters. A listing that disappears from buyer filter results never gets a showing, and that's a problem no amount of great tilework can fix. A bathtub's resale value case is strongest when the home has only one full bathroom or when the likely buyer is a family. In listings, "no tub" can become an objection for parents who bathe toddlers, wash pets, or want a flexible full bath. Pros: Maintains full bathroom classification in listing searches Appeals to families with young children and pet owners According to real estate professionals and NAR guidance, having at least one bathtub in a home continues to support broad resale value, with many buyers, especially families with young children, still expecting at least one functional tub Lower installation cost than a custom walk-in shower Freestanding soaking tubs can serve as luxury focal points in high-end markets Cons: High step-over threshold creates fall risk for older residents Large tubs consume floor space that could feel more open as a shower An outdated tub-shower combo can make the entire bathroom feel dated In a small bathroom, a tub can make the space feel cramped and outdated Low-use tubs may signal wasted space to buyers who shower exclusively Pro Tip: If you want the benefits of both fixtures, consider keeping a tub in a secondary bathroom and converting the primary bath to a walk-in shower. All buyers will be more attracted to a home with both a tub and a walk-in shower, and that combination maximizes your appeal across every buyer demographic. Common Mistakes That Kill Your ROI Over-Investing in the Wrong Bathroom After years of seeing bathroom remodels go sideways, the pattern is always the same: homeowners spend on the wrong room. Installing a $20,000 custom walk-in shower in a single-bathroom starter home rarely pays back. The walk-in shower vs tub ROI depends heavily on your home's existing layout, adding a walk-in shower to a primary bath yields high returns, but spending $8,000 to remove your home's only tub will likely result in a negative ROI when it comes time to sell. Choosing Style Over Execution The quality of your renovation matters more than the tub removal itself. A poorly installed walk-in shower with grout issues, inadequate waterproofing, or a cramped door swing signals deferred maintenance to buyers, the opposite of what you want. A high-quality walk-in shower with professional installation, good tile work, and modern fixtures can actually add value, especially in master bathrooms. Ignoring Local Market Signals While traditional advice suggests keeping at least one bathtub in a home to maintain its value, the modern housing market is more nuanced. The decision to replace a bathtub with a shower should be informed by the specific demographics of potential buyers in your area, as well as your personal needs and future plans for the home. A great contractor or a local real estate agent can give you this intelligence before you commit to a design. Before you commit to a walk-in tub, a healthcare professional breaks down the most common advertising claims to help you separate genuine accessibility benefits from marketing spin. Home Run Improvement: Best Overall for Walk-In Shower and Tub Conversions Editor's Pick, Best for Homeowners Who Want Maximum Resale Value Without Guesswork When you're making a bathroom decision that directly affects your home's market value, who you hire matters as much as what you install. Home Run Improvement brings together resale-minded remodeling expertise with transparent pricing and professional installation, a combination that protects your investment from the first design conversation through final sign-off. What sets Home Run Improvement apart for the walk-in shower vs tub decision is their consultative process. Rather than defaulting to one fixture over another, their team evaluates your home's number of bathrooms, your local buyer demographic, and your realistic budget before recommending a solution. That means you're not guessing whether your primary bath conversion will include enough value; you know before construction starts. For homeowners who want a mid-range walk-in shower that hits the sweet spot of modern appeal and strong ROI, or families who need a tub preserved strategically in a secondary bath, Home Run Improvement's bathroom remodeling services are built for exactly that kind of intentional, value-driven decision-making. Frequently Asked Questions Does removing a bathtub always lower home value? The short answer is no, removing a bathtub does not automatically devalue your home, but it can reduce buyer appeal in certain situations, especially if it's the only tub in the house. What matters most is how many bathrooms you have, who your likely buyers are, and the quality of the renovation. If you have two or more bathrooms and one retains a tub, a walk-in shower conversion in the primary bath typically adds value. How much does a walk-in shower cost compared to a bathtub? The national average cost of a walk-in shower installation is about $9,500, with most homeowners spending between $4,500 and $15,000 depending on size, materials, and labor. A standard bathtub installation is generally less expensive. The installation cost for bathtubs typically ranges from $1,200 to $5,000 depending on the tub type, plumbing changes, and labor. Staying with mid-range materials for either option produces the strongest resale returns. What is the ROI on a tub-to-shower conversion? A tub-to-walk-in-shower conversion returns 60 to 74% ROI and can add over $1,500 in resale value, but only if your home keeps at least one other bathtub. A mid-range conversion delivers between 60% and 74% ROI, and on a $3,000 project, homeowners typically recover $1,350 to $2,220 at resale. Custom conversions with relocated plumbing and luxury finishes see ROI drop to around 45%. Is a walk-in shower better for aging in place? Walk-in showers work well for aging in place, post-surgery recovery, or anyone with limited mobility who can still stand and walk. If you're aging in place, recovering from an injury, or managing mobility challenges, stepping over a traditional bathtub becomes a daily obstacle, and a properly designed walk-in shower with the right safety features restores dignity and confidence while preventing falls. Should I keep a tub if I have a two-bedroom home? A walk-in shower fits homeowners who plan to stay five years or longer, adults without young children, retirees, and sellers who already have another tub. It also fits smaller bathrooms where a glass shower makes the footprint feel less boxed in. A bathtub's resale value case is strongest when the home has only one full bathroom or when the likely buyer is a family. For a two-bedroom home marketed to families, keeping at least one tub is the safer call. The Verdict The walk-in shower vs tub debate does not have a universal winner; it has a context-dependent answer. Walk-in showers add more value in primary bathrooms of multi-bath homes, especially for homes targeting professionals, empty nesters, or luxury buyers. Bathtubs add more value when they represent the only tub in the house and your buyer pool includes families. The smartest move is the one that accounts for your home's specific layout, your local market, and your timeline. Before you commit to either, get a professional assessment from a remodeler who understands how bathroom decisions translate to actual dollars at closing. Home Run Improvement specializes in exactly that, helping homeowners make bathroom decisions that feel right to live in and pay off when it's time to sell. Sources Bathtubs vs. Shower, Resale Value 2026 , Badeloft USA. Analysis of walk-in shower vs. bathtub resale value considerations. https://www.badeloftusa.com/buying-guides/bathtubs-vs-shower-resale-value/ Walk-In Shower vs Bathtub for Home Resale Value , Tona USA. Head-to-head comparison of resale data and regional preferences. https://www.tonausa.com/blogs/blog/walk-in-shower-vs-bathtub-for-home-resale-value How Much Does a Walk-In Shower Cost? (2026 Pricing) , This Old House. National cost data for walk-in shower installations. https://www.thisoldhouse.com/bathrooms/walk-in-shower-cost 2025 Remodeling Impact Report , National Association of Realtors and NARI. Bathroom renovation demand, cost recovery, and Joy Score data. https://www.nar.realtor/newsroom/top-remodeling-projects-for-homeowner-satisfaction-and-cost-recovery-revealed-in-nar-report Walk-In Shower Accessibility Features: A 2026 Guide , TRC Home Improvements. CDC data on bathroom falls and walk-in shower safety features. https://www.trchomeimprovements.com/post/walk-in-shower-accessibility-features-a-2026-guide Does Removing a Bathtub Devalue Your Home? , Gill Construction. Practical breakdown of when tub removal hurts and when it helps. https://gillconstruction.com/does-removing-a-bathtub-devalue-your-home/ Walk-In Shower vs Bathtub: Which Adds More Home Value? , EZ Bath N Shower. NKBA research on bathroom remodels and buyer interest data. https://ezbathnshower.com/walk-in-shower-vs-bathtub-home-value/ Walk In Shower vs Tub Which Adds Value 2026 , Baltimore Chronicle. Regional and demographic breakdown of shower vs. tub resale decisions. https://baltimorechronicle.com/other/walk-in-shower-vs-tub-which-adds-value-2026/ Do You Need a Bathtub for Resale? What to Consider , Joyce Factory Direct. NAR 2025 cost recovery analysis and strategic tub-keeping guidance. https://www.joycefactorydirect.com/blog/do-you-really-need-a-bathtub-for-resale

What if the lowest bid you receive for your Louisville home remodel actually ends up being the most expensive mistake you ever make? It's a valid concern for homeowners in historic neighborhoods or growing suburbs who fear overpaying for subpar labor that won't survive a Kentucky storm. You've likely felt the anxiety of choosing between high end materials and budget friendly alternatives, wondering if the cheaper option will lead to rot or failure in just a few years. When you're trying to calculate the gutter replacement cost Louisville KY contractors are quoting this year, the price tag is only one part of the equation. If you choose based on the sticker price alone, you often sacrifice the durability that protects your home's foundation. We understand that your home is your most significant asset, and it deserves a level of precision that matches its value. This guide provides a transparent look at the real factors driving renovation costs in 2026, from the rising price of construction materials to the specialized labor required for older Louisville properties. You'll learn how to maximize your return on investment by prioritizing upgrades that offer both efficiency and aesthetic appeal. We will break down the variables for siding, roofing, and interior remodeling, ensuring you have the confidence to select materials and warranties that offer genuine, long term security for your family. Key Takeaways Learn how the Ohio Valley climate affects material longevity and why Louisville building codes impact your 2026 renovation budget. Discover how to evaluate the gutter replacement cost Louisville KY contractors quote by comparing initial expenses with long-term material resilience. Identify which interior projects, like kitchens and basements, offer the highest return on investment in the current local housing market. Understand the technical variables that drive up costs, including the importance of proper attic ventilation for preserving your roof's lifespan. Gain confidence in your contractor selection by prioritizing a 10-year craftsmanship warranty over the industry-standard 1-year coverage. Navigating Home Renovation Cost in Louisville KY: 2026 Market Overview Louisville homeowners face a unique set of variables in 2026. The local housing market remains competitive, which has shifted the focus from buying new properties to upgrading existing ones. Property owners realize that protecting their investment is non-negotiable. If you choose to renovate rather than relocate, you're making a strategic decision to build equity in an environment where inventory stays tight. However, success depends on understanding that local renovation costs aren't just about aesthetics; they're about long term resilience against our specific regional challenges. Our weather dictates the standards of the home improvement industry here. Between intense Ohio Valley humidity and unpredictable storm seasons, materials must be resilient. If you select cheap components, they'll likely fail before the decade is out. This is especially true when calculating the gutter replacement cost Louisville KY homeowners face; the price reflects the need for systems that can handle heavy rainfall without overflowing or sagging. Systems that fail during a Kentucky downpour can lead to foundation damage that costs thousands more than the initial installation. You must distinguish between cosmetic updates and structural necessities. While a fresh coat of paint or new hardware changes the look of a room, structural costs involve the integrity of your roof, siding, and drainage. Labor rates in Jefferson County trend differently than national averages because our regional architecture often requires specialized knowledge. When you hire a contractor, you aren't just paying for time. You're paying for an expert who understands how to seal a home against the damp Kentucky air. The Impact of Local Material Availability Proximity to regional suppliers affects your timeline and your budget. Sourcing from established manufacturers like Owens Corning ensures you get products engineered for the local climate. According to recent regional economic reports, material volatility remains a factor in 2026. When you choose a contractor with strong supplier relationships, you're securing a supply chain that keeps your project on schedule and avoids the delays common with smaller, unproven outfits. Budgeting for Older Louisville Homes Homes in established areas like Anchorage or Hurstbourne carry hidden complexities. These properties often hide outdated electrical systems, wood rot under old siding, or lead paint issues. If you start a project without a professional inspection, you risk mid-project budget spikes that can derail your finances. A thorough assessment acts as a protective shield, identifying structural weaknesses before the first hammer swings. Professional inspections prevent surprises and ensure your renovation remains a sound financial investment rather than a bottomless pit of repairs. Exterior Protection: Costs for Roofing, Siding, and Gutters Your home's exterior serves as its primary defense against the elements. If this protective envelope fails, the resulting water damage can compromise your entire structure. When evaluating the cost-to-value ratio of your renovation, you must prioritize durability over the lowest possible bid. Professional Roofing services in Louisville provide more than just a new look; they offer a safeguard for your property value. Doing your due diligence on your contractor's credentials is the most effective way of avoiding home improvement scams that often target unsuspecting homeowners after major storms. Roofing Performance and SureNail Technology If you choose Owens Corning shingles, you're gaining access to SureNail Technology. This features a tough, woven engineered reinforcing fabric in the nailing zone, which provides incredible gripping power. This is essential in the Ohio Valley, where high winds can easily strip away inferior shingles. These systems also carry a Class A fire resistance rating, the highest possible grade. This rating is based on the UL 790 standard, which measures a roof's ability to resist fire spread from external sources. Investing in high-performance roofing can often lead to lower home insurance premiums because you've significantly reduced the risk of catastrophic failure. Siding Options: From Vinyl to LP SmartSide Siding material choice is perhaps the largest variable in your exterior budget. If you choose traditional vinyl siding, you're selecting a versatile, low-maintenance option that performs well for many homeowners. However, when you choose LP SmartSide, you're upgrading to an engineered wood product designed to withstand hail and impact better than vinyl. To ensure this material performs as intended, you should work with an LP SmartSide Master Lead. This designation means the installer has undergone specialized training to handle the product's specific requirements. Professional Siding installation in Louisville ensures that your home remains sealed against the high humidity levels typical of our region. Gutter Systems and Foundation Protection A high-quality roof is useless if your drainage system fails. When calculating the gutter replacement cost Louisville KY homeowners should expect, it's vital to view it as foundation insurance. Seamless gutters are the industry standard because they eliminate the joints where leaks typically begin. If you want to prevent debris buildup and clogs, you should consider Shurflo gutter guards. These guards keep leaves out while allowing water to flow freely, protecting your basement from expensive flooding issues. You can explore our comprehensive Gutter services and guards to find a solution that fits your home's specific architecture. If you're ready to secure your home's exterior for the next decade, speak with a Louisville expert today . Transforming Your Interior: Kitchen, Bathroom, and Basement Estimates Interior remodeling represents a strategic shift in how you allocate your home's equity. Unlike exterior projects that focus on the protective envelope, interior work is heavily defined by a high labor-to-material ratio. When you remodel a kitchen or bathroom, you're paying for specialized trades like master plumbers and electricians who must work within the constraints of your existing structure. If you choose a design-build approach, you gain a single point of accountability that streamlines these trades and prevents the scheduling conflicts that often drive up costs with independent contractors. You must also account for construction material price trends , as the cost of cabinetry and stone surfaces can fluctuate based on regional supply chains. Homeowners often ask how interior budgets compare to exterior maintenance. While you might be focused on the gutter replacement cost Louisville KY companies quote to stop a basement leak, the actual cost to finish that basement into a living suite is a separate, more labor-intensive investment. Protecting your new interior always begins outside. If you ignore the gutter replacement cost Louisville KY experts recommend for proper drainage, you risk water seepage that can destroy new basement drywall and premium flooring before you even enjoy the space. Kitchen and Bathroom ROI in Kentucky The "Big Three" of interior work—kitchens, bathrooms, and basements—offer the most significant impact on your daily life and property value. In the Louisville market, Kitchen remodeling Louisville projects that prioritize functional layouts and durable quartz surfaces see the highest returns. For 2026, we see a move toward "aging-in-place" features. If you incorporate walk-in showers and wider doorways now, you're securing the home's long-term utility. You can find more details on these specific aesthetic and functional shifts in our guide to Modern Bathroom Remodeling Louisville . Basement Finishing: Maximizing Square Footage In neighborhoods like Crestwood , finishing a basement is the most efficient way to add square footage without changing the home's footprint. However, Louisville's geography requires strict moisture control. You cannot simply hang drywall and hope for the best. A professional Basement remodeling Louisville project must include vapor barriers and specialized flooring that can withstand the Ohio Valley's humidity. When you select materials designed for sub-grade environments, you're preventing the mold and rot issues that plague DIY attempts. High-quality basement finishing turns a dark storage area into a resilient living space that lasts for decades. Factors That Drive Renovation Costs Up in Louisville What if the most expensive part of your renovation is the mistake you didn't see coming? In the Louisville market, technical oversights often drive costs higher than material choices ever will. If you ignore the balance of your Net Free Ventilating Area (NFVA), you're essentially baking your shingles from the inside out. Improper ventilation traps heat and moisture in your attic, which leads to premature roof failure and increased energy bills. While you might be focused on the gutter replacement cost Louisville KY contractors provide, don't overlook how these hidden technical factors impact your long term investment. If your ventilation isn't balanced to meet local building codes, even the most expensive roofing materials won't last their intended lifespan. Material quality also plays a decisive role in your total expenditure. When you choose Class 4 impact resistant shingles, your upfront cost is higher than standard shingles. However, this investment acts as a protective shield against the hail storms common in the Ohio Valley. Many insurance providers offer premium discounts for homes with Class 4 ratings because the risk of a claim is significantly lower. If you opt for the cheapest materials now, you'll likely pay the difference through higher insurance premiums and more frequent repairs later. Structural Integrity and Code Compliance Adhering to the International Residential Code (IRC) is non-negotiable for any reputable contractor. Whether you're in Jefferson County or Southern Indiana, permitting requirements ensure your home remains safe and legal. For a deck installation in Louisville , joist spacing and proper blocking are critical to preventing structural sag. If a contractor suggests skipping permits to save money, they're asking you to assume all the legal and physical risk. Following ASTM and CSA standards for roofing and siding ensures that your home can withstand the mechanical stresses of our changing seasons. The Value of Professional Installation The hidden price of "low-bid" contractors often reveals itself through a lack of insurance and non-existent warranty support. If you choose a contractor based solely on the lowest quote, you're often sacrificing the security of a 10-year craftsmanship guarantee . As an Owens Corning Preferred Contractor, we provide access to better warranties that are only available through certified professionals. This certification ensures that the manufacturer's warranty remains valid because the installation meets their strict performance standards. Our locally owned roots in Louisville mean we're here to stand behind our work long after the project is finished. Contact us for a professional renovation estimate Securing Your Investment: Why Quality Installation Outlasts a Low Quote Choosing a contractor based solely on the lowest bid is often a recipe for long term financial regret. If you accept a quote that seems too good to be true, you're likely sacrificing the expertise and insurance coverage that protect your property. When you're analyzing the gutter replacement cost Louisville KY companies present to you, look beyond the immediate price tag. A low bid often comes with a standard 1-year warranty, which leaves you vulnerable the moment that twelve-month window closes. If a leak develops in year two, you're the one paying for the repair. In contrast, a 10-Year Craftsmanship Warranty acts as a firm commitment to quality, ensuring your home remains protected through a decade of Kentucky seasons. Quality isn't a luxury. It's a requirement for home stability. When you hire a master of their trade, you're paying for a methodical approach that identifies potential failures before they happen. A "Free Estimate" should be more than a single number scribbled on a notepad. It must be a comprehensive document that outlines material specifications, labor timelines, and safety protocols. You should always verify that your contractor follows the guidelines provided by the Better Business Bureau for hiring reputable professionals. This level of transparency is the only way to ensure you aren't hit with hidden fees once the demolition begins. Protecting Your Biggest Asset Before you sign a renovation contract, you must perform your own due diligence. Your home is your most significant asset, and it deserves a partner who treats it with respect. We recommend a final checklist for every Louisville homeowner: Verify active general liability and workers' compensation insurance. Confirm the contractor has a physical, local address in the Louisville area. Check for recent Home Improvement Testimonials from your specific neighborhood. Ensure the contract includes specific brand names for all materials used. We take pride in our deep local roots, serving homeowners in Glenview , Indian Hills , and Jeffersontown . When you choose a contractor with a proven local track record, you're choosing accountability. You don't have to worry about a "storm chaser" disappearing once the check clears. Next Steps for Your Louisville Home Scheduling a professional consultation is the first step toward a successful 2026 project. We provide a detailed assessment that explains the "why" behind every recommendation. If you're ready to move forward with confidence, we're here to provide the expert guidance you need. Don't settle for a contractor who views your home as just another job site. Choose a partner who invests in your property's future as much as you do. Contact Home Run Improvement for a Free Estimate Build Your Louisville Home’s Future with Confidence Your home is more than a structure; it's the primary foundation of your family's security. As we've explored, the 2026 Louisville market favors homeowners who invest in durability over the temporary savings of a low bid. If you prioritize high-performance systems like LP SmartSide or Owens Corning roofing, you're protecting your equity from the volatile Ohio Valley climate. When you evaluate the gutter replacement cost Louisville KY contractors are quoting, remember that professional installation is your primary defense against foundation failure. A cheap fix today often leads to a catastrophic expense tomorrow. Successful renovations rely on technical precision and local accountability. Choosing an LP SmartSide Master Lead and an Owens Corning Preferred Contractor ensures your project meets the highest industry standards. According to the National Association of Home Builders , quality improvements remain the most reliable way to increase property value in competitive markets. Our 10-Year Craftsmanship Warranty provides the peace of mind you deserve, shielding you from the risks of poor workmanship and ensuring your investment stands the test of time. Get Your Free Renovation Estimate Today You don't have to navigate these complex home investments alone. We're here to ensure your property remains a safe, beautiful, and valuable asset for years to come. Frequently Asked Questions What is the average home renovation cost per square foot in Louisville KY? Renovation costs in the Ohio Valley vary significantly based on whether the work is structural or cosmetic. While national averages exist, local labor rates in Jefferson County often reflect the specialized skills needed for historic home preservation. You should account for the fact that high-end interior projects generally carry a higher cost per square foot than exterior maintenance. For current market trends, you can consult the latest real estate market reports for the Louisville area. Does a new roof increase home value in the Louisville market? A new roof is one of the most reliable ways to boost property value and buyer confidence. If you install an Owens Corning system, you're providing a prospective buyer with a transferable warranty and proven wind resistance. In a competitive market like Indian Hills, a certified roof installation can be the difference between a quick sale and a failed inspection. It also lowers long term maintenance costs by preventing water intrusion and structural rot. How much does it cost to replace gutters in Louisville? Your total gutter replacement cost Louisville KY will depend on the linear footage of your roofline and the complexity of your home's architecture. Seamless aluminum systems are the standard for local protection because they minimize leak points. If you add Shurflo gutter guards, your upfront investment increases, but you'll save significantly on professional cleaning fees and foundation repairs over the next decade. Every project requires a custom assessment to ensure proper drainage and downspout placement. Is LP SmartSide siding worth the investment over vinyl? LP SmartSide offers superior impact resistance compared to traditional vinyl, making it a better choice for Kentucky's storm seasons. If you want a product that resists hail damage and retains its aesthetic appeal for decades, engineered wood is the professional recommendation. When you hire an LP SmartSide Master Lead, you're ensuring the installation follows strict manufacturer protocols. This maximizes the product's lifespan and protects your manufacturer warranty against claims of improper handling. What permits are required for a basement finishing project in Jefferson County? Most basement finishing projects in Jefferson County require multiple permits to ensure code compliance. You will typically need a building permit for structural changes, along with separate permits for electrical and plumbing upgrades. If you're converting a space into a bedroom, you must also meet specific egress requirements for safety. You can find detailed application guides on the Louisville Metro Construction Review website to begin your planning process. How do I know if a contractor is truly an Owens Corning Preferred partner? You can verify a contractor's status by visiting the official Owens Corning contractor locator tool. Truly preferred partners undergo rigorous screening for financial stability, professional licensing, and a history of quality work. If a contractor holds this status, they can offer extended warranties that include SureNail technology performance. This certification acts as a protective shield for the homeowner, guaranteeing that the roofing system is installed to precise manufacturer specifications. What is included in a 10-year craftsmanship warranty? Our 10-year craftsmanship warranty covers any issues resulting from the physical installation of your roofing, siding, or gutters. While many contractors only offer a standard 1-year guarantee, our extended coverage ensures we remain accountable for the long term performance of your home. If a leak or structural failure occurs due to workmanship within ten years, we take full responsibility for the correction. This commitment provides the security and peace of mind every Louisville homeowner deserves. Can I finance my home renovation in Louisville? Home Run Improvement does not provide in-house financing for our renovation projects. We recommend that homeowners explore external options such as Home Equity Lines of Credit (HELOC) or traditional home improvement loans through local financial institutions. Many homeowners in Crestwood and Jeffersontown find that comparing personal loan rates allows them to secure the best terms for their specific budget. Securing funding before the project begins ensures a smooth and uninterrupted timeline.
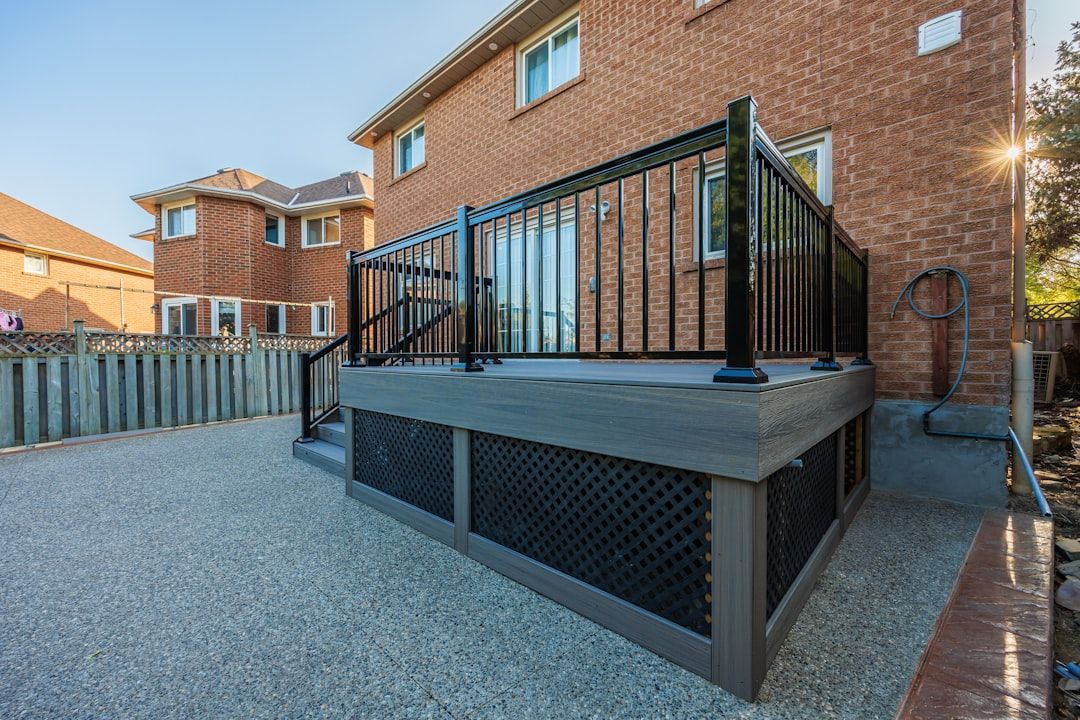
A deck is one of the smartest investments a Louisville homeowner can make, and one of the easiest to get wrong. Pick the right contractor and you end up with a structurally sound outdoor space that adds real resale value and years of daily enjoyment. Pick the wrong one and you could be dealing with sagging boards, permit violations, or a builder who disappears the moment the check clears. This guide cuts through the noise so you know exactly what to look for, what questions to ask, and what a fair deck cost in Louisville KY actually looks like in 2026. According to the 2025 Cost vs. Value Report , a wood deck addition recoups approximately 60.1% of its cost, while a composite deck addition returns approximately 83.8% through added home value. That means the deck you build today is working for you long after the last board is fastened. The question is making sure the right crew is doing the fastening. Key Takeaways Verify insurance and bonding before anything else: Working with a licensed contractor gives you opportunities for legal recourse if their work is unsatisfactory, and you should ask for a surety bond and get a copy before signing any contracts. In Kentucky, the state does not require a general builder's license, so this step is entirely on you. Deck cost in Louisville KY ranges widely by material: A deck in Louisville KY costs $25-$40 per square foot for pressure-treated pine, $35-$55 per square foot for cedar, and $45-$75 per square foot for Trex composite, installed, with a typical 12x16 deck running $4,800-$14,400 depending on material. Use these ranges as a benchmark when reviewing bids. Most decks in Louisville require a permit: Any deck attached to the house, or a freestanding deck over 200 square feet, requires a permit and site plan in Louisville. Any contractor who tells you otherwise is a red flag. Composite delivers superior long-term value in Kentucky's climate: Composite decking resists moisture and is less prone to rot, while wood can absorb water and may decay if not properly sealed and maintained, particularly in wet or humid climates. Louisville averages 46 inches of rain annually, making this distinction critical. Get at least three itemized bids: Some contractors make their bids appear lower by leaving out crucial parts of the process such as job site clean-up, landscaping, grading, or caulking, and they might use lower quality materials, trim detail, and railing. Make sure you're comparing apples to apples before going for a lower bid. Quick-Start Prioritization Framework Start here if you're: New to the process: Confirm your permit requirements first using the Louisville Metro Construction Review guide , then collect at least three bids. Focused on value and low maintenance: Prioritize composite deck builders who carry manufacturer certifications for brands like TimberTech or Trex. Working with a tight timeline: Book contractors in fall or winter. The fall and winter months are best for building or replacing a deck, as deck contractors are busiest in the spring and summer months, so fitting into your ideal builder's schedule during these seasons may not be possible. Understanding Deck Cost in Louisville KY What Does a Deck Cost in 2026? The most common question Louisville homeowners ask is: what does a deck cost? The honest answer is that the number depends on four variables: material choice, deck size, design complexity, and who you hire. The cost to build a wooden deck in Louisville, KY typically ranges from $1,737 to $3,475, including both materials and professional labor, for smaller projects. However, these figures represent entry-level builds. For a mid-sized attached deck, the numbers climb considerably. A deck in Louisville KY costs $25-$40 per square foot for pressure-treated pine, $35-$55 per square foot for cedar, and $45-$75 per square foot for Trex composite, installed. If your quotes are falling well below these floors, ask the contractor specifically what is and isn't included. Pro Tip: Ask every contractor to provide a line-item written estimate that separates labor, materials, permit fees, and cleanup. Vague lump-sum bids are the most common source of "surprise" charges once work begins. Hidden Cost Factors to Watch For Factors affecting the final price include project scope, material quality, local Louisville labor rates, site accessibility, and any necessary permits or inspections required by local building codes, and additional expenses may include site preparation, debris removal, and any structural modifications needed. If your yard is sloped, access is limited, or the existing structure needs to be demolished first, build these costs into your planning from day one. For specialty builds, the price premium is significant. Pool decks in Louisville average $11,150-$11,923, varying from $10,763 to $12,309 based on project specifics. That's a meaningful jump from a standard attached deck, so be sure you're getting quotes from contractors who specialize in the build type you actually need. How to Vet Deck Builders in Louisville KY Check Licensing, Insurance, and Bonding This is the non-negotiable starting point. One notable aspect of Kentucky's system is that the state does not require general contractors or home builders to hold a state license, meaning the person building your deck does not need a state-issued builder's license. That makes your due diligence even more important. Instead of relying on state licensing as a filter, you need to go deeper. The most crucial question you can ask is whether your deck builder is insured. Make sure you hire a contractor who carries general liability insurance for the sake of everyone involved, and get insurance proof from your contractor to confirm it covers everyone who will be working in your backyard. Workers' compensation coverage matters too, if someone is injured on your property without it, you could be liable. Evaluate Experience and Portfolio Understanding a local deck contractor's level of experience and expertise in deck building is essential, ask for references and check their portfolio to see a range of completed projects. In my experience, a contractor who hesitates to share past project photos or skips over local references is one worth passing on. Any builder worth hiring in Louisville will have completed projects in neighborhoods like St. Matthews, Anchorage, Jeffersontown, or the South End that you can actually go see. These are all standard questions that any legitimate company will be happy to answer. If you find yourself talking to a company that is hesitant to answer any of these, it may be a red flag that they have something to hide. Trust that instinct. Ask About Crew Structure and Subcontractors This one catches homeowners off guard. Many deck builders use subcontractors for framing, electrical, or concrete work, so ask who is physically on your property each day and get the answer in writing. Employee-based companies offer capacity, backup crews, and structured warranty support, while owner-operated builders offer direct access to the decision maker on site. Neither model is inherently better, but you need to know which you're hiring so your expectations match reality. Pro Tip: Ask specifically: "Will you or a crew member you directly manage be on-site every day?" If the answer is vague, follow up with "Who do I call if I have a concern mid-project?" A builder who can't answer both questions clearly isn't ready for your project. Louisville Permits and Local Building Requirements What Triggers a Permit in Louisville? If you're building or modifying a deck, the Louisville Metro Construction Review guide outlines the design standards, permit requirements, and inspection steps needed to ensure your project meets Louisville Metro's building codes. The basic rule is straightforward: there is a very limited deck exemption for residential decks under 200 square feet, not attached, less than 30 inches above grade, and not serving a required exit door. Everything else needs a permit. For the overwhelming majority of decks Louisville homeowners actually want to build, that means going through the permitting process. From a zoning perspective, decks must not encroach into any required property setbacks, and for more information homeowners should consult the Land Development Code available through Louisville Planning and Design Services. Why Your Contractor Should Handle Permitting I've found that the contractor who confidently says "we handle permits" is almost always more experienced than one who puts that task on the homeowner. Confirm they handle permitting before signing anything, and verify it's included in the bid. If a contractor suggests skipping the permit to save time or money, walk away. An unpermitted deck can create serious headaches when you sell, or worse, require demolition. In addition to meeting the Kentucky Building Code, projects in Louisville Metro may be subject to other local regulations. If your property is in a Preservation District or Overlay Zone, you'll need approval for any exterior changes before you can get a building permit. This applies to parts of the Highlands, Cherokee Triangle, and other historic Louisville neighborhoods. Wood vs. Composite: Choosing the Right Deck Material The True Cost Comparison The upfront sticker price for wood looks better. The 10-year total cost often tells a different story. Wood deck owners spend between $450 to $850 annually on maintenance, primarily on staining, sealing, and repairs, while composite deck maintenance costs only $5 to $15 per year, consisting mainly of occasional cleaning. Over a decade, that gap adds up to thousands of dollars, money you should factor into your material decision, not just the initial bid. The 25-year total cost of a wood deck is often higher once you add staining ($550-$1,250 every 2 years), sealing, board replacements, and the time invested. In Louisville's climate specifically, this matters. Louisville averages 46 inches of rain annually, snow accumulation through winter, real freeze-thaw cycling from November through March, and summer humidity exceeding 75%. Those conditions accelerate wood deterioration faster than in drier climates. Wood Pros: Lower upfront cost Natural grain appearance Easier to cut, modify, and repair individual boards Familiar to most contractors Wood Cons: Requires staining and sealing every 1-3 years Susceptible to moisture, rot, and insect damage in Louisville's humid climate Shorter overall lifespan than composite Annual maintenance costs of $450-$850 Composite Pros: Minimal ongoing maintenance Resists moisture, rot, and insects Long warranties (25-50 years on many brands) Higher resale ROI in many markets Composite Cons: Higher upfront cost per square foot Can retain more heat in full sun Harder to match colors for repairs Fewer DIY-friendly options What Deck Builders in Louisville KY Recommend In my experience speaking with Louisville contractors, the majority of experienced builders lean toward composite for attached decks in the Louisville metro, particularly products like TimberTech and Trex, because the warranty coverage is transferable and the material simply holds up better through Kentucky's freeze-thaw cycle. Home Run Improvement is one Louisville-area contractor that specializes in TimberTech composite builds, offering a 10-year workmanship warranty alongside the manufacturer's coverage. Pro Tip: When a contractor names specific composite brands rather than just saying "composite," that's a positive signal. Before choosing a deck contractor you should know the specific type of decking and railing they will use, and you should pass on any contractors who only use vague terms like "composite" or "vinyl" instead of naming specific brands, because not all composite and vinyl decking are created equal, and you want to hire a contractor who knows what brands are industry leaders and won't skimp on durability to save money. Red Flags to Watch for When Hiring Deck Builders Structural Details That Separate Good Builders from Risky Ones Most homeowners focus on surface aesthetics, the decking boards, railing style, and stair design. Experienced deck builders focus on what's underneath. Every build should start with proper footing depth below Kentucky's frost line at 18-24 inches and a correctly attached ledger board, because these are the two structural details that separate a safe, lasting deck from one that shifts, sags, or pulls away from the house over time. Pressure-treated wood should be chosen for all framing, and any posts that come into contact with the ground should have an added level of protection. Ask your prospective contractor about their framing process directly. A builder who can explain footing depth, ledger attachment, and beam sizing without hesitation knows their trade. Pricing and Contract Red Flags Be cautious of any contractor who: Asks for a large upfront payment (more than 30-35% deposit before work begins) Cannot produce proof of general liability insurance on the spot Provides only a verbal estimate with no written scope of work Refuses to pull permits or suggests you don't need one for an attached deck Cannot name specific material brands they plan to use Getting price quotes from at least three companies is the best way to know what it takes to get a personal project completed, and having options allows people to pick a contractor that they know will do a great job. Considering that most deck jobs cost hundreds of dollars in supplies alone, it's best to choose a company that guarantees its work. This home inspector walkthrough shows exactly the kind of structural and code violations that result from hiring an unqualified deck builder. Frequently Asked Questions How much does a deck cost in Louisville KY? A deck in Louisville KY costs $25-$40 per square foot for pressure-treated pine, $35-$55 per square foot for cedar, and $45-$75 per square foot for Trex composite, installed, and a typical 12x16 deck runs $4,800-$14,400 depending on material. More complex designs with stairs, railings, built-in seating, or multi-level structures will push toward the higher end of that range. Do I need a permit for a deck in Louisville KY? Almost certainly yes, for any deck of meaningful size. Any deck attached to the house, or a freestanding deck over 200 square feet, requires a permit and site plan in Louisville. Your contractor should handle this as part of the project. For official guidance, consult the Louisville Metro Government's deck page directly. Is composite or wood better for Louisville's climate? Composite decking resists moisture and is less prone to rot, while wood can absorb water and may decay if not properly sealed and maintained, particularly in wet or humid climates. Given Louisville's high annual rainfall and freeze-thaw cycles, composite tends to outperform wood on longevity with far less maintenance, though wood remains a solid budget-friendly option if you're prepared for ongoing upkeep. What return on investment can I expect from a new deck? According to the 2025 Cost vs. Value Report , a wood deck addition recoups approximately 60.1% of its cost, while a composite deck addition returns approximately 83.8% through added home value. Beyond resale, you get daily use of the space in the meantime, so the lifestyle value compounds the financial return. What is the most important question to ask a deck contractor? Choosing a deck contractor is less about comparing bid totals and more about understanding who is accountable when something goes sideways. The single most revealing question is: "Who specifically will be on my property each day, and are they your direct employees or subcontractors?" How a contractor answers that tells you a great deal about their operation and your accountability if something goes wrong. The Bottom Line Choosing among deck builders in Louisville KY comes down to three things: verifying that the contractor is properly insured and bonded, confirming they handle permits without passing that task to you, and getting at least three line-item bids that spell out exactly what's included. The best deck builders in Louisville work transparently, name specific materials, and have a portfolio of local projects you can actually visit. If you're ready to start comparing options, Home Run Improvement offers free estimates and specializes in custom composite and wood deck builds across Louisville neighborhoods, from St. Matthews to Jeffersontown and the South End. Sources 2025 Cost vs. Value Report, Deck Addition , Remodeling Magazine. Wood and composite deck ROI benchmarks. https://blog.callcustombuilt.com/what-roi-deck-build Guide to Deck Project , Louisville Metro Government / Office of Construction Review. Permit requirements and design standards. Louisville Metro Construction Review guide Louisville Decks Page , LouisvilleKY.gov. Local building code and zoning rules for decks. Louisville Metro Government's deck page Site Plan Requirements in Louisville KY , SitePlanCreator.com. Permit thresholds for decks and accessory structures. https://www.siteplancreator.com/site-plans/louisville-ky Kentucky Building Permit Guide (2026) , PermitsGuide.com. Statewide deck permit thresholds and licensing rules. https://permitsguide.com/kentucky Questions to Ask Your Deck Contractor , Decks.com. Vetting checklist for licensing, bonding, and insurance. https://www.decks.com/resource-index/decking/questions-to-ask-your-deck-contractor/ How to Choose a Deck Contractor , AnotherAmazingDeck.com. Crew structure analysis and contractor vetting process. https://anotheramazingdeck.com/how-to-choose-a-deck-contractor/ Questions to Ask Your Potential Deck Contractor , Decks R Us. Material specification guidance and scheduling advice. https://www.decksrusllc.com/blog/questions-to-ask-your-potential-deck-contractor/ 10 Questions to Ask Before Hiring a Deck Contractor , DesignBuildersMD.com. Bid comparison and scope of work best practices. https://www.designbuildersmd.com/blog/questions-for-decking-contractors Composite vs Wood Deck Cost , MyModernRenovations.com. Annual maintenance cost comparison over 10 years. https://www.mymodernrenovations.com/company/blog/composite-vs-wood-deck-cost Composite vs Wood Decking (2026) , CompositeDeckDirect.com. 25-year total cost-of-ownership analysis. https://compositedeckdirect.com/blogs/composite/composite-vs-wood-decking Comparing Composite vs Wood Decking , Lowes.com. Climate and maintenance considerations by material. Composite decking resists moisture Deck Builders Louisville KY , Home Run Improvement. Local deck builder specializing in TimberTech composite with 10-year warranty. https://www.homerunimprovement.com/services/decking-louisville Cost to Build a Wooden Deck in Louisville KY , Contractor+. Entry-level wood deck cost ranges with labor included. https://contractorplus.app/resources/construction-costs/build-a-wooden-deck/louisville-ky Important Questions to Ask Your Deck Builder , Decksouth.com. Insurance verification and process transparency guidance. https://decksouth.com/5-important-questions-to-ask-your-deck-builder/

A stunning master suite is a liability if the structural integrity doesn't match the surface aesthetics. If you're planning a bathroom remodeling louisville project for 2026, you're likely caught between the desire for a modern spa and the fear of hidden moisture damage. You want the luxury found in neighborhoods like Anchorage or Prospect, but you worry about whether a "fast" timeline will lead to mold behind your new tile. It's a valid concern because a beautiful room that fails within five years is a failure of craftsmanship. When you choose quality over shortcuts, your investment becomes a lasting asset rather than a temporary fix. This guide reveals the latest 2026 design trends forecasted by the National Kitchen & Bath Association alongside the critical structural insights you need for long-term durability. We'll explore how to marry high-end finishes with industrial-grade moisture protection. You'll learn how to secure a retreat that functions perfectly for years, providing you with the peace of mind that only comes from a 10-year craftsmanship warranty and a commitment to local excellence. Key Takeaways Stay ahead of the curve by integrating 2026 biophilic and smart technology trends into your bathroom remodeling louisville project for a spa-like retreat that aligns with NKBA forecasts. Prioritize industrial-grade moisture protection behind your tile to prevent the hidden mold and rot that often plagues older homes, following EPA moisture control best practices. Select a style that fits your neighborhood's character, whether it's the Modern Farmhouse warmth popular in Crestwood or the sleek Urban Industrial look seen in modern loft designs . Protect your investment with a 10-year craftsmanship warranty from a locally owned contractor who understands the structural demands of the Kentucky climate. Learn why a holistic approach to the home envelope, including your roof and gutters, is essential for maintaining the integrity of a pristine interior remodel. 2026 Bathroom Trends for Louisville Homes The landscape for bathroom remodeling louisville is shifting toward intentional, high-performance design. Homeowners are moving away from generic, catalog looks in favor of spaces that reflect the natural beauty of the Bluegrass region. Biophilic design is at the forefront of this movement. We're seeing a surge in natural Kentucky textures, specifically stone and wood-look porcelain, which brings the warmth of the outdoors inside without the rot risks associated with real wood in high-moisture environments. This aesthetic often culminates in the "wet room" concept. By combining the shower and tub into a single, open-concept waterproof zone, you create a seamless flow that is both visually striking and highly accessible. While aesthetics set the mood, the 2026 bathroom is also a hub of precision technology. Voice-controlled showers allow you to set the perfect temperature before you even step inside, while high-efficiency heated floors have become a non-negotiable comfort for those biting Louisville winters. This isn't just about gadgetry; it's a sophisticated process of improving your daily routine through engineering. To complete the transformation, sculptural statement lighting is replacing standard recessed cans. These fixtures act as functional art, defining the room's personality and providing the layered illumination necessary for a true spa-like retreat. The Rise of "Resilient Luxury" The NKBA 2026 Trend Report highlights a critical pivot toward "Resilient Luxury." This trend prioritizes materials that offer the high-end appearance of marble or limestone but possess the industrial-grade durability of modern porcelain or quartz. In the historic estates of Anchorage, this means maintaining a classic, timeless look that won't succumb to moisture damage. For the contemporary builds found in Prospect , it allows for bold, expansive surfaces that stay pristine with minimal upkeep. If you invest in high-performance materials today, you're protecting your home from the costly repairs that always follow poor material selection. Sustainable & Water-Efficient Fixtures Luxury and conservation are no longer at odds in a modern bathroom remodeling louisville project. Modern low-flow showerheads now utilize air-induction technology to maintain high pressure while significantly reducing water volume. For Louisville homeowners, this translates to lower utility bills without sacrificing the power of a morning shower. Sustainable luxury is the intersection of eco-consciousness and high-end comfort. It ensures your remodel is as responsible as it is refined, providing long-term value for both your wallet and the environment. Beyond the Surface: The Importance of Moisture-Proof Durability A frequent mistake in bathroom remodeling louisville is prioritizing the "look" while ignoring the "life" of the room. Pretty tile is a superficial victory if the waterproofing system beneath it fails within three years. In Louisville's humid climate, moisture is an aggressive enemy. If your contractor uses outdated felt paper or moisture-resistant drywall alone, they're inviting mold growth. We advocate for high-performance bonded membranes that create a truly impenetrable seal. This "Protective Expert" approach ensures that water stays exactly where it belongs: in the drain, not in your floorboards. Identifying hidden rot is a critical first step, especially in older Louisville properties. Many homes have sustained slow, undetectable leaks for decades. Simply covering up damaged wood with new tile is a recipe for structural failure. Finding a trustworthy contractor involves choosing someone who isn't afraid to tell you when a subfloor needs replacement. Proper ventilation is also a requirement, not an upgrade. High-CFM fans are necessary to evacuate the thick Kentucky humidity that lingers after a shower, preventing the surface mold that ruins grout lines and paint. Structural Integrity Behind the Walls Modern 2026 trends often include heavy cast iron or stone soaking tubs. These fixtures can weigh hundreds of pounds even before they're filled with water. If your joists aren't reinforced to handle this load, you'll see cracked tiles and shifting walls within months. We treat the interior bathroom envelope with the same technical rigor we apply to a roof or siding installation. This structural focus is why we offer a 10-year craftsmanship warranty . It's a security blanket that guarantees your investment is built on a solid foundation. Plumbing Precision and Leak Prevention Plumbing is the nervous system of your bathroom remodeling louisville project. Poor pipe installation or low-quality fittings lead to catastrophic water damage that often stays hidden until it's too late. While a DIY project or a generic handyman might save money upfront, the lack of precision usually costs more in the long run. Professional plumbing requires specialized knowledge of local codes and pressure requirements. When you choose a locally owned expert, you're buying peace of mind. If you're ready to discuss the technical details of your project, you can schedule a structural assessment with our team today. Popular Styles in the Bluegrass Region Louisville's architectural diversity requires a nuanced approach to interior design. A successful bathroom remodeling louisville project doesn't just follow national fads; it respects the specific character of your neighborhood. In areas like Crestwood and Mt. Washington, the Modern Farmhouse remains a dominant choice. This style prioritizes warmth and utility, often featuring apron-front sinks and durable porcelain tiles that withstand the rigors of family life. Conversely, the downtown lofts of Louisville demand an Urban Industrial aesthetic. Here, we utilize matte black fixtures and preserve exposed brick to create a sophisticated, raw atmosphere that mirrors the city's urban revitalization. For the stately homes in Glenview and Indian Hills, the goal is often Classic Kentucky Elegance. This involves timeless materials like polished stone and traditional cabinetry that won't look dated in a decade. We're also seeing a rise in Minimalist Spa designs in Hurstbourne. These projects focus on clean lines, hidden storage, and clutter-free surfaces to provide a mental reset at the end of the day. By choosing a style that aligns with your property's architecture, you ensure that your remodel adds the maximum possible equity to your home while maintaining a cohesive look. Tailoring Trends to Your Neighborhood Every zip code in Jefferson County has unique demands. In Anchorage, homeowners are increasingly blending historic charm with modern smart-bath technology. This allows for a vintage aesthetic that hides high-efficiency performance behind the walls. In Prospect and Glenview, the demand is centered on expansive luxury master suites that function as private retreats. If you're planning a project in these areas, your design must reflect the high standard of the surrounding community. For those in Crestwood KY , the focus remains on durable, high-traffic solutions that serve growing families without sacrificing style. Maximizing Small Spaces in Historic Homes Historic neighborhoods like the Highlands or St. Matthews often present the challenge of compact floor plans. You don't need a massive footprint to achieve a high-end result. We use creative storage solutions, such as recessed niches and floating vanities, to reclaim every inch of usable space. Strategically placed mirrors and layered lighting can also expand the feel of a compact Louisville bathroom, making it feel airy rather than cramped. If your current layout is simply too small for your needs, a bathroom addition Louisville Kentucky homeowners can rely on is a proven way to increase property value while solving functional constraints. Planning Your Remodel: Avoiding Common Contractor Pitfalls Choosing a partner for your bathroom remodeling louisville project is a high-stakes decision that requires more than a cursory glance at a quote. Many homeowners fall into the trap of hiring the first available person without verifying their local stability. A "Louisville-first" contractor has a reputation to uphold in neighborhoods like yours; they won't disappear mid-project because their business depends on local referrals. You must verify that your chosen professional has deep roots in the community and a physical presence you can rely on. Beyond local roots, you must check for specialized credentials. We maintain Owens Corning Preferred Contractor status and are an LP SmartSide Master Lead. These designations aren't just marketing badges. They indicate that a manufacturer has vetted our methods and trusts us to install their high-performance materials correctly. Before signing any contract, demand to see a portfolio of real "before and after" examples from local homes. Finally, ensure you are comparing "all-in" quotes rather than "estimate-only" pricing. An estimate is often a low-ball guess that balloons once the walls are opened, whereas a professional quote provides the financial predictability you deserve. The Danger of the "Lowest Bid" If you choose the cheapest labor, then you will likely pay more for repairs in three years. It's a simple, painful logic that we see play out across Jefferson County far too often. Low bids frequently hide shortcuts in waterproofing systems or the use of sub-par plumbing fixtures that aren't built for longevity. The Federal Trade Commission (FTC) on Hiring Contractors specifically warns that the lowest price can lead to the highest total cost if the work requires a complete redo. Quality labor and premium materials have a fixed cost; anyone significantly undercutting the market is likely sacrificing your home's structural integrity. Why a 10-Year Warranty is Non-Negotiable A standard one-year warranty is insufficient for a major investment. Most structural moisture issues don't even surface until the second or third year after a project is finished. When you invest in bathroom remodeling Louisville KY , you need a guarantee that matches the expected lifespan of the room. Our 10-year craftsmanship warranty is the industry gold standard because it protects your investment over the long term. It shifts the accountability from your shoulders to ours, ensuring that we get the "interior envelope" right the first time. Request your professional structural assessment and quote Why Professional Integration Matters: The Home Run Improvement Difference A high-end bathroom remodeling louisville project is only as secure as the structure surrounding it. Many specialized remodelers focus strictly on the finishes within the four walls of the bathroom. They ignore the external factors that often lead to catastrophic interior failure. At Home Run Improvement, we take a holistic approach. We recognize that a beautiful new shower is worthless if a structural leak from above or poor drainage from below compromises the space. Our team manages every aspect of the project, from the initial structural reinforcement to the final plumbing and electrical hookups. This seamless coordination eliminates the typical delays and miscommunications that occur when multiple uncoordinated subcontractors are involved. We live and work in this community. Our reputation is our most valuable asset, and we treat every client’s property with the same level of care we would our own. When you choose a partner with local accountability, you're gaining a professional who is invested in the long-term stability of your home. We don't just build bathrooms; we protect the integrity of your entire living environment. Our process is methodical and highly organized, mirroring the structured nature of a construction project to ensure nothing is left to chance. From Roof to Remodel: Protecting Your Investment Your interior finishes are only safe if your home’s exterior remains watertight. As a premier roofing contractor Louisville KY , we understand how a failing roof or clogged gutters can allow moisture to migrate into your walls. If you invest in high-end tile but ignore your failing gutter guards , then you are gambling with your investment. We apply a "home envelope" mindset to every interior project, ensuring that your new spa-like retreat is shielded from the elements. You can see the results of this integrated approach by browsing the our work gallery, where we showcase projects that prioritize both style and structural resilience. For more on the technical standards of home protection, the National Roofing Contractors Association provides extensive data on how exterior integrity preserves interior assets. Your Next Step: The Free Estimate Planning a 2026 bathroom remodeling louisville transformation shouldn't be a source of anxiety. Our consultation process is designed to provide professional guidance rather than a high-pressure sales pitch. We take the time to explain the "why" behind our methods, from moisture barrier selection to structural joist reinforcement. This educational approach ensures that you feel informed and confident before any work begins. If you're ready to move from the planning phase to reality, we are here to act as your knowledgeable guide and protective expert. We take personal responsibility for every detail, treating your property with the same level of care as our own. Schedule your free bathroom remodeling estimate today! Secure Your Vision with Louisville Craftsmanship A successful renovation is measured by how well it performs five, ten, or twenty years after the final tile is laid. If you choose to invest in high-performance waterproofing and professional integration, you're securing your property value in a competitive market. We've detailed how 2026 trends like biophilic textures and smart fixtures are reshaping bathroom remodeling louisville , but the true value lies in the invisible details. Following EPA moisture control standards is non-negotiable for a healthy home. Home Run Improvement is locally owned and operated; we're here to stand by our work long after the project is complete. Our status as an Owens Corning Preferred Contractor and our 10-year craftsmanship warranty act as your security blanket. Don't settle for a "fast" fix that leads to future rot. It's time to choose the precision and accountability that your Louisville home deserves. Ready for a Resilient Luxury Bathroom? Get Your Free Estimate from Home Run Improvement! Frequently Asked Questions How much does a bathroom remodel cost in Louisville, KY? Project costs vary significantly based on the square footage and the quality of finishes you select. While national data like the Remodeling Magazine Cost vs. Value Report provide a baseline, Louisville's market reflects local labor rates and material availability. If you choose high-end stone and smart technology, your investment will be higher than a standard cosmetic refresh. We provide project-based pricing after a structural assessment to ensure your quote is accurate and "all-in" rather than a vague estimate. How long does a typical bathroom renovation take in 2026? A standard bathroom remodeling louisville project typically spans three to six weeks depending on the complexity of structural changes. If you're moving plumbing lines or installing high-tech wet rooms, the timeline reflects the precision required for those tasks. We coordinate electrical, plumbing, and tiling seamlessly to avoid the delays common with unorganized contractors. Our methodical approach ensures that we respect your home while maintaining the rigorous standards necessary for long-term durability and moisture protection. Do I need a permit for a bathroom remodel in Louisville? Yes, most comprehensive renovations require permits from the Louisville Department of Codes and Regulations. If your project involves moving walls, updating electrical circuits, or modifying plumbing stacks, a permit ensures the work meets safety standards. We handle the permitting process for our clients to guarantee that every aspect of the remodel is code-compliant. This protection is essential for your safety and for maintaining your home's resale value in neighborhoods like Prospect or Anchorage. Can a bathroom remodel increase my home value in Kentucky? Modernizing a bathroom is one of the most effective ways to increase property equity in the Bluegrass region. High-quality master suites are a major selling point in competitive areas like Glenview and Indian Hills. If you prioritize "Resilient Luxury" with industrial-grade moisture protection, then you're offering future buyers peace of mind alongside aesthetic beauty. According to National Association of Realtors data, updated bathrooms consistently provide a strong return on investment during professional home appraisals. What is the best way to prevent mold in a newly remodeled bathroom? Effective mold prevention starts with the "interior envelope" behind your tiles. We utilize high-performance bonded membranes rather than outdated moisture-resistant drywall to create an impenetrable seal. Additionally, you must install a high-CFM ventilation fan to evacuate the thick Kentucky humidity that lingers after use. If you combine professional-grade waterproofing with proper airflow, you eliminate the environment where mold thrives. This protects your health and your home's structural integrity for years, preventing the rot that ruins lesser remodels. Why should I choose a local Louisville contractor over a national chain? Choosing a local expert ensures that your contractor understands the specific architectural challenges of Louisville homes, from historic Highlands bungalows to modern Prospect builds. National chains often rely on rotating subcontractors who lack a personal investment in the community. As a locally owned and operated business, our reputation is our most valuable asset. We live where you live; this means we provide a level of accountability and neighborly reassurance that a faceless corporation simply cannot match. What does a 10-year craftsmanship warranty actually cover? Our 10-year craftsmanship warranty acts as a security blanket for your investment, covering the integrity of our installation work. If an issue arises due to the way a moisture barrier was sealed or a tile was set, we take personal responsibility for the correction. This contrast to the industry-standard one-year warranty highlights our confidence in our methods. It ensures that your bathroom remodeling louisville project is built to last, providing security against the hidden failures that often plague cheaper labor. Is it worth adding a bathroom to my Louisville home in 2026? Adding a bathroom is a strategic move that significantly improves daily functionality and increases marketability. In historic areas where homes often have limited facilities, a new bathroom addition can transform a property's value. If you have an underutilized basement or a large master closet, we can convert that space into a modern retreat. This project provides a high level of utility for your family while ensuring your home remains competitive in the evolving Louisville real estate landscape for years to come.
LEARN MORE ABOUT ROOFING & REMODELING IN LOUISVILLE
HOME UPDATES. LEARN ABOUT THE LATEST HOME IMPROVEMENT OPTIONS
As a family owned and operated business we have a genuine care and concern for our customers. Our blog features the best tips, tricks, deals, and ideas for planning your dream home. Our goal is to help you achieve this dream by helping you every step of the way from planning to completion. Check out our articles for home improvement ideas or contact us today to start your new project!
If you believe the greatest threat to your property is a passing thunderstorm, you're overlooking the silent damage accumulating just above your head. In a city that sees nearly 50 inches of annual rainfall according to NOAA climate data , a clogged gutter isn't just a nuisance; it's a direct invitation for foundation erosion and basement flooding. You shouldn't have to risk a life-altering fall from a ladder just to clear out the endless debris from local Oak and Maple trees. We understand the anxiety that comes when the clouds darken over Jefferson County, especially when you know your downspouts are struggling to keep up. By choosing professional gutter guard installation Louisville KY, you're not just buying a product; you're investing in a permanent structural defense. This guide will demonstrate how the Shurflo system protects your home from water damage without compromising your roofing warranty. When you prioritize precision engineering over DIY fixes, you ensure your home remains dry and your weekends remain yours. We'll examine the technical advantages of micro-mesh technology and why professional calibration is the only way to achieve true peace of mind during a heavy Kentucky downpour. Key Takeaways Identify the specific Louisville climate risks, including the high precipitation rates documented by the National Weather Service , that threaten your home's foundation. Explore the technical advantages of Shurflo micro-mesh technology and how it uses natural airflow to keep your system maintenance-free without the need for ladder climbing. Discover why professional gutter guard installation Louisville KY is essential for preventing wood rot and basement moisture issues caused by clogged downspouts. Understand the importance of choosing an Owens Corning Preferred Contractor to ensure your gutter system integration doesn't void your roof's warranty. Learn how a 10-year craftsmanship warranty from a local expert provides the ultimate security for your home's exterior and long-term stability. Why Louisville Homes Require Specialized Gutter Protection Louisville's weather isn't just unpredictable; it's aggressive. If your gutter system fails during a typical Kentucky spring, the consequences start at your roofline and end at your foundation. Most homeowners view gutters as a simple drainage tool, but they're actually your home's primary defense against structural decay and long-term instability. When water isn't managed correctly, it doesn't just disappear; it finds the path of least resistance into your home's framework. According to local climate data , Louisville averages nearly 50 inches of rain per year. This volume is often delivered in high-intensity bursts that quickly overwhelm generic screen guards. When water overflows because of a clog, it saturates the fascia board and roof rafters. This constant moisture increases the risk of wood rot, which can compromise the integrity of your entire roofing system before you even notice a leak inside. It's not just the water that causes issues; it's the specific biological load of the Ohio Valley. Local foliage presents a unique challenge that standard hardware store filters can't handle. Oak tassels and Maple "helicopters" are notorious for bypassing wide-mesh screens. Once inside, they decay into a thick sludge that creates blockages nearly impossible to clear without professional intervention. To maintain a functional home, you need a system designed for the Science of Clog-Free Performance . The Environmental Impact of the Ohio Valley In heavily wooded neighborhoods like Anchorage and Glenview, pine needles pose a distinct threat. These thin, sharp needles pierce through most guards, creating a "bird's nest" effect that traps other debris. If your gutter guard installation Louisville KY doesn't account for these micro-debris types, you'll still find yourself on a ladder twice a year. High-intensity rainstorms in our region require a guard that can handle rapid water intake while simultaneously shedding these stubborn needles. We've seen hundreds of homes where "guaranteed" systems failed because they weren't engineered for our local tree density. Foundation Risks Specific to Louisville Soil Kentucky soil is rich in expansive clay, which behaves like a sponge. When this clay absorbs excessive water from overflowing gutters, it swells and puts immense pressure on your basement walls. If you don't move water at least 10 feet away from your home, you're inviting foundation cracks and chronic basement moisture. Professional gutter guard installation Louisville KY ensures that water is captured and diverted properly every single time. Ignoring these signs often leads to the hidden dangers of incorrect gutter installation , which eventually results in five-figure foundation repair bills. A proactive approach to gutter protection is the only way to safeguard your home's structural footprint. Shurflo Gutter Guards: The Science of Clog-Free Performance Shurflo is not a simple screen or a temporary retail insert. It's a professional-grade micro-mesh system engineered to filter out everything from heavy branch debris to the finest shingle grit. While big-box retailers sell plastic inserts that warp under the intense Kentucky sun, Shurflo utilizes a heavy-duty aluminum construction that maintains its shape for decades. If you choose a metal-based system, you avoid the common pitfalls of sagging and collapsing that plague cheaper alternatives. This durability is essential for any gutter guard installation Louisville KY , where our fluctuating temperatures can quickly degrade inferior materials. The true genius of the Shurflo system lies in its patented technology. It uses natural airflow to keep the surface clear. As wind moves across the low-profile guard, it creates a vortex that lifts and blows away dry leaves and debris. This self-cleaning mechanism ensures that the system remains functional without constant manual intervention. Because the guards sit flush with your gutters, they don't disturb your roof's aesthetic or create an unsightly "hump" at the roofline. They integrate seamlessly, providing a clean, finished look that enhances your home's curb appeal. Micro-Mesh vs. Perforated Aluminum Many systems use wide perforations that allow small seeds and shingle granules to pass through. Once these particles enter the gutter, they combine with moisture to form a sludge that promotes organic growth. Shurflo's surgical-grade micro-mesh is designed to block these microscopic contaminants. This level of filtration meets the rigorous standards often discussed in independent gutter protection testing. By preventing organic buildup, you eliminate the risk of internal gutter corrosion and the foul odors associated with stagnant debris. How Shurflo Handles Heavy Kentucky Downpours Louisville's maximum hourly rainfall rate can reach 5.5 inches, a volume that would cause most guards to "overshoot," sending water cascading over the edge. Shurflo solves this with a unique siphoning action. The mesh surface breaks the water's tension, pulling it into the gutter even on steep-slope roofs. Managing this runoff is a core part of Specialized Gutter Protection , as it prevents the soil saturation that threatens your foundation. Our Professional Gutter Guard Services ensure that every panel is calibrated to handle these high-velocity events. If you're tired of seeing water bypass your gutters during spring storms, request a technical consultation to see how Shurflo manages heavy volume. Professional Installation vs. DIY: Protecting Your Roof Warranty Many homeowners view gutter guards as a simple weekend project, but this assumption often leads to expensive long-term consequences. If you install a guard incorrectly, you risk more than just a leaky gutter; you risk voiding your entire roofing warranty. Most high-quality roofing systems, specifically those from Owens Corning, require strict adherence to installation standards that protect the integrity of the shingles. When an amateur tucks a guard under the first course of shingles, they can break the sealant bond or damage the starter strip, leaving your roof vulnerable to wind uplift and water infiltration. Structural integration is the difference between a system that works and one that fails. A professional gutter guard installation Louisville KY ensures that the guard is calibrated to your home's specific roof pitch and gutter size. If the guard isn't aligned perfectly with your gutter installation Louisville KY , water will simply overshoot the mesh during a heavy rain, defeating the purpose of the investment. We see this frequently with store-bought parts that aren't designed for the high-velocity runoff common on steep Kentucky roofs. Safety remains the most immediate concern. According to data from the Centers for Disease Control and Prevention, falls from ladders are a leading cause of emergency room visits for homeowners. Hiring a fully insured contractor eliminates this personal liability. You shouldn't have to risk your physical well-being for routine maintenance. When you choose a professional service, you aren't just buying a product; you're securing a result that is backed by professional accountability and proper insurance coverage. The Owens Corning Preferred Contractor Advantage As an Owens Corning Preferred Contractor, we understand the chemistry of your roof. We ensure that your Shurflo guards are installed without lifting or damaging the shingles. This expertise is critical for maintaining your manufacturer's coverage. If a non-certified installer damages your roof during a gutter project, the manufacturer won't cover the resulting leaks. You can learn more about how we protect your home's exterior through our specialized Roofing Services Louisville . Why a 10-Year Craftsmanship Warranty Matters A store-bought guard comes with a limited product warranty, but it offers zero protection if the installation itself fails. We provide a 10-year craftsmanship warranty on every project we complete. This promise creates a level of peace of mind that a DIY project simply can't match. If a panel shifts or a seal fails during a storm, we take responsibility for the fix. This long-term accountability is the hallmark of a local expert who cares about the community's structural health. The Installation Process: What to Expect from Home Run Improvement Professionalism in home exterior work is defined by a methodical, transparent process. If you're investing in gutter guard installation Louisville KY , you deserve a sequence of events that treats your home as a complete, integrated system. We don't simply snap panels into place and leave. Our approach is designed to eliminate the common industry pitfalls that lead to system failure and homeowner frustration. Every project begins with a comprehensive audit of your existing drainage to ensure the foundation is sound before any protection is applied. Step 1: Gutter System Optimization Putting guards on a failing gutter is a classic "Protective Expert" anti-pattern that we strictly avoid. Before the Shurflo panels are even unpacked, we perform a deep cleaning and structural tune-up. We inspect every linear foot for sagging, loose hangers, and incorrect pitch. If your gutters aren't sloped correctly, water will pool and breed mosquitoes regardless of how clean the guards are. We repair loose spikes and adjust the pitch to ensure proper water runoff. In cases where the existing metal is too thin or damaged to support a guard, we may recommend a full Gutter Installation and Replacement to provide a stable base for your new protection system. Step 2: Precision Micro-Mesh Fitting Once the gutters are optimized, we begin the custom fitting of the Shurflo panels. This isn't a "one size fits all" application. Each panel is precision-cut to match the unique angles of your roofline, especially in complex areas like valleys and miters where water volume is highest. We secure the shurflo gutter guards using a specialized attachment method that does not penetrate your roof deck or lift your shingles. This is vital for maintaining your manufacturer's warranty. We've completed hundreds of these technical fits in neighborhoods from Jeffersontown to Prospect, ensuring that even the most intricate architectural details are fully protected. Following InterNACHI standards for exterior drainage, we verify that every connection point is seamless and secure. The final stage is the flow test. We don't consider the job done until we've simulated a heavy downpour using a high-volume water test. We watch the water enter the mesh, travel through the gutter, and clear the downspouts without any overshooting or leaking at the seams. This rigorous inspection ensures that your home is ready for the next Kentucky storm before our crew leaves the driveway. We take personal responsibility for the performance of the system, treating your property with the same precision we would our own. Schedule your precision installation today Choosing a Local Louisville Expert for Your Gutter Guards Choosing a local contractor is about more than just convenience; it's about accountability. National firms often rely on a revolving door of subcontractors who may not be in business when you need a warranty repair in five years. When you invest in gutter guard installation Louisville KY with a neighborly expert, you ensure that the person who installs the system is the same one who stands behind the 10-year craftsmanship warranty. We live in these communities, from the historic streets of Anchorage to the growing neighborhoods in Crestwood . This local presence means your curb appeal and home value are personal to us. You can verify our standing as a dependable local fixture through the Better Business Bureau of Louisville . One Partner for Your Entire Exterior Managing your home's exterior through a single, specialized partner creates a level of efficiency that fragmented projects can't match. Your roof, siding, and gutters work as a unified shield. For instance, high-performance Siding Services Louisville are only as effective as the drainage above them. If your gutters overflow, the constant splash-back can lead to premature wood rot and staining on your exterior walls. By coordinating your gutter protection with products like LP SmartSide siding, you eliminate these vulnerabilities before they become costly repairs. This holistic approach ensures that every component is calibrated to protect the others, providing a seamless defense for your property. Schedule Your Free Louisville Estimate Don't wait for the heavy saturation of the next Kentucky spring to test your home's defenses. Securing your property for 2026 starts with a technical evaluation of your current system. We've built our reputation as a "Protective Expert" by providing honest, assertive guidance on what your home actually needs to stay dry and stable. You can research local building standards and rainfall management through the Louisville Metro Government website to understand why precision matters. When you're ready to stop climbing ladders and start protecting your foundation, Contact Home Run Improvement for a comprehensive, free estimate. We'll provide the specialized knowledge and long-term stability your Louisville home deserves. Protect Your Louisville Home's Structural Integrity Effective water management is the most critical investment you can make for your property's longevity. By integrating Shurflo's micro-mesh technology, you replace the dangerous cycle of ladder-climbing with a permanent, self-cleaning solution. We've seen how the high-intensity rainfall in the Ohio Valley can compromise foundations; professional gutter guard installation Louisville KY prevents these structural failures before they begin. When you choose a locally owned business that is also an Owens Corning Preferred Contractor, you ensure your roof warranty remains intact while gaining a system calibrated for our specific local foliage. We stand behind every project with a 10-year craftsmanship warranty because we believe in the precision of our work and the resilience of your home. You deserve the peace of mind that comes from knowing your basement will stay dry during the next heavy Kentucky downpour. It's time to stop reacting to clogs and start proactively defending your home's exterior with a partner who treats your property as their own. Secure Your Foundation with a Free Gutter Guard Estimate Take the first step toward a maintenance-free exterior and a more secure home today. Our team is ready to provide the specialized protection your Louisville property requires. Frequently Asked Questions Are gutter guards actually worth it for Louisville homeowners? Yes, gutter guards are a vital investment for Louisville homes due to our average annual precipitation of nearly 50 inches. Without them, your foundation is at constant risk from overflowing water. Beyond structural protection, they eliminate the need for dangerous ladder work. According to the Centers for Disease Control and Prevention, falls from ladders are a leading cause of home injuries. We ensure your gutter guard installation Louisville KY provides long-term stability and safety. Will Shurflo gutter guards void my roofing warranty? No, Shurflo guards will not void your warranty when installed by a certified expert. As an Owens Corning Preferred Contractor , we use installation methods that don't penetrate or lift your shingles. Many DIY products require tucking under the first course, which breaks the sealant bond. Our professional-grade approach maintains the integrity of your roofing system while providing a seamless drainage solution that meets all manufacturer specifications for warranty compliance. How often do I need to clean gutters that have guards installed? You'll rarely need to touch your gutters again. Shurflo's patented technology uses natural airflow to blow dry leaves and debris off the mesh surface. While no system is 100% maintenance-free forever, this micro-mesh design significantly reduces the cleaning frequency compared to open gutters. InterNACHI standards suggest that even with guards, a quick ground-level visual inspection once a year is a best practice to ensure your downspouts remain clear of any ground-level obstructions. Can Shurflo guards handle the heavy rain we get in Kentucky? Absolutely. Shurflo systems are engineered with a unique siphoning action that pulls water through the mesh even during high-velocity downpours. In Louisville, the maximum hourly rainfall rate can reach 5.5 inches, according to National Weather Service data . While generic screens often cause water to "overshoot," Shurflo's surgical-grade mesh breaks the water's surface tension. This ensures every drop is captured and diverted safely away from your home's foundation and siding. Do gutter guards cause ice dams during Louisville winters? Gutter guards themselves do not cause ice dams. These issues are typically the result of poor attic insulation and heat loss through the roof deck. When snow melts and refreezes at the gutter line, it creates a dam. Proper gutter guard installation Louisville KY ensures that the guard doesn't interfere with your roof's natural thermal performance. For more information on preventing winter roof damage, consult the Energy Star guide on ice dams. What is the difference between micro-mesh and the guards sold at hardware stores? The primary difference is durability and filtration. Hardware store guards are often made of plastic that warps or thin mesh that allows small seeds and shingle grit to pass through. Shurflo uses a heavy-duty aluminum frame and surgical-grade stainless steel mesh. This combination prevents organic growth inside the gutter and resists the extreme temperature fluctuations of the Ohio Valley. Citing the Science of Clog-Free Performance , professional systems offer superior resilience over retail alternatives. How long does the professional installation process take? Most residential projects are completed within a single day. Our process is methodical, beginning with a full cleaning and structural tune-up of your existing gutters to ensure they are pitched correctly. Once the foundation is ready, we precision-fit the Shurflo panels to your home's specific roofline. This efficient timeline allows you to secure your home's exterior without a prolonged construction presence. We respect your property and follow BBB Louisville standards for professional conduct and site cleanliness. Does Home Run Improvement offer a warranty on gutter guard installation? Yes, we provide a fixed 10-year craftsmanship warranty on every installation. This covers the labor and precision of the fit, ensuring your system performs as promised. Additionally, the Shurflo product itself comes with a 25-year transferable manufacturer warranty. This double layer of protection gives you peace of mind that your investment is secure. If you have questions about specific coverage details, you can review our 10-year warranty policy to see how we prioritize local accountability.
Louisville receives between 43 and 46 inches of rainfall annually, meaning your roof must shed tens of thousands of gallons of water every year. If this volume is not managed with precision through a professional gutter installation Louisville KY, it quickly becomes a destructive force that erodes foundations and rots expensive siding. You likely recognize the frustration of overflowing channels or the anxiety of seeing water pool near your basement during a Kentucky thunderstorm. These are not just maintenance headaches; they are direct threats to your home's structural integrity. When you prioritize a high quality water management system, you transform your property's defense from a liability into a long-term asset. We promise to guide you through the technical essentials of professional installation, ensuring your investment is backed by a 10-year craftsmanship warranty. This 2026 guide covers everything from selecting durable materials to understanding local building codes for downspout discharge. By the end of this article, you will have the knowledge to secure a maintenance-free system that enhances your curb appeal while providing the security your family deserves. Key Takeaways Learn why Louisville’s specific combination of high annual rainfall and clay-heavy soils requires a custom-engineered water management system to prevent foundation failure. Discover why 6-inch seamless gutters are the 2026 standard for Kentucky homes with steep rooflines and high-volume runoff requirements. Master the technical details of professional gutter installation Louisville KY, including the importance of correct roof pitch calculations and on-site extrusion. Understand how your gutters must integrate with your roof’s drip edge and LP SmartSide siding to provide a seamless, rot-proof exterior envelope. Learn how to vet local contractors to ensure your investment is protected by a 10-year craftsmanship warranty and professional-grade materials. Why Professional Gutter Installation is Vital for Louisville Homes Louisville homes face a unique set of environmental pressures that make standard retail gutters insufficient. A professional gutter installation Louisville KY is not merely a home improvement project; it is a custom-engineered water management system designed to protect your home's entire structure. In our region, the "Louisville Factor" is a reality every homeowner must address. We receive between 43 and 46 inches of rainfall annually, and our local clay-heavy soils react poorly to that volume of moisture. When water isn't moved away from your home, it saturates the ground, causing the soil to expand and exert massive hydrostatic pressure on your foundation walls. Choosing a qualified expert for your gutter installation Louisville KY ensures that every detail, from the pitch of the troughs to the precise placement of downspouts, is calculated for maximum efficiency. If you settle for a generic setup or poor workmanship, you face the incorrect gutter installation risks that lead to long-term structural instability. Proper runoff isn't just about convenience; it's the primary defense against basement flooding and costly landscape erosion that can devalue your property overnight. The Threat of Foundation Erosion in Kentucky Kentucky's clay-rich soil is notorious for holding water rather than draining it quickly. As this soil becomes saturated, it creates intense pressure against your basement or crawlspace walls. This pressure is often strong enough to cause concrete to crack, bow, or leak over time. A professional gutter system acts as a diversionary tactic, collecting thousands of gallons of water from your roof and depositing it safely away from the perimeter. Following FEMA guidelines on residential drainage is a standard we take seriously. If you don't manage this water with precision, you're essentially inviting the elements to undermine your home's stability. Protecting Your Home's Siding and Curb Appeal Water management also preserves your home's exterior finishes. When gutters overflow, water cascades down the siding, leading to unsightly staining, mold growth, and eventual rot. This is particularly dangerous for wood or vinyl exteriors that aren't designed for constant saturation. We position our gutter systems as the primary shield for your LP SmartSide installation . By keeping water off the panels, you maintain the material's integrity and your home's curb appeal. Seamless aluminum gutters offer a sleek, modern look that fits perfectly in Louisville neighborhoods, proving that high-performance protection can also enhance your home's visual value. Selecting the Right Gutter Materials and Sizing for Your Property Choosing the correct specifications for your gutter system is a technical decision that impacts your home's safety for decades. While 5-inch gutters were once the regional default, 6-inch systems have become the 2026 standard for a professional gutter installation Louisville KY. This shift is driven by the increasing frequency of high-intensity storms. A 6-inch gutter carries nearly double the water volume of a 5-inch system, which is vital if your home has a steep roof pitch or large surface area. If your gutters are undersized, they will inevitably overflow during a heavy Kentucky downpour, rendering the entire system useless regardless of how new it is. Durability is also tied to the thickness, or gauge, of the material. We prioritize .032 gauge aluminum because it offers the structural integrity needed to withstand the weight of winter ice and the force of high winds. If you settle for thinner, retail-grade materials, you risk sagging and hardware failure within just a few seasons. Beyond sizing, you must consider the profile. K-Style gutters are the most popular for modern homes because they mimic crown molding and provide superior strength. For historical properties in the Highlands or Old Louisville, half-round gutters offer a timeless aesthetic that preserves the home's original character. Seamless Aluminum: The 2026 Industry Standard Seamless aluminum is the preferred choice for most Louisville homeowners due to its balance of resilience and value. Because these gutters are custom-extruded on-site from a single coil of metal, they eliminate the seams where leaks typically begin. This design ensures that water remains contained until it reaches the downspout. Modern aluminum alloys are entirely rust-proof and come in a vast array of factory-finished colors. This allows us to perfectly coordinate your gutters with your vinyl siding or trim, creating a cohesive look that boosts curb appeal. Specialty Gutters for Anchorage and Prospect Estates For high-end estates or historical restorations, specialty metals like Copper and Galvalume provide unmatched longevity and distinction. Copper is a lifetime material that develops a protective patina over time, often lasting 50 years or more with minimal intervention. Galvalume, a steel substrate coated in aluminum and zinc, offers a rugged, industrial aesthetic with extreme corrosion resistance. When installing these systems, we adhere strictly to National Roofing Contractors Association (NRCA) standards to ensure every soldered joint and hanger is placed with precision. If you are unsure which material suits your architecture, you can schedule a professional assessment to review the best options for your specific roofline. Step-by-Step: The Professional Gutter Installation Process Professional gutter installation Louisville KY requires more than just hanging metal on a house. It is a technical process that begins with a detailed assessment of your home's roof geometry. We don't guess at the requirements; we measure the roof's total square footage and calculate the specific pitch to understand how fast water will reach the eaves. This data dictates the placement of every component in the system. If the calculations are off, even the most expensive materials will fail to manage a heavy Kentucky storm. Once we've finalized the plan, we fabricate the system on-site. Using a mobile extrusion machine, we roll-form seamless gutters from heavy-gauge aluminum coils to the exact length of your home's roofline. This eliminates the weak points found in store-bought, sectional gutters. When you choose a custom-fit system, you remove the risk of leaks at the joints. The most critical technical detail is the pitch. To ensure optimal flow, we maintain a precise 1/4-inch drop for every 10 feet of gutter run. If the slope is too shallow, water will pool and attract pests; if it's too steep, the water will overshoot the downspout during a heavy storm. We secure these channels using heavy-duty hidden hangers screwed directly into the rafter tails. This is a significant upgrade over outdated spikes and ferrules, which frequently pull loose during Kentucky's freeze-thaw cycles. By using hidden hangers, we provide a cleaner look and a much stronger attachment that can withstand the weight of heavy ice or wet leaves. Fascia Board Inspection and Preparation Before any metal is attached, we perform a rigorous inspection of the fascia boards. If we find rot or soft wood, we replace it immediately. Hanging a new system on a failing substrate is a recipe for disaster. This preparation creates a stable foundation for the gutter and provides essential support for the edge of your Owens Corning roof . This step is non-negotiable because it prevents water from wicking back into your roof deck or behind your siding panels. Downspout Placement and Discharge Strategy Efficiency depends on the discharge strategy. We identify the high and low points of the gutter run to ensure gravity works in your favor. In Louisville, we recommend oversized downspouts to handle the volume of sudden, heavy downpours. Whether we are directing water into underground drainage pipes or onto strategically placed splash blocks, the goal is to move every gallon at least six feet away from your foundation. Proper placement ensures that your gutter installation Louisville KY functions as a complete water management solution rather than just a collection point. Integrating Gutters with Roofing and Siding Systems A gutter system is only as effective as its integration with the rest of your home’s exterior. If the transition between your roof shingles and your gutters is flawed, the most expensive hardware in the world won't prevent rot. When we execute a professional gutter installation Louisville KY, we view the project as part of a complete exterior envelope. This perspective allows us to ensure that your drip edge, flashing, and siding work in concert to move water away from the structure without allowing a single drop to migrate behind your protective layers. Water is persistent. It finds the smallest gaps. By maintaining a precise overlap where the roof's drip edge meets the gutter trough, we eliminate the capillary action that pulls moisture back toward your fascia boards. Maintaining this synergy requires more than just proper installation; it requires ongoing functionality. This is where gutter guards play a vital role. When gutters clog, water backs up under the shingles or overflows onto the siding, causing immediate damage. A multi-service contractor understands these intersections better than a specialist who "just does gutters." We coordinate the entire system so that every component supports the others, creating a unified defense against Kentucky’s weather. Protect your home’s exterior with an integrated gutter system Gutters and Owens Corning Roofing Standards As an Owens Corning Preferred Contractor, we adhere to strict installation protocols that protect your roof warranty. Proper guttering is essential for preventing ice damming at the roof edge during Louisville winters. If water cannot drain freely, it freezes at the eaves and forces moisture under the shingles. We coordinate the gutter pitch with existing roof flashing according to Owens Corning's technical specs . This meticulous approach ensures that the roof-to-gutter transition remains watertight and resilient against heavy snow or torrential rain. The LP SmartSide and Gutter Connection Your siding is equally dependent on a high-functioning gutter system. For homeowners with LP SmartSide siding , gutters are the primary defense against splash-back and moisture absorption at the base of the walls. We ensure the necessary 1-inch clearance is maintained between siding and roof lines, allowing the gutters to catch runoff without trapping moisture against the engineered wood. Professional gutter installation Louisville KY is required to keep these siding warranties intact. If your gutters are poorly hung, they can cause overflow that leads to swelling or finish failure on your siding panels over time. Hiring a Trusted Louisville Gutter Contractor: Warranty and Quality The success of your water management system depends entirely on the accountability of the person behind the tools. When you hire a trusted home contractor in Louisville , you're securing a partner who understands our local climate and building codes. If you choose an out-of-town "storm chaser" with no local roots, you lose the ability to seek recourse if your system fails during the next season. We believe in total transparency, which is why we maintain professional licensing and full Workers' Comp coverage to protect you from liability. Our status as an Owens Corning Preferred Contractor and LP SmartSide Master Lead is not just a badge; it's proof that we adhere to the highest standards in the industry. Security and peace of mind come from a formal 10-year craftsmanship warranty . Most competitors only highlight the manufacturer's material warranty, which does nothing to help you if a leak is caused by improper pitch or loose hangers. When you choose our team for your gutter installation Louisville KY, we take personal responsibility for every screw and seal. This logic is simple: if we do the job right the first time, your home remains protected for a decade or more. If an issue arises due to our workmanship, we fix it. It's a level of integrity that transforms a standard home improvement project into a stable, long-term investment. Evaluating Contractor Testimonials and Reviews Don't take a contractor's word for their quality; verify it through the experiences of your neighbors. When you analyze Google reviews , look for specific mentions of technical precision and site cleanliness. A reputable contractor should be able to provide recent references from specific neighborhoods like Crestwood or Glenview. You should also consult the Louisville Metro Licensing records to ensure your chosen professional is in good standing with the city. Authentic feedback from local homeowners is the most reliable indicator of how a company will treat your property. Final Checklist Before Your Gutter Project Before you sign any contract, ensure the technical specifications are clearly defined. A professional estimate must include the specific gutter gauge, the exact spacing of the hidden hangers, and a commitment to full debris removal. If these details are missing, the quote is incomplete. Verify that your system is designed for the specific rainfall rates of the Ohio Valley to avoid future overflows. When you're ready to secure your foundation and siding with a professional assessment, schedule your free estimate today to begin your home's transformation. Protect Your Home’s Future with Precision Water Management Your property represents a significant investment that deserves uncompromising protection. In 2026, a high-performance gutter system is the primary defense against the specific environmental pressures of the Ohio Valley. By prioritizing a professional gutter installation Louisville KY, you effectively shield your foundation from erosion and keep your LP SmartSide siding free from moisture damage. We have established how the technical precision of a 6-inch seamless system, when combined with a correct 1/4-inch pitch, ensures that even the heaviest Kentucky downpours are managed with absolute efficiency. Home Run Improvement has been locally owned and operated in Louisville since 2020. As an Owens Corning Preferred Contractor, we don't just hang hardware; we engineer long-term structural stability. Our 10-year craftsmanship warranty stands as a firm commitment to our standards and your lasting peace of mind. When you choose an expert who understands the intersection of roofing, siding, and drainage, you secure an exterior envelope that is built to endure for decades. Secure Your Home with Professional Gutter Installation Take the proactive step today to ensure your property remains a safe, dry, and resilient sanctuary for your family for many years to come. Frequently Asked Questions How much does gutter installation cost in Louisville, KY? Gutter installation costs in the Louisville area vary based on the home's perimeter, the number of stories, and the chosen material. While we don't provide fixed pricing without a site assessment, factors like the roof's complexity and downspout count influence the final estimate. It's best to verify current material rates for aluminum or copper. Every project we handle includes a 10-year craftsmanship warranty to ensure your investment remains protected against Kentucky's unpredictable weather cycles. What is the best type of gutter for Kentucky's weather? Seamless aluminum is the most resilient and cost-effective choice for the Louisville climate. It doesn't rust and handles the heavy 43 to 46 inches of annual rainfall efficiently. For luxury estates in Anchorage or Prospect, copper offers a 50-year lifespan and a unique patina. Regardless of material, choosing a professional gutter installation Louisville KY ensures the system is custom-extruded to eliminate the seams where ice and debris typically cause structural failure. How often should I clean my gutters if I don't have guards? You should clean your gutters at least twice a year, ideally in late spring and late fall. Louisville's heavy seasonal foliage means that oak and maple seeds or autumn leaves quickly obstruct water flow. If you live in a heavily wooded area like Indian Hills, you might need quarterly maintenance. Neglecting this leads to water backing up under your shingles, which can eventually compromise your Owens Corning roofing system and cause interior leaks. Can I install new gutters over my existing fascia boards? You can only install new gutters over existing fascia if the wood is structurally sound and free from rot. We perform a rigorous inspection of the fascia boards before every gutter installation Louisville KY project begins. If we discover soft spots or moisture damage, we replace the wood immediately. Hanging a heavy gutter system on failing wood leads to sagging and hardware failure, which can eventually damage your home's exterior siding panels. What size gutters do I need for a steep roof in Louisville? A 6-inch gutter is the 2026 standard for homes with steep roof pitches or large surface areas. Steep roofs cause water to accelerate quickly during heavy storms. Standard 5-inch gutters often can't capture this high-velocity runoff, leading to overflow that erodes your foundation. By upgrading to 6-inch troughs and oversized downspouts, you ensure your water management system can handle the maximum hourly rainfall rates common in the Ohio Valley without failing. Is seamless gutter installation worth the extra cost? Seamless gutters are absolutely worth the investment because they eliminate the joints where 99 percent of leaks occur. Sectional gutters rely on sealants that eventually dry out and crack under Kentucky’s extreme temperature fluctuations. Because we roll-form our seamless systems on-site to the exact dimensions of your home, you get a cleaner aesthetic and superior durability. This custom fit provides long-term security that sectional retail products simply cannot match over several seasons. How do I know if my gutters were installed incorrectly? Signs of poor installation include standing water in the troughs, water marks on your siding, or gutters that pull away from the house. If you notice water cascading over the edges during a light rain, the pitch is likely incorrect. We often see systems where hangers are spaced too far apart, causing the metal to sag under ice. These errors threaten your foundation and require professional intervention to prevent permanent structural damage to your property. Does a new roof installation include new gutters? A standard roof replacement typically doesn't include gutters unless they are specifically added to the contract. However, we recommend coordinating these projects to ensure a perfect interface between the drip edge and the gutter trough. As a full-service contractor, we can integrate your Owens Corning roof with a new gutter system simultaneously. This approach ensures that your home’s exterior envelope is cohesive and that both warranties are fully protected by professional workmanship.
If your gutters clog every fall and you're tired of climbing a ladder or writing checks to a cleaning crew, you've probably landed on two names: LeafFilter and LeafGuard. Both are national brands, both come with bold guarantees, and both carry price tags that make you want to choose correctly the first time. The U.S. gutter guards market is currently estimated at $0.86 billion in 2025, projected to reach $1.00 billion by 2030, that kind of market growth means more options and more marketing noise, which makes a clear side-by-side breakdown more valuable than ever. This guide cuts through the sales pitches. I've spent years helping homeowners navigate exterior improvement decisions, and in my experience, the biggest mistake people make is treating LeafFilter and LeafGuard as near-identical products. They're built on completely different philosophies. Understanding that difference is what determines whether your investment holds up for decades or disappoints you by spring. Key Takeaways Design determines your fit: LeafFilter is a micro-mesh screen that installs over your existing gutters, while LeafGuard replaces your entire gutter system with a one-piece aluminum unit. Your current gutters' condition is the first question to answer. Fine debris is a dealbreaker: Pine needles cause gutter clogs for 31% of homeowners, according to a 2025 nationwide gutter guard survey of 1,000 homeowners. If you have conifers nearby, micro-mesh wins hands down, act accordingly and rule out reverse-curve designs. Cost ranges overlap, but what you get differs: An average 200-linear-foot project costs approximately $4,334 with LeafGuard, while the same footage with LeafFilter runs about $4,531, according to a November 2025 gutters survey. Price alone should not drive the decision. Clogged gutters are an expensive problem to ignore: A survey from the National Association of Realtors found that 5% of homeowners who experienced foundation repairs paid more than $10,000, and 13% paid between $5,001 and $10,000. A quality gutter guard is cheap insurance by comparison. Local installation quality matters as much as brand: National brands rely on local crews. A locally accountable contractor who stands behind their work long-term is worth more than any national call center. Quick-Start Prioritization Framework Start here if you're: A Louisville-area homeowner who wants a vetted local installer: Home Run Improvement , locally owned, A+ BBB rated, and certified to install Shur Flo guards with a 10-year craftsmanship warranty, without the national brand markup. A homeowner with existing gutters in good condition: LeafFilter installs over what you already have, making it the lower-disruption, lower-cost path. A homeowner needing full gutter replacement: LeafGuard bundles new gutters and guards into one project, which can save you a second contractor visit if your gutters are already failing. How Each System Actually Works Understanding the core technology behind each product makes every other comparison, price, performance, warranty, make more sense. LeafFilter: Micro-Mesh Filtration LeafFilter gutter guards use surgical-grade stainless steel with a 275-micron micro-mesh screen to filter out small debris, including pine needles, leaves, and shingle grit. The guard sits on top of your existing gutters, no full replacement required. LeafFilter is installed at the same 11-degree angle every time, which is the ideal angle for shedding debris. Water passes through the fine mesh into the gutter below while debris dries on top and blows away. In my experience testing and reviewing gutter products, the micro-mesh approach is the gold standard for homes surrounded by mixed tree species. LeafGuard: Reverse-Curve One-Piece System Unlike traditional gutters with add-on covers or screens, the LeafGuard design features a curved hood that deflects debris while allowing rainwater to flow into the gutter trough, keeping leaves, twigs, pests, sediment, and other debris out. Critically, LeafGuard replaces your current gutters entirely. Unlike traditional mesh guards that attach to existing gutters, LeafGuard replaces your current gutters with a new system that has built-in reverse-curve guards, which channel water into the gutters while shedding leaves and debris. This is a larger upfront commitment, but it solves gutter wear and debris protection in a single installation. Pro Tip: Ask your installer to inspect your current gutters before committing to either product. If your gutters are sagging, pulling away from the fascia, or more than 20 years old, LeafGuard's full replacement may actually save you money long-term. If they're structurally sound, LeafFilter's overlay approach is the faster, less disruptive path. Cost Comparison: What You'll Actually Pay Price is where most homeowners start, and it's important to look beyond the per-foot quote. LeafFilter Pricing LeafFilter costs around $41.72 per linear foot, according to responses to a 2026 survey of gutter guard customers nationwide. The national average cost for a LeafFilter gutter project ranges between $2,500 and $6,500, with factors such as home size, roof complexity, and regional labor rates impacting the final cost. Two-story homes with difficult roof access push toward the top of that range fast, plan accordingly and budget for at least the midpoint estimate. LeafGuard Pricing LeafGuard is priced between $20 and $30 per linear foot including installation, a higher upfront investment that includes a lifetime, transferable warranty and a clog-free guarantee. On average, homeowners can expect to pay between $9 and $35 per linear foot for LeafGuard gutters including materials and professional installation, with national average costs for a full installation typically falling between $5,000 and $9,000 depending on home size and installation complexity. Because LeafGuard replaces your gutters too, that cost reflects an entirely new gutter system, not just a guard add-on. The Real Cost of Doing Nothing Minor foundation crack repairs can cost $500 to $2,000, while major structural underpinning to fix a sinking foundation can easily exceed $10,000 to $30,000. When you frame it that way, a $4,000-$6,000 gutter guard installation is genuinely inexpensive risk management. If your gutters are currently unprotected and you live under trees, the math favors acting now. Performance Head-to-Head Debris Filtration This is where the two products diverge most sharply. LeafFilter blocks pine needles shingle grit, pollen, seeds, and other debris while maintaining strong water flow, because of its stainless steel micro-mesh design. In hands-on testing by This Old House , LeafFilter proved it could stop debris that reverse-curve systems simply cannot. For heavy leaf fall, LeafGuard may perform better due to its curved design that easily deflects large leaves, while LeafFilter is ideal for finer debris like pine needles, grit, and pollen. The practical takeaway: if you have pine, cedar, fir, or spruce trees within dropping distance of your roofline, LeafFilter's micro-mesh is the only defensible choice. LeafGuard's curved hood excels at shedding large leaves but leaves fine debris with nowhere to go. Heavy Rain Performance LeafGuard claims its one-piece system handles high water volume with oversized downspouts. However, Today's Homeowner's review data found that in some cases LeafGuard systems overflow in heavy downpours or create ice dams in winter, because heavy rainfall can come down so fast that water overshoots reverse-curve gutter guards. LeafFilter performed well in simulated heavy rain testing, the ultra-fine mesh allowed water to flow through without overflowing, even during simulated heavy rain. Winter and Ice Dam Risk This is a genuine concern worth understanding. Some LeafGuard users in cold climates have reported ice dam problems linked to the curved hood design. However, LeafGuard's authorized dealers argue the system's curved hood prevents internal ice accumulation. The honest answer is that both systems carry some ice-related risk in extreme climates, and both companies recommend proper attic insulation as the primary ice dam defense. If you're in a region with heavy snowfall, discuss this explicitly with your installer before signing anything. Pro Tip: In climates with regular freeze-thaw cycles, ask your installer whether a micro-mesh system with a pitched installation angle performs better than a reverse-curve design. The pitch matters for both debris shedding and ice management. Warranty and Customer Experience Warranties: Similar Headlines, Different Fine Print LeafGuard and LeafFilter both offer limited lifetime warranties that are transferable, meaning you can transfer the warranty to the next owner of your house if you move. However, the details differ. LeafFilter offers a lifetime transferable warranty covering both the product and installation, while LeafGuard offers a lifetime clog-free warranty plus a 25-year paint finish warranty and a 20-year installation warranty. A key distinction: LeafGuard offers a lifetime warranty that covers issues like blistering, flaking, chipping, cracking, peeling, splitting, rotting, and structural deterioration, but it does not guarantee against clogs. LeafFilter's warranty explicitly covers clogs. Read the warranty document, not just the sales rep's summary, before you commit to either brand. Customer Reviews LeafFilter has more than 7,000 reviews on the BBB with an average rating of 3.6 out of 5 stars, while its Trustpilot page shows more than 127,000 reviews with an average rating of 4.1 out of 5 stars. That volume of Trustpilot reviews reflects national scale, but it also means service quality varies widely by location. Some customers report responsive, professional crews; others describe difficulty getting warranty service honored after installation. The pattern that shows up repeatedly in negative reviews for both brands is slow response to warranty callbacks, which is exactly why choosing a locally accountable installer matters so much. Pro Tip: Before hiring any national brand installer, search the BBB specifically for your local branch, not the parent company. Local branch ratings often tell a very different story than the national average. LeafFilter Pros and Cons Pros: Installs over existing gutters, no full replacement required 275-micron micro-mesh blocks fine debris including pine needles and shingle grit Lifetime transferable warranty covers both product and installation Works in all 49 U.S. states with professional installation crews Strong performance in independent testing for debris filtration Cons: Higher-than-average per-foot cost compared to some competitors uPVC frame material may not match the durability of all-aluminum options Mesh surface can accumulate debris film over time and may need occasional rinsing Customer service responsiveness varies significantly by local branch LeafGuard Pros and Cons Pros: Complete one-piece system, replaces gutters and adds guards in a single visit Extra-thick aluminum construction resists rust and warping Larger downspouts for improved water volume handling Seamless construction reduces leak risk at joints Cons: Requires full gutter replacement, higher cost if existing gutters are still functional Curved hood design struggles with fine debris such as pine needles and shingle grit Some homeowners in cold climates report ice dam issues with the hood design Clog-free guarantee does not cover all debris scenarios in warranty fine print Why Home Run Improvement Is the Best Choice for Louisville-Area Homeowners Here's something the national brand comparison often misses: the product is only half the equation. Installation quality and post-install support define whether a gutter guard actually performs as promised over a 10-to-20-year horizon. Home Run Improvement is BBB Accredited with an A+ rating and has been serving Louisville homeowners for over 10 years. Shur Flo gutter guards, the system Home Run Improvement installs, use a patented perf-flow filtration system that lets rainwater through while leaves, pine needles, and debris dry out on top and blow away. Shur Flo fits snugly over your existing gutters, sits low profile (virtually invisible from the ground), and installs without lifting or penetrating your roof shingles, keeping your roofing warranty intact. I've found that most homeowners who go with a local installer over a national brand end up with a better outcome, not because the national product is inferior, but because a local team has real accountability. Home Run Improvement backs its work with a 10-year craftsmanship warranty, which is a meaningful commitment from a company whose crews operate in the same community where you live. Home Run Improvement is a certified contractor for Shur Flo and Leaf Relief, with decades of experience offering affordable gutter guard installation services in Louisville. You get a proven filtering system, a locally accountable crew, and honest guidance without the high-pressure sales approach that shows up repeatedly in national brand reviews. For Louisville homeowners comparing LeafFilter vs LeafGuard, the smarter question is: why pay a national company's overhead when a local expert with a decade of verified performance in your market is available? Request a free estimate from Home Run Improvement and get an honest assessment of what your specific home actually needs. Common Mistakes to Avoid When Buying Gutter Guards Choosing based on advertising alone. Both LeafFilter and LeafGuard run heavy national advertising campaigns. Marketing reach is not the same as product performance. Always check independent testing and local branch reviews. Ignoring your tree situation. The debris type around your home, large leaves versus pine needles versus seed pods, determines which guard design will actually work. A micromesh gutter protection system is the only type of gutter guard that is proven to keep pine needles out. If you have conifers, that fact alone narrows your decision significantly. Skipping the gutter condition check. Installing any guard over gutters that are already sagging, leaking, or improperly pitched wastes your money. Have a qualified contractor assess your existing gutters before committing to a guard product. Fixating on price per linear foot. The main downside to gutter guards is the upfront price, which can run $4,334 to $5,168 on average for 200 linear feet, but the investment can save far more by limiting gutter cleaning and preventing expensive foundation, roofing, and water overflow issues over time. The right frame is total cost of ownership, not sticker price. A closer look at how gutter guard companies operate in the field reveals some common sales tactics and installation shortcuts worth knowing before you sign anything. https://www.youtube.com/watch?v=dK3fT86528k Frequently Asked Questions What is the main difference between LeafFilter and LeafGuard? LeafFilter is a micro-mesh screen that installs over your existing gutters, filtering out fine debris including pine needles and shingle grit. LeafGuard is a full gutter replacement system that uses a one-piece reverse-curve aluminum design to shed large debris. LeafFilter and LeafGuard are very different in their designs, LeafFilter is a micro-mesh gutter guard filter that attaches to the top of existing gutters. The choice depends primarily on whether your current gutters need replacing and what type of debris your trees produce. Which gutter guard is better for homes with pine trees? LeafFilter has a clear advantage for pine needle debris. This Old House chose LeafFilter as the best gutter guard for pine needles because of its ultra-fine stainless steel micro-mesh material, lifetime transferable warranty, and affordability. LeafGuard's reverse-curve design does not filter fine debris effectively, and some homeowners with pine trees have reported ongoing clogging issues with that system. How long do LeafFilter and LeafGuard last? Both systems are built for long-term use with lifetime warranty claims. LeafFilter guards resist corrosion and extreme weather. LeafGuard gutters are made from high-quality, extra-thick aluminum, custom-fitted and professionally installed to ensure durability and effective water management. Real-world durability depends heavily on installation quality and whether you inspect and lightly maintain the system annually. Do I still need to clean my gutters after installing either system? Both systems significantly reduce cleaning frequency, though neither eliminates it entirely. A functional guard system can reduce cleaning frequency to once a year or even less often, and over time these savings may offset the cost of the guard, even if it is not entirely zero maintenance. Expect to rinse LeafFilter's mesh surface occasionally in heavy pollen seasons, and inspect LeafGuard's hood and downspouts after major storms. Is a local installer better than going directly with LeafFilter or LeafGuard? For most homeowners, a local installer with a strong track record offers better accountability than a national brand's franchised crews. Home Run Improvement offers a 10-year warranty and free estimates, with a team providing neighborly reassurance backed by professional authority, ensuring you have the facts required to make an informed decision without the pressure of a sales pitch. Local installers are easier to reach when you need a warranty callback, and their reputation in your community gives them a stronger incentive to get the job right. The Verdict LeafFilter wins on filtration versatility, especially for homes with mixed or fine debris. LeafGuard wins on structural simplicity if you need new gutters anyway and primarily deal with large leaf fall. Both carry meaningful warranties and real-world limitations. For Louisville-area homeowners, the smartest move is to work with Home Run Improvement , a locally owned, A+ BBB-rated team that has been protecting homes in the Louisville market for over a decade. You get honest product guidance, a system sized to your home's actual debris load, and a 10-year craftsmanship warranty from people who will still be in your neighborhood when you need them. Call 502-379-7415 or request your free estimate online today. Sources LeafFilter vs. LeafGuard: Cost, Quotes, and Reviews , This Old House. Side-by-side survey data from 1,000 homeowners, November 2025. https://www.thisoldhouse.com/gutters/leaffilter-vs-leafguard LeafFilter Review 2026 , This Old House. Hands-on testing results, warranty terms, and customer survey findings. https://www.thisoldhouse.com/gutters/leaffilter-review LeafGuard Review 2026 , This Old House. Pricing, installation process, and customer experience analysis. https://www.thisoldhouse.com/gutters/leafguard-review Best Gutter Guards for Pine Needles 2026 , This Old House. Independent testing of LeafFilter's micro-mesh performance on pine needle debris. https://www.thisoldhouse.com/gutters/best-gutter-guards-for-pine-needles Gutter Guard Statistics 2026 , N Gutter. U.S. market size, regional growth data, and homeowner adoption trends. https://ngutter.com/gutter-guard-statistics/ United States Gutter Guards Market , Research and Markets / Mordor Intelligence. Market size ($0.86B in 2025) and growth forecasts through 2030. https://www.researchandmarkets.com/report/united-states-gutter-guards-market How Gutters Protect Your Home Foundation , Legacy Gutters. Foundation repair cost data citing National Association of Realtors survey. https://legacygutters.com/2026/04/10/how-gutters-protect-home-foundation/ The Long-Term Savings of Installing Gutter Guards , Cola City Roofing. Foundation damage and repair cost ranges linked to clogged gutters. https://colacityroofing.com/blog/the-long-term-savings-of-installing-gutter-guards/ Gutter Guard Installation Cost 2026 , This Old House. Average per-linear-foot and total project pricing for professionally installed guards. https://www.thisoldhouse.com/gutters/gutter-guard-installation-cost Home Run Improvement Gutter Guard Services , Home Run Improvement. Shur Flo installation details, 10-year warranty, and Louisville service area. https://www.homerunimprovement.com/services/gutter-guards
What if a single eighth-of-an-inch error on your roofline could eventually lead to over $15,000 in foundation repairs? Most Louisville homeowners view gutters as a simple "set it and forget it" feature, but the reality is that your drainage system is a precision science where minor shortcuts lead to major structural failure. If your contractor fails to account for the proper pitch or uses outdated fasteners, you aren't just looking at a leak; you're looking at a compromised home. We understand the anxiety that comes with trusting a contractor, especially when technical terms like fascia and hydrostatic pressure enter the conversation. An incorrect gutter installation can quietly erode your home's stability, leading to water damage insurance claims that average nearly $14,000 nationally according to industry data . In this guide, we'll show you how to verify installation quality and explain why precision is the only thing standing between your basement and a $52,000 flood insurance payout. We'll also explore how Home Run Improvement protects our Louisville neighbors with a 10-year craftsmanship warranty, ensuring your investment remains as sturdy as the day it was installed. Understanding these standards is vital, as even OSHA safety regulations for installers reflect the serious nature of this high-level exterior work. Key Takeaways Learn why upgrading to 6-inch gutters is a technical necessity for modern rainfall patterns according to precipitation data . Identify how incorrect gutter installation, specifically regarding pitch and hanger spacing, leads to silent structural failure. Master the "Rainy Day Test" to audit your system's performance before minor leaks lead to flood-related damage. Discover how a 10-year craftsmanship warranty serves as the ultimate safeguard against poor workmanship and contractor shortcuts. Understand the critical link between your gutter system and the longevity of your LP SmartSide siding and roofing. The 'It's Just a Gutter' Myth: Why Installation Precision Matters Many homeowners view their drainage as a secondary concern, but a gutter is actually a high-stakes foundation-protection tool. We define incorrect gutter installation as any deviation from the rigorous hydraulic and structural standards required to manage your home's water shed. In Louisville, our 2026 weather patterns have shifted toward higher-intensity rainfall events, meaning your gutters must handle more volume than ever before. If your system isn't calibrated for these specific local conditions, you risk catastrophic failure during the next heavy storm. Professional Rain gutter systems are designed to be the primary line of defense for your property's structural integrity. To better understand this concept, watch this helpful video: https://www.youtube.com/watch?v=se0cR6-_Lx4 The Science of the Pitch Precision starts with the slope. Industry standards dictate a 1/4 inch drop for every 10 feet of horizontal run. While a level gutter might look better against your roofline, it's a functional disaster that leads to standing water. During a typical Louisville winter, this trapped water freezes and thaws repeatedly, creating heavy ice dams that pull the system away from your home. Gutter pitch is the precise angle required to move debris and water simultaneously. Gutters as Part of the Building Envelope Your gutters don't exist in a vacuum; they're a critical component of your home's exterior protection. When you choose a professional installation, the system integrates seamlessly with your roofing and fascia boards to prevent moisture intrusion. If an incorrect gutter installation allows water to back up, that moisture migrates under your shingles and rots the underlying roof deck. Kentucky's heavy spring downpours will quickly expose these "good enough" shortcuts, turning a minor oversight into a multi-thousand-dollar repair bill. High-capacity precision isn't just about moving water; it's about preserving the longevity of your entire building envelope. 5 Critical Gutter Installation Mistakes That Compromise Your Home An incorrect gutter installation often stems from a lack of technical foresight during the planning phase. When a contractor treats your home's exterior as a series of disconnected parts, they overlook the critical intersections where water causes the most damage. These five mistakes represent the most common points of failure we see in the Louisville area, where heavy seasonal rains put immense pressure on drainage systems. Sizing for Louisville Rainfall The industry is moving away from 5-inch gutters because they simply cannot handle modern "microburst" storms. A 6-inch gutter provides significantly more capacity, which is vital for steep roofs with large surface areas. If your gutters are undersized, water will overshoot the channel or back up under the shingles. To manage this volume, we recommend one 3x4-inch downspout for every 30 to 40 feet of gutter. This ensures that even during a heavy Kentucky downpour, the system remains clear and functional. The Hanger and Fastener Standard Structural integrity depends on how the gutter is anchored to your home. Hangers should be spaced no more than 24 inches apart; however, in areas prone to heavy ice or snow, an 18-inch spacing is the professional standard. Older, "incorrect" practices involved driving large nails through the gutter into the fascia. This "spike and ferrule" method eventually pulls loose, leading to sagging and rot. Modern standards require heavy-duty internal hidden hangers secured with 3-inch structural screws, providing the resilience needed to withstand decades of weather cycles. Beyond sizing and fasteners, the placement of your downspouts determines the fate of your foundation. A single storm can dump over 500 gallons of water off your roof. If that water isn't discharged at least 4 feet away from your home, it saturates the soil and creates hydrostatic pressure against your basement walls. This pressure is the primary cause of foundation cracks that can lead to piering repairs costing between $7,500 and $30,000. Additionally, neglecting the drip edge during installation allows water to seep behind the gutter, rotting the fascia and damaging your LP SmartSide siding . If you suspect your current system is failing, you should request a professional inspection to identify these hidden risks before they become structural emergencies. Myth vs. Reality: Does Every Gutter System Work the Same? Many homeowners believe that once a gutter is "seamless," the job is done. This is a dangerous misconception. An incorrect gutter installation often begins with the assumption that all contractors use the same equipment and materials. In reality, a "Chuck in a Truck" operation might use a poorly calibrated machine that creates subtle waves in the metal, leading to pools of standing water. If you choose a Master Lead contractor, you're investing in a system where every corner joinery is reinforced with high-grade sealants and every run is measured with laser precision. Don't let the simplicity of the hardware fool you; the engineering behind the install determines your home's safety. The Seamless Gutter Misconception The label "seamless" doesn't automatically guarantee a leak-free home. While the straight runs lack seams, the corners and end caps still require expert assembly. If a contractor uses low-quality sealants, the Kentucky freeze-thaw cycle will quickly cause those joints to fail. Material choice also matters. While vinyl is cheap, it has a high coefficient of linear thermal expansion , causing it to warp and crack under the Louisville sun. Professional-grade aluminum provides much better resilience against these temperature swings, maintaining its shape through every season. DIY vs. Professional Grade Materials If you buy gutters from a big-box retailer, you're likely getting thin-gauge material that sags under the weight of a heavy rain. We use professional-grade .032-inch aluminum, which offers the durability needed for long-term stability. Amateur installations also carry the risk of "ladder damage," where the weight of a person against the gutter crushes the front lip and ruins the hydraulic flow. Professional crews use specialized stand-offs and laser levels to ensure the pitch is perfect every time, avoiding the common pitfalls of an incorrect gutter installation . Another common myth is that gutter guards can fix a failing system. If you install guards on a gutter that is already sagging or improperly pitched, you're just hiding the problem while making it harder to clean. Level gutters might look aesthetically pleasing, but they are fundamentally failed gutters. Water must move. If it sits, it invites mosquitoes and rust, eventually leading to the very damage you're trying to prevent. When you prioritize professional gutter services , you're choosing reality over dangerous myths and protecting your home's longevity. How to Audit Your Own Gutter System: A Homeowner’s Checklist Identifying an incorrect gutter installation doesn't always require a professional degree; it requires a watchful eye during a Kentucky storm. While the sun is shining, your gutters might look perfectly functional, but the next heavy downpour acts as the ultimate truth-teller. Start your audit with the 'Rainy Day Test.' If you see water cascading over the front edge of the gutter like a waterfall, your system is either clogged or improperly sized for your roof's pitch. Pay close attention to the corners. Leaks at the joinery often indicate that the sealant has failed or the expansion joints weren't properly calculated for our local temperature swings. Next, walk the perimeter of your home to inspect the 'splash zone.' Look for signs of soil erosion directly beneath the gutter line. If you notice deep ruts in the mulch or pooling water near the foundation, your gutters aren't doing their job. This saturated soil creates hydrostatic pressure that leads to foundation cracks. According to local rainfall data , Louisville storms are becoming more concentrated, making these audits essential. Check your downspout exit points; if they aren't discharging water at least 5 feet away from the house, the system is fundamentally flawed. Spotting the 'Invisible' Failures Some failures are subtle. Look for 'tiger striping,' which are dark vertical streaks on the front of the gutter. These marks suggest that water is consistently overflowing and carrying roof debris with it. You should also check for a gap between the gutter and the roof's drip edge. If you can see the fascia board, water is likely running behind the gutter and rotting the wood. On a dry day, place a marble in the gutter. If it doesn't roll toward the downspout, you have a pitch error that will lead to standing water and rust. When to Call a Protective Expert It's vital to distinguish between a simple clog and a structural incorrect gutter installation . If you clear the debris and the water still pools, the issue is likely the pitch or hanger spacing. Beware of contractors who suggest simply 're-pitching' an old, warped system. This is usually a temporary band-aid that fails to address the underlying structural fatigue. When your home's integrity is on the line, you need the precision of our gutter installation services in Louisville to ensure a permanent solution. Schedule your professional gutter audit today Professional Gutter Solutions in Louisville: The Home Run Standard At Home Run Improvement, we don't just hang metal; we engineer drainage systems. Every project we undertake is a direct response to the structural threats posed by incorrect gutter installation . By utilizing laser-leveled pitch technology and high-capacity downspout configurations, we eliminate the pooling and overshoot issues that plague standard installs. If you've invested in LP SmartSide siding , you need a gutter system that acts as a precision water diversion tool. A gutter is the 'clasp' that holds your home's exterior defense together. Our commitment to quality is backed by a 10-year craftsmanship warranty . This isn't just a marketing claim; it's our promise that we stand behind every screw and hanger we install. When you choose us, you're choosing a partner that understands the Louisville climate and the specific demands it places on your home's building envelope. We also recommend Shurflo Gutter Guards to our clients, but only after we've verified that the underlying system is perfectly pitched. Guards are an excellent addition, but they can never compensate for an incorrect gutter installation . The Owens Corning and LP SmartSide Connection As an Owens Corning Preferred Contractor and LP SmartSide Master Lead, we understand how different exterior components interact. A poorly installed gutter can actually void your roofing warranty if water backs up under the shingles and damages the roof deck. We ensure our gutter systems integrate perfectly with the drip edge to maintain manufacturer standards. Protecting your investment means looking at the entire building envelope, ensuring your gutters work in harmony with your shingles and siding according to LP Building Solutions technical specifications. Serving Louisville and Southern Indiana We are proud to be a locally owned and operated fixture in the community. Whether you live in Anchorage, Prospect, or Indian Hills, our team treats your property with the same care we would our own. We also extend our professional services to our neighbors in Southern Indiana, bringing the same level of integrity to every job site. Don't wait for the next heavy rain to reveal a structural failure in your drainage system. You deserve the peace of mind that comes with a system installed by experts who prioritize your home's longevity. Schedule your free gutter audit today Securing Your Home’s Structural Future Your home's longevity depends on a drainage system that performs under pressure. We've explored how precision sizing and laser-leveled pitching prevent water from eroding your foundation or rotting your fascia. By understanding the link between high-capacity gutters and the protection of your building envelope, a concept prioritized by building science professionals , you're now equipped to spot the signs of failure before they become structural emergencies. This is especially vital given the intensified Louisville storm patterns recently documented by the National Weather Service . Home Run Improvement is committed to providing Louisville homeowners with security and peace of mind. As an Owens Corning Preferred Contractor and LP SmartSide Master Lead, we ensure every exterior component works in perfect harmony. We eliminate the risks associated with incorrect gutter installation by applying rigorous engineering standards to every project. Every installation we perform is backed by our 10-year craftsmanship warranty, giving you the long-term stability you deserve from a locally owned expert. Protect your home with a professional gutter audit from Home Run Improvement Take the first step toward a drier, safer home today. We're ready to help you safeguard your property for decades to come. Frequently Asked Questions What are the first signs of incorrect gutter installation? Common red flags include water overflowing during moderate rain, visible sagging, or gaps between the gutter and the fascia board. In Louisville, look for "tiger striping" on the gutter's face, which indicates consistent overflow. If you notice soil erosion or ruts in your landscaping directly below the roofline, it's a clear sign that the system isn't managing the water shed effectively. These early warnings often point to improper hanger spacing or sizing errors. Can incorrectly installed gutters cause foundation cracks? Yes, improper drainage is a leading cause of structural foundation failure. When an incorrect gutter installation allows water to pool at the base of your home, it saturates the soil and creates hydrostatic pressure against basement walls. Over time, this pressure forces the walls to shift or crack. Ensuring your downspouts discharge water at least five feet away from the foundation is the standard defense against these costly structural repairs. How much slope should a gutter have per foot? A professional grade gutter system requires a slope of roughly 1/4 inch for every 10 feet of horizontal run. While a perfectly level gutter might look aesthetically pleasing against your home's roofline, it's functionally useless. Without this precise pitch, water remains stagnant, inviting rust and mosquitoes. We use laser levels to ensure this angle is consistent across the entire run for maximum hydraulic efficiency and debris removal. Is it normal for gutters to have a small amount of standing water? No, gutters should be completely dry within a few hours after the rain stops. If you see standing water, it's a definitive sign of an incorrect gutter installation or a significant clog. Stagnant water adds immense weight to the system, causing hangers to pull loose from the fascia. In the Louisville climate, this water will freeze during winter, leading to heavy ice dams that can damage your shingles and siding. Can I fix the pitch of my gutters myself? DIY re-pitching is rarely a permanent solution because it doesn't address structural fatigue in the metal or the underlying fascia. Most homeowners lack the specialized stand-offs and laser tools needed to calibrate a precise slope over a long distance. If the hangers were originally spaced too far apart, simply moving them won't stop the sagging. A professional audit ensures the entire system is structurally sound and avoids further damage. Why is water leaking behind my gutters instead of into them? This usually happens when the gutter is installed without a proper drip edge or is placed too low on the fascia board. Water follows the curve of the roof, and surface tension pulls it behind the gutter channel. This leads to silent rot in your fascia and can eventually damage your siding investment. A correct installation ensures the gutter is tucked up under the roof's edge to catch every drop of runoff. How many downspouts does a standard house need? The general rule is one 3x4-inch downspout for every 30 to 40 feet of guttering. However, the complexity of your roof's surface area and the intensity of local rainfall dictate the final count. In Louisville, where microburst storms are common, we often recommend additional downspouts to prevent the system from becoming overwhelmed. Proper placement is just as important as the total number to ensure water moves away from the foundation. Does a new roof include new gutter installation? Not necessarily, as gutters are technically a separate system from the roofing deck and shingles. However, as an Owens Corning Preferred Contractor, we strongly recommend evaluating your gutters during a roof replacement. If you install a high-performance roof but keep a failing gutter system, you risk water backing up under your new shingles. We provide integrated solutions to ensure your entire building envelope remains protected under our 10-year craftsmanship warranty.
Every fall, thousands of homeowners discover too late that their roof was nowhere near ready for winter. Roof repair and replacement cost value totaled nearly $31 billion in 2024, up nearly 30 percent since 2022, and a significant portion of that spending could have been avoided with a simple pre-season checkup. A free roof inspection before the cold arrives takes less than two hours, costs you nothing out of pocket, and can be the difference between a $200 repair and a $20,000 crisis. The question for most homeowners is whether these inspections are genuinely useful or just a sales opportunity for roofing contractors. The honest answer is: both can be true, and this guide will help you tell them apart. Key Takeaways Roofs deteriorate faster than most people realize: Around 29 percent of U.S . homes with asphalt shingles have less than four years of remaining useful roof life, and roofs nearing that point can sustain 50 percent more damage during severe weather compared to roofs with eight or more years of life remaining. If you have not had an inspection in several years, schedule one before the first hard frost. The timing window matters: Most roofing professionals recommend an inspection once a year, ideally in the fall before winter weather sets in, and again after any major wind or hail event. Fall gives you the best chance to find and fix problems while temperatures are still workable. Small repairs prevent catastrophic costs: Minor shingle repairs caught early run $150 to $400; ignored damage escalates to $1,200 to $3,500 in roof decking rot or $8,000 to $18,000 in full replacement. A free inspection that catches even one minor issue pays for itself many times over. A credible inspection ends with paperwork: A credible free inspection ends with documentation, not just a conversation. Homeowners should expect photo documentation of slopes, penetrations, and any identified issues as part of a written report. That report becomes your reference point for repair estimates, insurance conversations, and future maintenance planning. Age determines your urgency: Use this general reassessment timeline for an asphalt shingle roof: years 0 to 10 carry minimal concern unless storm damage occurs; years 12 to 15 warrant an inspection every two to three years; years 15 to 20 are the lifecycle reassessment window; and at 20-plus years, annual inspection is recommended. Quick-Start Prioritization Framework Start here if you're: A homeowner with a roof over 15 years old: Schedule a professional free inspection before mid-October. A roof that is 15 to 20 years old or older should be professionally inspected before each winter season. Seeing any interior warning signs: Ceiling stains, attic condensation, or unusually high heating bills all point to roof issues. Act before freezing temperatures lock in the damage. Unsure of your roof's age: A licensed contractor can estimate age from shingle type and wear patterns during a free inspection, that knowledge alone guides every other decision you make. What a Free Roof Inspection Actually Covers Many homeowners assume a free inspection is a quick glance from the driveway. A legitimate inspection covers considerably more ground than that. The Five-Zone Checklist Professionals Follow A standard free roof inspection covers five to seven components, including shingles, flashing, gutters, attic ventilation, and structural decking, and typically takes 45 to 90 minutes to complete on a residential roof. That is not a superficial drive-by; it is a systematic review of every system that keeps water out of your home. The exterior check covers shingle condition, flashing integrity around chimneys and vents, gutter attachment and drainage, and the overall roofline for sagging. This includes areas around chimneys, plumbing vents, skylights, and roof valleys. Flashing that is rusted, bent, separated, or missing sealant can let water in long before you notice a ceiling stain. The attic check is equally important. Exterior and attic checks together detect hidden leaks and structural issues that a surface-only visual pass would miss entirely. Pro Tip: When your inspector finishes, ask them to walk you through the photos on the spot and explain which findings are urgent versus which can be monitored over the next season. Most roofing professionals photos when possible and explain what is urgent versus what can be monitored. A cracked vent boot and a rotted section of decking are not the same kind of problem, and they should not get the same kind of quote. Free vs. Paid: Is There a Real Difference? Many homeowners wonder if a free roof inspection differs from a paid roof inspection. The answer depends on the roofing contractor you choose. Some roofing companies offer visual inspection, while others may include infrared or drone roof inspections. For most residential homes, a thorough visual inspection with attic access is sufficient to identify the issues that matter most heading into winter. In terms of what you should receive at the end, the standard is clear. Once a contractor has completed an inspection, they should provide you with a full report and allow you time to make your own informed decision about any repairs they recommend. The report should include photos and descriptions of any damage. If a contractor finishes and simply tells you verbally that "everything looks fine" with no documentation, that is a flag worth noting. The Real Cost of Skipping a Pre-Winter Inspection Numbers make this concrete. The national average for a paid inspection sits at $331, and that inspection can prevent a single roof leak that might cause $3,000 to $15,000 in water damage to your ceiling, walls, flooring, and belongings. When you factor in potential mold remediation costs, which can easily exceed $10,000, the return on investment becomes even more dramatic. When the inspection is free, the math becomes even simpler. Ice Dams: Winter's Hidden Budget Killer One of the most expensive winter roof problems is one many homeowners have never heard of until they are already dealing with it. Ice dams appear when snow melts on the warmer sections of your roof and then refreezes at the colder edges. This process creates a barrier of ice that prevents proper drainage, causing water to pool behind it. The trapped water often finds its way under shingles and into the home, leading to serious structural damage and expensive repairs. The average ice dam removal cost is $1,200, but homeowners might spend between $400 and $4,000. Several factors that affect the cost include the size of the house or its roofline, the removal method, local labor rates, snow removal, or any additional inspections or roof repairs. That figure does not include the downstream water damage and mold remediation. A pre-winter inspection that identifies poor attic ventilation, the root cause of most ice dams, can prevent that entire scenario from developing. The Insurance Dimension Roofs in moderate to poor condition have 60 percent higher loss costs than those in good or excellent condition, and 38 percent of homes in the U.S. have roofs that are in moderate to poor condition. That statistic matters to your insurer as much as it matters to you. Insurers are increasingly scrutinizing roof age and condition at renewal time, and a well-documented inspection report gives you defensible evidence of your roof's status. Warning Signs You Should Not Ignore Before Booking You do not need to climb onto your roof to know whether an inspection is overdue. Several warning signs are visible from the ground or from inside your home. What to Look for From the Ground A handful of warning signs mean your home needs a roof inspection before the first snow rather than waiting for your regular annual check: curling or missing shingles, granules collecting in gutters, water stains on ceilings, daylight in the attic, and a sagging roofline. Any single one of these is enough to make the call. If you see small, sand-like particles collecting in your gutters, that may be a sign your shingles are wearing down. These granules protect shingles from UV exposure and weather damage. Once they begin wearing away, the shingles themselves deteriorate much faster. This is one of the most commonly missed signals because it requires actually looking into the gutters rather than just scanning the roof surface. What to Look for Inside Your Home Yellow or brown stains on ceilings, especially near exterior walls or around chimneys, almost always point to water finding its way past your roofing system. By the time a stain is visible inside your home, water has typically been getting through for a while, the stain is a symptom of an issue that has been developing, not a sudden event. Increased energy bills may also indicate roof performance problems affecting home efficiency. Poor ventilation, inadequate insulation, or air leaks around roof penetrations can significantly impact heating and cooling costs. If your heating bills jumped last winter without an obvious explanation, your roof's ventilation system is worth having checked. Pro Tip: Before your inspector arrives, do a quick attic walkthrough with a flashlight during daylight hours. Look for any spots where you can see light coming through the roof decking. Attic spaces are often dim even during the day, and a bright flashlight makes it much easier to spot moisture stains or daylight gaps. This takes five minutes and gives you useful context for the professional's report. Before you book anything, this news segment breaks down how unsolicited free inspection offers can be the opening move in a costly scam. How to Choose a Trustworthy Contractor for Your Free Inspection The value of a free inspection depends entirely on who is conducting it. Knowing what separates a legitimate contractor from an opportunist is worth understanding before you make a call. Green Lights: What a Good Contractor Does Reputable roofing contractors are licensed, insured, and willing to prove it before they set foot on your property. You can ask the contractor to show their credentials. A reputable roofing professional should be more than happy to provide their licensure and proof of insurance. A reputable contractor will provide their findings in writing and allow you to review the information before making a decision. They will also give you time to think, gather other estimates, and ask follow-up questions. Quality contractors will be patient, respectful, and willing to answer your questions. Red Flags: When to Walk Away Unsolicited door-to-door visits are the biggest warning sign. Pressure to decide immediately means they do not want you researching them. Established contractors earn their work through reputation and referral; they do not need to canvass neighborhoods. Red flag answers include being vague about license or insurance, rushing through in under 20 minutes, pressure for immediate decisions, refusing written reports, and finding "emergency" damage on newer roofs. If any of these come up during your interaction, end the appointment and start fresh with a different company. Pro Tip: Before scheduling with any contractor, verify their license through your state's licensing board website and check Google reviews for patterns, not just the overall rating. A company with 50 reviews over three years and consistent responses from ownership is a far safer choice than one with 200 reviews and zero engagement. What Happens After the Inspection The inspection report is the beginning of the process, not the end. Understanding what to do with it makes the entire exercise productive. Reading Your Report Honestly The person inspecting your roof works for a company that profits from repairs. That does not make the inspection dishonest, but it does mean you should read the report critically and get a second opinion on any major findings before committing to significant work. This is especially true for any recommendation involving full roof replacement. For minor repairs, acting quickly is the right move. Even small leaks can lead to big problems in winter. Water inside your roof structure can freeze, expand, and create larger gaps. This worsens leaks and could damage insulation, ceilings, and even your home's framing. A cracked flashing seal repaired in October is a $200 job. The same issue ignored through a hard winter can easily become a structural problem requiring far more than that to fix. Using the Report for Insurance and Planning Attic spaces are often dim even useful evidence if storm damage needs to be reported. Store your inspection report, including all photos, in a folder you can access quickly. If a winter storm causes damage, having a pre-storm baseline report can significantly strengthen an insurance claim by demonstrating the roof's condition before the event. Teams like Home Run Improvement document their findings thoroughly and walk homeowners through the repair priority levels so there are no surprises between the inspection and any follow-up work. Frequently Asked Questions How long does a free roof inspection take? A standard free roof inspection covers five to seven components and typically takes 45 to 90 minutes to complete on a residential roof. Larger or more complex rooflines, or roofs with multiple penetrations and features, may take slightly longer. A thorough inspector will not rush this process. Will I be pressured to buy repairs after a free inspection? A reputable contractor will not pressure you. A contractor who pressures you to sign a contract on the spot, especially after a storm, is a red flag. Legitimate roofing companies give you time to review estimates, ask questions, and make an informed decision. If you feel pressured, you are free to thank the inspector, take the report, and get additional opinions before committing to anything. What does my roof's age mean for a winter inspection? Most asphalt shingle roofs should be replaced every 15 to 30 years, depending on the shingle type and your climate. Three-tab shingles generally need replacement around the 15 to 20 year mark, while architectural shingles can often go 25 to 30 years with proper maintenance. If your roof is approaching or past these thresholds, a pre-winter inspection is not optional; it is essential. Owens Corning advises that most asphalt shingle roofs last between 15 and 30 years, and it is critical to start planning for replacement once your roof hits the 20-year mark, even if problems are not yet visible. Can a roof inspection actually be done safely in cold weather? Yes, you can inspect a roof in winter. Even with snow or low temperatures, experienced contractors use tools like drones, ladders, and attic access to safely assess roof conditions. A winter inspection is often more revealing because cold weather exposes issues that go unnoticed in summer. That said, fall, before the first significant snowfall, remains the ideal window because it gives you maximum time to schedule and complete any repairs. How often should I get a roof inspection if everything looks fine? Most professionals recommend a roof inspection at least once a year. The best time to inspect a roof is not only when you suspect damage. A quick review in the spring and fall helps you stay ahead of age-related wear, flashing issues, and drainage problems. Think of it like a dental checkup, regular maintenance is far cheaper than emergency treatment. The Bottom Line A free roof inspection before winter is one of the smartest, lowest-effort home protection steps available to any homeowner. The inspection itself costs nothing. The knowledge it gives you, about your roof's condition, its remaining life, and any repairs needed before the cold hits, is worth considerably more than the cost of any single repair it might uncover. The only real risk is booking with someone who lacks the credentials and documentation practices of a legitimate contractor. Verify licensure, expect a written report with photos, and take time to review the findings before committing to any work. Done right, a pre-winter roof inspection gives you exactly what every homeowner wants heading into the coldest months: clarity and confidence. If you are ready to get a professional set of eyes on your roof before winter, Home Run Improvement offers thorough pre-season inspections with documented findings and no-pressure recommendations. Book before the fall rush to ensure you have time to address any repairs while weather and contractor availability are still on your side. Sources U.S. Roof Claims Costs Reached Over $30 Billion In 2024 , Verisk Analytics. Industry data on roof claim volume and condition of U.S. roofs. https://www.verisk.com/company/newsroom/u.s.-roof-claims-costs-reached-over-$30-billion-in-2024-underscoring-evolving-risks/ Roof Claim Costs Increased 30% from 2022 to 2024 , IA Magazine. Summary of Verisk roofing trends report. https://www.iamagazine.com/news/roof-claim-costs-increased-30-from-2022-to-2024/ What Does Free Roof Inspection Mean for Homeowners , Elevated Roofing and Siding. Guide to free inspection process and documentation expectations. https://elevatedroofingandsiding.com/what-does-free-roof-inspection-mean-for-homeowners/ What Is a Free Roof Inspection and What Does It Include , Paramount Building Inc. Component checklist and timing guidance for Detroit homeowners. https://paramountbuildinginc.com/blogs/free-roof-inspection/ What We Look for During a Free Roof Inspection , Southwest Roofing MI. Inspection frequency and seasonal timing recommendations. Most roofing professionals What Is a Roof Inspection Worth? A Homeowner's Guide to Value , Como Exteriors. Cost-benefit analysis of inspections vs. repair and replacement costs. https://comoexteriors.com/what-is-a-roof-inspection-worth-a-homeowners-guide-columbia-mo/ Roof Inspection Before the First Snow: Warning Signs , Roof Crafters West. Visual warning signs checklist for pre-winter preparation. A handful of warning signs mean How Much Does Ice Dam Removal Cost? , Yahoo Lifestyle / HomeAdvisor data. National cost averages for ice dam removal and related repairs. For additional cost averages for ice dam removal and related repairs, ice dam removal costs average $1,200, with most homeowners spending between $650 and $2,400. Free Roof Inspections: Legit or Scam? , RoofQuotes. Red flag checklist and contractor vetting guidance. https://roofquotes.com/blog/free-roof-inspection-legitimate-or-scam Choosing a Roofing Contractor: 7 Red Flags to Watch For , Southwest Exteriors. Signs of legitimate vs. predatory contractor behavior. https://www.southwestexteriors.com/blog/2025/april/choosing-a-roofing-contractor-7-red-flags-to-wat/ How Long Do Shingle Roofs Last? , Home Genius Exteriors. Owens Corning guidance on asphalt roof lifespan and replacement planning. https://homegeniusexteriors.com/genius-blog/how-long-do-shingle-roofs-last/ Complete Roof Inspection Checklist Guide for Homeowners , Classic Midwest. Seasonal inspection scheduling and documentation best practices. Attic spaces are often dim even Signs Your Roof Was Damaged by Snow and Ice , Star Roofing. Age-based inspection urgency and winter damage identification. https://starroofing.net/residential/signs-your-roof-was-damaged-by-snow-and-ice/ Roofing Facts and Statistics 2025 , This Old House. Hail damage cost data and general roof maintenance guidance. https://www.thisoldhouse.com/roofing/roofing-facts-and-statistics
How many times have you stood at the top of a swaying ladder, pulling handfuls of wet sludge from a gutter, and wondered if one slip could change your life? It's a seasonal burden that every local homeowner understands, yet the alternative is even worse. When gutters fail, the resulting basement moisture and rotting fascia boards lead to structural damage that costs thousands to repair. If you want to protect your property and your physical safety, professional gutter guard installation Louisville is the strategic solution that ends the cycle of manual cleaning for good. We know you value the integrity of your home's exterior. This guide explains how the right protection system manages Louisville's average annual rainfall of nearly 50 inches while keeping you firmly on the ground. You'll discover how to choose a system that complies with the 2018 Kentucky Residential Code and preserves your manufacturer warranties. We will preview the best materials for our local tree-lined neighborhoods and explain why a 10-year craftsmanship warranty is the hallmark of a truly permanent exterior protection plan. Key Takeaways Identify the specific debris threats posed by local Oak and Maple trees and learn why specialized filtration is required to keep them out of your system. Compare micro-mesh technology against surface tension designs to decide which gutter guard installation Louisville residents can rely on during intense seasonal storms. Discover how professional calibration of your gutter's pitch prevents water backup that could otherwise compromise your home’s foundation and fascia boards. Understand the synergy between gutter protection and your exterior envelope, including how guards prevent backsplash damage to LP SmartSide siding. Recognize the importance of a 10-year craftsmanship warranty as a guarantee that your investment provides the long-term stability your property deserves. Why Gutter Guard Installation is a Necessity for Louisville Homeowners A Rain gutter system is your home's first line of defense against water intrusion, but it's only as effective as its ability to flow freely. Gutter guards are specialized filtration systems designed to divert water into the channel while blocking debris from entering. Without them, your home remains vulnerable to the unpredictable Kentucky climate and the constant threat of clogs. If you choose to ignore this vital component, then you're essentially inviting water damage to your most valuable asset. Investing in professional gutter guard installation Louisville is a calculated decision to protect your home's structural envelope from the ground up while providing a sense of long-term stability. Louisville Weather and Your Gutters Louisville homeowners face unique challenges from heavy spring rainfall that often overwhelms standard 5-inch and 6-inch gutters. While many people focus on autumn, the spring "helicopters" from local Oak and Maple trees are far more dangerous. These seeds form a dense paste that seals off downspouts during high-volume thunderstorms. High-performance Shurflo guards ensure water moves even when debris is heavy, which also helps prevent ice dams during Kentucky winters by keeping the drainage path clear of frozen obstructions. The Hidden Costs of Gutter Neglect If your gutters clog, then water overflows and destroys expensive landscaping or mulch beds. Louisville’s clay-heavy soil retains this moisture, leading to basement dampness and increased foundation pressure. Fascia rot is the primary result of gutter failure, occurring when stagnant water saturates the wood behind the gutter until it decays. Preventing these issues through professional gutter guard installation Louisville safeguards your home's value and prevents the need for costly structural remediation down the road. The economic reality is simple: preventing a single foundation repair or a basement waterproofing project pays for the entire installation of gutter guards. When you consider that foundation stabilization can cost tens of thousands of dollars, the upfront investment in protection becomes the only logical choice. Beyond the financial aspect, you must consider the physical risk. Ladder falls remain the leading cause of home maintenance injuries every year. By choosing a permanent solution, you eliminate the need to climb a swaying ladder during seasonal cleaning, providing your family with lasting security and neighborly peace of mind. Comparing Gutter Protection Systems: What Works Best in Kentucky? When you evaluate the options for your home, you'll find a market flooded with gimmicks and temporary fixes. Many homeowners are tempted by "helmet" style surface tension systems, but these often fail during the intense downpours common in the Ohio Valley . If the rain volume exceeds the system's surface tension capacity, water overshoots the gutter entirely. This creates a waterfall effect that erodes your foundation and destroys landscaping. Similarly, big-box plastic guards are a poor investment for Kentucky properties. The extreme humidity and summer heat cause vinyl to warp and crack, rendering the protection useless within a few short seasons. Micro-Mesh vs. Perforated Aluminum Micro-mesh technology is widely considered the gold standard for comprehensive filtration. It effectively blocks the smallest debris, including pine needles and shingle grit, which can accumulate and form a sludge in traditional screen guards. If you want a system that remains invisible from the street, then low-profile aluminum designs like Shurflo are the superior choice. Unlike bulky covers, these systems maintain your home's curb appeal while providing high-tensile strength. Shurflo professional-grade aluminum guards are engineered to withstand heavy snow loads and high winds, offering a level of resilience that plastic alternatives simply cannot match. Key benefits of these systems include: Total exclusion of microscopic debris and shingle grit. High-volume water handling during seasonal flash floods. Structural resistance to UV damage and thermal expansion. Why Professional-Grade Guards Outperform DIY Kits The primary flaw in DIY kits is the "gap" problem. These generic systems don't account for the specific corners, miters, or end caps of your unique gutter run. This leaves entry points for wasps, birds, and small debris to bypass the guard entirely. When you choose professional gutter guard installation , every piece is custom-fitted and secured with stainless steel screws rather than unstable plastic snaps. This structural security ensures the guards won't blow off during a storm or sag under the weight of wet leaves. According to Kentucky Climate Center data, our region's weather patterns demand this level of durability. While the initial cost of a professional gutter guard installation Louisville is higher than a weekend DIY project, the long-term value is undeniable. You're investing in a system that lasts decades and protects your home's structural integrity. If you're tired of temporary fixes that fail when you need them most, then it is time to consult with an expert. You can request a professional evaluation to see which high-performance system fits your home’s specific needs. The Critical Role of Professional Installation in Water Damage Prevention Even the highest quality filtration system will fail if the underlying geometry of your drainage is incorrect. Many homeowners view gutter guards as a "set and forget" accessory, but the reality is that they are precision-engineered components that must be integrated with your home’s specific architecture. When you choose professional gutter guard installation Louisville, you are ensuring that the physics of water management work in your favor. If a system is installed without recalibrating the gutter's pitch, then water will pool and overflow regardless of how clean the guards remain. Our experts verify that every linear foot of your system maintains the proper slope to move water toward the downspouts at maximum velocity. Proper integration also safeguards your existing roofing in Louisville . As an Owens Corning Preferred Contractor, we understand the delicate relationship between the roof deck, the drip edge, and the gutter channel. Incorrectly mounted guards can force water backward under the shingles, leading to deck rot and voiding your roof warranty. We pay meticulous attention to transition points like roof valleys, miters, and end caps where water volume is highest. These areas require custom-fitted diverters to prevent "overshoot" during heavy Kentucky thunderstorms. The 7-Step Professional Assessment Our process begins long before the first fastener is driven. We follow a methodical sequence to ensure your home’s exterior remains a cohesive shield against the elements: Evaluate the roof pitch and shingle overhang to determine the optimal guard angle. Inspect the integrity of the fascia boards to ensure they can support the added weight of the system. Clear and flush the existing gutters and downspouts to provide a clean slate. Re-seal all leaking seams and joints with high-grade industrial sealant. Calibrate the gutter pitch for consistent water flow. Custom-fit the Shurflo guards to the exact dimensions of your eaves. Final water test to verify performance under load. Securing the System for High Winds Louisville weather is known for sudden storm fronts that bring high-velocity winds. If you rely on snap-in DIY guards, then you risk seeing your investment scattered across your lawn after the first major gust. We utilize heavy-duty stainless steel fasteners that bond the guard directly to the gutter and fascia. Professional fastening prevents fascia pull-away by distributing the weight of the system and water volume more evenly across the structural members of your home. This level of precision in gutter guard installation Louisville is why we confidently provide a 10-year craftsmanship warranty on every project we complete. How Gutter Guards Protect Your Owens Corning Roof and LP SmartSide Siding Your home's exterior is an interconnected shield. If one component fails, the others are quickly compromised. Professional gutter guard installation Louisville isn't just about the gutters themselves; it's about preserving the high-performance materials you've already invested in. There is a critical synergy between Owens Corning roofing and your drainage system. If gutters overflow, the water backs up under the shingle edges, leading to rot in the roof deck that no shingle can prevent. We ensure your drainage system works in harmony with your roof to move water away from your home's structure immediately. Improperly installed guards often lift the first course of shingles to create a mounting point. This is a catastrophic error. Lifting these shingles breaks the factory seal and can void your manufacturer warranty. As an Owens Corning Preferred Contractor, we ensure that guard brackets never interfere with the SureNail technology strip or the integrity of the drip edge. We maintain the original drainage plane so your roof performs exactly as engineered. If the installation is handled correctly, then your roof and gutters function as a single, unified defense against the elements. Protecting Your Siding Investment When gutters clog, the resulting "backsplash" sends a constant spray of water and debris against your LP SmartSide siding . While this material is exceptionally resilient, chronic moisture exposure can lead to staining and premature wear on the finish. Effective water management is also essential for maintaining the curb appeal of vinyl siding , which can develop unsightly algae streaks if water is allowed to cascade down the walls. By controlling runoff through professional gutter guard installation Louisville, you also protect your decking in Louisville and foundation from the rot caused by constant dripping and pooling at the house line. Roof Warranty Compliance Your roof warranty is a promise of long-term stability, but that promise depends on correct installation. If you choose an unqualified installer who compromises the shingle seal, then you are left unprotected when a leak occurs. Our status as an Owens Corning Preferred Contractor means we are trained to integrate accessories without damaging the roofing system. We back this expertise with our own 10-year craftsmanship warranty, providing a second layer of security that generic contractors simply cannot match. This integrated approach treats your home as a single, durable unit rather than a collection of separate parts. Protect your exterior investment with a professional gutter guard installation Why Home Run Improvement is Louisville’s Trusted Choice for Gutter Protection Choosing a contractor for your home's exterior is about more than finding the lowest bid; it's about finding a partner who understands the environmental demands of the Ohio Valley. Home Run Improvement is locally owned and operated, which means we live in the same neighborhoods we protect. We don't believe in the high-pressure sales tactics or the one-size-fits-all solutions used by national chains. If you want a gutter guard installation Louisville residents can depend on for decades, then you need a team that treats your property with the same care as their own. National chains often prioritize volume over precision, but we prioritize the long-term stability of your home. Our commitment to quality begins with the materials we select for every project. We specialize in Shurflo gutter guards and high-performance products like LP SmartSide because they represent the pinnacle of durability and resilience. When you choose our team, you aren't just getting a product; you're getting a comprehensive exterior protection plan. This commitment is backed by our 10-year warranty on craftsmanship. This isn't a hollow marketing claim; it's a mark of integrity that ensures we remain accountable for every fastener and miter we install on your property. Service Areas: From Anchorage to Bardstown Our team provides specialized exterior solutions across the entire metropolitan region. We understand the unique architectural styles and tree canopy challenges in Prospect and Indian Hills . Whether you need a system for a historic home or a modern build, we bring the same level of precision to Crestwood and Jeffersontown . Our service reach also extends across the river to serve our neighbors in Clarksville, IN and New Albany , ensuring that top-tier protection is accessible to homeowners throughout the Kentuckiana area. The Home Run Difference The "Protective Expert" approach means we identify potential pitfalls before they become expensive repairs. During your professional consultation, we don't just look at your gutters. We evaluate your entire exterior envelope to ensure your roof and siding are functioning as a unified shield. If we find issues with your fascia or shingle overhang, then we address them before the gutter guard installation Louisville begins. This methodical, integrity-driven process ensures your home remains a secure environment for your family. If you're ready to eliminate the risks of ladder falls and water damage, then it's time to work with a contractor who prioritizes your home's security. Contact Home Run Improvement for your free gutter guard estimate today.Secure Your Home’s Future with Permanent Protection Protecting your property requires a comprehensive strategy that goes beyond simple aesthetics. By choosing professional gutter guard installation Louisville, you're investing in the long-term resilience of your home's structural envelope. You've learned how high-performance filtration prevents foundation erosion and eliminates the physical risks associated with seasonal ladder use. According to the National Safety Council, falls are a leading cause of preventable injury; a permanent solution keeps you safely on the ground.As an Owens Corning Preferred Contractor with a consistent record of 5-star Google reviews, we take personal responsibility for every detail of your project. Our 10-year craftsmanship warranty serves as a mark of integrity, ensuring your investment remains secure through every Kentucky storm. When you choose a partner dedicated to accountability and local pride, you gain more than just clean gutters. You gain the confidence that your home is prepared for whatever the Louisville weather brings.Schedule Your Free Gutter Guard Estimate in Louisville It's time to step off the ladder and let our experts handle your exterior protection. We look forward to helping you safeguard your property and providing the neighborly reassurance you deserve. Frequently Asked Questions Are gutter guards really worth it for Louisville homes? Yes, they are a strategic investment for any local property owner. Louisville receives an average of 49.1 inches of rain annually, which places immense pressure on your home's foundation and siding. If you don't have protection, then you risk basement flooding and fascia rot. A professional gutter guard installation Louisville residents trust eliminates the dangerous chore of ladder climbing and safeguards your home’s structural integrity for the long term. Will gutter guards damage my Owens Corning roof shingles? No, your shingles will remain protected if the installation is handled correctly. As an Owens Corning Preferred Contractor, we understand how to integrate guards without disturbing the SureNail technology strip or lifting the first course of shingles. If an amateur installer lifts those shingles, then they break the factory seal and potentially void your manufacturer warranty. We use mounting methods that maintain the drip edge integrity while providing a 10-year craftsmanship warranty. Do gutter guards work with heavy Louisville rainstorms? High-performance systems like Shurflo are specifically engineered to manage the high-volume thunderstorms common in the Ohio Valley. While helmet style systems often fail because water overshoots the channel during heavy downpours, perforated aluminum guards allow water to enter the gutter immediately. If you choose a system calibrated to your roof's pitch, then you won't have to worry about water cascading over the edge and eroding your expensive landscaping or mulch beds. Can birds or squirrels get inside the gutter guards? Professional-grade guards act as a physical barrier that prevents pests from nesting in your drainage system. Unlike DIY plastic screens that can be chewed through or pushed aside, our aluminum guards are secured with heavy-duty fasteners. If you have a system that is custom-fitted to your miters and end caps, then there are no entry points for birds, squirrels, or wasps to bypass the protection. This keeps your gutters clear and your attic space secure. How much does professional gutter guard installation cost in Kentucky? The total investment depends on your home’s linear footage, the complexity of your roofline, and the specific material you choose. We provide project-based pricing that accounts for professional labor and high-quality procurement. If you want an accurate figure for your property, then we recommend scheduling a free estimate. This allows us to inspect your current gutters and fascia boards to ensure the sub-structure is sound before we begin any work on your home. Do I still have to clean my gutters if I have guards installed? While guards drastically reduce the frequency of maintenance, they are not entirely maintenance-free. You will no longer need to scoop wet sludge or clear downspout clogs, but you should periodically check for shingle grit or fine debris sitting on top of the guards. If you notice an accumulation, then a simple brushing from the ground is usually sufficient. This small step ensures your gutter guard installation Louisville continues to perform at peak efficiency during Kentucky’s wettest seasons. What is the best gutter guard for homes with lots of Oak trees? Micro-mesh or perforated aluminum systems like Shurflo are the most effective options for homes near Oak and Maple trees. These trees drop helicopters and tassels that easily clog traditional screens or surface tension covers. If you use a fine filtration system, then even the smallest organic matter is blocked from entering the channel. This prevents the debris from forming a heavy paste that would otherwise stop water flow and lead to expensive fascia repairs. How long does a professional gutter guard installation take? Most residential projects are completed within a single day. The exact timeline depends on the linear footage of your home and whether your existing gutters require cleaning or repairs before the guards are mounted. We follow a methodical 7-step process that includes flushing the system to ensure a clean slate. If your project has complex roof valleys or requires custom miter work, then we take the necessary time to ensure every fastener is perfect.
Bathrooms sell homes. That single sentence has driven billions of dollars in renovation spending, and the debate at the center of it all keeps coming back to the same fixture face-off: walk-in shower vs tub. Should you rip out that rarely-used tub and replace it with a sleek, glass-enclosed shower, or does keeping the tub protect your asking price? The answer depends on a handful of factors your home already has in place. Bathrooms remain one of the most influential spaces when it comes to resale value, and the fixtures you choose can directly impact buyer appeal, with real estate professionals and National Association of Realtors guidance consistently noting that at least one bathtub in a home supports broad resale value. At the same time, walk-in showers have become the default in new construction and high-end remodels because they solve real problems. This guide cuts through the noise so you can make a decision backed by data, not guesswork. Key Takeaways Walk-in showers win in the primary bath, when a tub exists elsewhere: A tub-to-walk-in-shower conversion adds resale value only when the home has at least one other bathtub, with mid-range conversions returning 60 to 74% ROI and adding roughly $1,350 to $2,220 on a $3,000 project. If your ROI falls below 60%, revisit your materials and labor budget. Zillow data favors showers, by a measurable margin: Walk-in showers return $1.71 for every dollar spent, and homes with one sell for about $1,583 more on average than comparable homes without. Use that figure as your floor, if your renovation costs more per dollar returned, simplify the design. Removing your only tub is the riskiest move: Removing the only bathtub in a home can shrink your buyer pool by up to 40%. Before pulling that tub, confirm you have a second bathroom with one. Bathroom renovation demand is rising fast: Bathroom renovations are mentioned by 35% of Realtors as a project seeing increased demand, with updated primary baths becoming more of a must-have than a bonus. That demand signals opportunity, move now before your competition on the block does. The golden formula for 2026: The formula that works in 2026 is a walk-in shower in the primary bath paired with a tub in a secondary bathroom. Quick-Start Prioritization Framework Start here if you're: Selling in the next 1-2 years with a multi-bath home: Install a mid-range walk-in shower in the primary bath, keep a tub in a second bathroom to maximize ROI without shrinking your buyer pool. Planning to stay 5+ years: Prioritize what you use daily. A walk-in shower improves everyday comfort and sets up your home for a strong eventual sale. Uncertain about your local market: Call Home Run Improvement first, our team assesses your specific layout, neighborhood demographics, and budget to give you a data-backed recommendation before you spend a dollar. Walk-In Shower vs Tub: The Head-to-Head Breakdown Cost to Install, What You're Really Paying Cost is the first number most homeowners look at, and it varies more than people expect. Walk-in shower installation typically ranges from $4,000 to $20,000 nationwide, with an average cost of around $12,000. That wide range exists because materials make a huge difference: on average, homeowners spend between $3,500 and $15,000, with most projects falling around $7,000 to $10,000 for a mid-range installation, while basic prefab walk-in shower kits can start as low as $800 to $2,500 excluding labor. Bathtubs carry their own installation costs. The installation cost for bathtubs typically ranges from $1,200 to $5,000, depending on the tub type, plumbing changes, and labor, with standard acrylic tubs on the cheaper end and cast iron or whirlpool tubs at the higher end. The lesson here is clear: if you want the best ROI per dollar spent, choose mid-range materials for either fixture and avoid relocating plumbing when possible. Pro Tip: Upscale conversions using custom tile, relocated plumbing, and luxury fixtures tend to drop to around 45% ROI, the spend goes up, the percentage recovered goes down. Mid-range materials hit the sweet spot: modern, clean, durable, and priced so the numbers still make sense at resale. Resale Value, The Numbers Side by Side This is the section most homeowners come for, and the data tells a nuanced story. Return on investment comparisons show near-identical returns overall (70.6% for showers vs. 70.1% for tubs), but Zillow's Home Value Index shows luxury showers with spa features can add a 29% premium for "spa-like" listings. That spa premium is the prize worth chasing, and it requires quality execution, not just any shower. NAR's 2025 Remodeling Impact Report found increased buyer demand for bathroom renovations and estimated that bathroom renovation projects recovered about half their cost at resale on average, meaning a bathroom renovation may improve condition and buyer appeal, but it does not guarantee full cost recovery. Therefore, if you're renovating primarily for resale, keep the scope targeted and mid-range rather than going full custom. Buyer Demographics, Who's Looking at Your Home The core difference for resale value lies in functionality versus aesthetics. While a walk-in shower often looks more luxurious and makes a small bathroom feel larger, a bathtub provides essential utility for families with children or pets. Your neighborhood's typical buyer profile is one of the strongest factors in determining whether a bathtub boosts resale value. In family-friendly communities where families with young children are the primary buyers, a bathtub is often expected, parents typically need a tub for bathing kids, so removing the only one could become a drawback. On the other side, in condos, city homes, or neighborhoods that attract younger professionals, a spacious shower can sometimes be more appealing than a bathtub. In my experience working on bathroom remodels across a range of home types, the single most important question to answer before touching either fixture is: who is most likely to buy this home in three to five years? The Case for a Walk-In Shower Modern Appeal and Market Demand Over the past decade, the walk-in shower has become one of the most requested bathroom upgrades. Homeowners love the clean lines, open feel, and modern aesthetic, and in primary bathrooms especially, a spacious walk-in shower with glass panels and thoughtful tile design often feels more luxurious than a traditional tub-shower combo. According to the 2025 Houzz Bathroom Trends Study, 3 in 5 homeowners are increasing the size of their primary bathroom shower during renovations, with a quarter expanding the shower space by more than 50%. That level of demand signals a clear market preference that only keeps growing, homeowners who act now position their primary bathroom ahead of the competition rather than catching up to it. Pros: Perceived as a luxury feature that increases listing appeal Frameless glass and quality tile signal a move-in-ready home Walk-in showers can increase home value and are particularly attractive to buyers looking for modern design and accessibility, offering a potential return of $1.71 for every dollar spent Easier to clean than a tub-shower combo Space-efficient in smaller bathrooms, glass panels open up the visual footprint Cons: A bathroom equipped solely with a walk-in shower and no tub is labeled a three-quarter bath, which might deter certain buyers such as families with young children who often prefer a full bath with a tub for versatility Installation costs, which can range from $1,000 to $15,000, must also be considered as they factor into the overall return on investment Custom designs can over-personalize the space and narrow buyer appeal Poor installation quality hurts value rather than helping it Accessibility and Aging in Place This is where walk-in showers truly separate themselves from tubs. According to CDC data on fall prevention for older adults, falls in the bathroom account for over 80% of non-fatal trauma-related hospital admissions among older adults, and a walk-in shower with grab bars, non-slip flooring, and proper maneuvering space directly addresses this risk. Traditional bathtubs require stepping over a high edge to enter and exit, which can become more difficult over time as mobility, balance, or joint comfort change. Bathrooms are also one of the most common places for slips and falls in the home. A walk-in shower removes that tall barrier, allowing for a low or even zero-threshold entry, and that simple design shift can make daily routines easier and safer while maintaining a comfortable and welcoming space. Pro Tip: Accessibility features like grab bars and slip-resistant floor options can add value to your home and broaden potential buyer appeal. Aesthetic appeal matters too, clean lines, a frameless enclosure, and cohesive finishes help the space feel premium. You get safety and style without sacrificing either. I've found that homeowners who add accessibility features during a shower conversion end up with a bathroom that appeals to a much wider age range of buyers, from young adults who appreciate the spa feel to older buyers who need the safety features. The Case for Keeping a Bathtub Protecting Your Buyer Pool Let's be honest about what removing your only tub actually costs. Because families represent one of the largest active buyer groups in most markets, removing the tub shrinks your pool of potential buyers with one decision. In many places, a bathroom without a tub is treated as a "three-quarter bath," which changes how the listing appears in search filters. A listing that disappears from buyer filter results never gets a showing, and that's a problem no amount of great tilework can fix. A bathtub's resale value case is strongest when the home has only one full bathroom or when the likely buyer is a family. In listings, "no tub" can become an objection for parents who bathe toddlers, wash pets, or want a flexible full bath. Pros: Maintains full bathroom classification in listing searches Appeals to families with young children and pet owners According to real estate professionals and NAR guidance, having at least one bathtub in a home continues to support broad resale value, with many buyers, especially families with young children, still expecting at least one functional tub Lower installation cost than a custom walk-in shower Freestanding soaking tubs can serve as luxury focal points in high-end markets Cons: High step-over threshold creates fall risk for older residents Large tubs consume floor space that could feel more open as a shower An outdated tub-shower combo can make the entire bathroom feel dated In a small bathroom, a tub can make the space feel cramped and outdated Low-use tubs may signal wasted space to buyers who shower exclusively Pro Tip: If you want the benefits of both fixtures, consider keeping a tub in a secondary bathroom and converting the primary bath to a walk-in shower. All buyers will be more attracted to a home with both a tub and a walk-in shower, and that combination maximizes your appeal across every buyer demographic. Common Mistakes That Kill Your ROI Over-Investing in the Wrong Bathroom After years of seeing bathroom remodels go sideways, the pattern is always the same: homeowners spend on the wrong room. Installing a $20,000 custom walk-in shower in a single-bathroom starter home rarely pays back. The walk-in shower vs tub ROI depends heavily on your home's existing layout, adding a walk-in shower to a primary bath yields high returns, but spending $8,000 to remove your home's only tub will likely result in a negative ROI when it comes time to sell. Choosing Style Over Execution The quality of your renovation matters more than the tub removal itself. A poorly installed walk-in shower with grout issues, inadequate waterproofing, or a cramped door swing signals deferred maintenance to buyers, the opposite of what you want. A high-quality walk-in shower with professional installation, good tile work, and modern fixtures can actually add value, especially in master bathrooms. Ignoring Local Market Signals While traditional advice suggests keeping at least one bathtub in a home to maintain its value, the modern housing market is more nuanced. The decision to replace a bathtub with a shower should be informed by the specific demographics of potential buyers in your area, as well as your personal needs and future plans for the home. A great contractor or a local real estate agent can give you this intelligence before you commit to a design. Before you commit to a walk-in tub, a healthcare professional breaks down the most common advertising claims to help you separate genuine accessibility benefits from marketing spin. Home Run Improvement: Best Overall for Walk-In Shower and Tub Conversions Editor's Pick, Best for Homeowners Who Want Maximum Resale Value Without Guesswork When you're making a bathroom decision that directly affects your home's market value, who you hire matters as much as what you install. Home Run Improvement brings together resale-minded remodeling expertise with transparent pricing and professional installation, a combination that protects your investment from the first design conversation through final sign-off. What sets Home Run Improvement apart for the walk-in shower vs tub decision is their consultative process. Rather than defaulting to one fixture over another, their team evaluates your home's number of bathrooms, your local buyer demographic, and your realistic budget before recommending a solution. That means you're not guessing whether your primary bath conversion will include enough value; you know before construction starts. For homeowners who want a mid-range walk-in shower that hits the sweet spot of modern appeal and strong ROI, or families who need a tub preserved strategically in a secondary bath, Home Run Improvement's bathroom remodeling services are built for exactly that kind of intentional, value-driven decision-making. Frequently Asked Questions Does removing a bathtub always lower home value? The short answer is no, removing a bathtub does not automatically devalue your home, but it can reduce buyer appeal in certain situations, especially if it's the only tub in the house. What matters most is how many bathrooms you have, who your likely buyers are, and the quality of the renovation. If you have two or more bathrooms and one retains a tub, a walk-in shower conversion in the primary bath typically adds value. How much does a walk-in shower cost compared to a bathtub? The national average cost of a walk-in shower installation is about $9,500, with most homeowners spending between $4,500 and $15,000 depending on size, materials, and labor. A standard bathtub installation is generally less expensive. The installation cost for bathtubs typically ranges from $1,200 to $5,000 depending on the tub type, plumbing changes, and labor. Staying with mid-range materials for either option produces the strongest resale returns. What is the ROI on a tub-to-shower conversion? A tub-to-walk-in-shower conversion returns 60 to 74% ROI and can add over $1,500 in resale value, but only if your home keeps at least one other bathtub. A mid-range conversion delivers between 60% and 74% ROI, and on a $3,000 project, homeowners typically recover $1,350 to $2,220 at resale. Custom conversions with relocated plumbing and luxury finishes see ROI drop to around 45%. Is a walk-in shower better for aging in place? Walk-in showers work well for aging in place, post-surgery recovery, or anyone with limited mobility who can still stand and walk. If you're aging in place, recovering from an injury, or managing mobility challenges, stepping over a traditional bathtub becomes a daily obstacle, and a properly designed walk-in shower with the right safety features restores dignity and confidence while preventing falls. Should I keep a tub if I have a two-bedroom home? A walk-in shower fits homeowners who plan to stay five years or longer, adults without young children, retirees, and sellers who already have another tub. It also fits smaller bathrooms where a glass shower makes the footprint feel less boxed in. A bathtub's resale value case is strongest when the home has only one full bathroom or when the likely buyer is a family. For a two-bedroom home marketed to families, keeping at least one tub is the safer call. The Verdict The walk-in shower vs tub debate does not have a universal winner; it has a context-dependent answer. Walk-in showers add more value in primary bathrooms of multi-bath homes, especially for homes targeting professionals, empty nesters, or luxury buyers. Bathtubs add more value when they represent the only tub in the house and your buyer pool includes families. The smartest move is the one that accounts for your home's specific layout, your local market, and your timeline. Before you commit to either, get a professional assessment from a remodeler who understands how bathroom decisions translate to actual dollars at closing. Home Run Improvement specializes in exactly that, helping homeowners make bathroom decisions that feel right to live in and pay off when it's time to sell. Sources Bathtubs vs. Shower, Resale Value 2026 , Badeloft USA. Analysis of walk-in shower vs. bathtub resale value considerations. https://www.badeloftusa.com/buying-guides/bathtubs-vs-shower-resale-value/ Walk-In Shower vs Bathtub for Home Resale Value , Tona USA. Head-to-head comparison of resale data and regional preferences. https://www.tonausa.com/blogs/blog/walk-in-shower-vs-bathtub-for-home-resale-value How Much Does a Walk-In Shower Cost? (2026 Pricing) , This Old House. National cost data for walk-in shower installations. https://www.thisoldhouse.com/bathrooms/walk-in-shower-cost 2025 Remodeling Impact Report , National Association of Realtors and NARI. Bathroom renovation demand, cost recovery, and Joy Score data. https://www.nar.realtor/newsroom/top-remodeling-projects-for-homeowner-satisfaction-and-cost-recovery-revealed-in-nar-report Walk-In Shower Accessibility Features: A 2026 Guide , TRC Home Improvements. CDC data on bathroom falls and walk-in shower safety features. https://www.trchomeimprovements.com/post/walk-in-shower-accessibility-features-a-2026-guide Does Removing a Bathtub Devalue Your Home? , Gill Construction. Practical breakdown of when tub removal hurts and when it helps. https://gillconstruction.com/does-removing-a-bathtub-devalue-your-home/ Walk-In Shower vs Bathtub: Which Adds More Home Value? , EZ Bath N Shower. NKBA research on bathroom remodels and buyer interest data. https://ezbathnshower.com/walk-in-shower-vs-bathtub-home-value/ Walk In Shower vs Tub Which Adds Value 2026 , Baltimore Chronicle. Regional and demographic breakdown of shower vs. tub resale decisions. https://baltimorechronicle.com/other/walk-in-shower-vs-tub-which-adds-value-2026/ Do You Need a Bathtub for Resale? What to Consider , Joyce Factory Direct. NAR 2025 cost recovery analysis and strategic tub-keeping guidance. https://www.joycefactorydirect.com/blog/do-you-really-need-a-bathtub-for-resale
What if the lowest bid you receive for your Louisville home remodel actually ends up being the most expensive mistake you ever make? It's a valid concern for homeowners in historic neighborhoods or growing suburbs who fear overpaying for subpar labor that won't survive a Kentucky storm. You've likely felt the anxiety of choosing between high end materials and budget friendly alternatives, wondering if the cheaper option will lead to rot or failure in just a few years. When you're trying to calculate the gutter replacement cost Louisville KY contractors are quoting this year, the price tag is only one part of the equation. If you choose based on the sticker price alone, you often sacrifice the durability that protects your home's foundation. We understand that your home is your most significant asset, and it deserves a level of precision that matches its value. This guide provides a transparent look at the real factors driving renovation costs in 2026, from the rising price of construction materials to the specialized labor required for older Louisville properties. You'll learn how to maximize your return on investment by prioritizing upgrades that offer both efficiency and aesthetic appeal. We will break down the variables for siding, roofing, and interior remodeling, ensuring you have the confidence to select materials and warranties that offer genuine, long term security for your family. Key Takeaways Learn how the Ohio Valley climate affects material longevity and why Louisville building codes impact your 2026 renovation budget. Discover how to evaluate the gutter replacement cost Louisville KY contractors quote by comparing initial expenses with long-term material resilience. Identify which interior projects, like kitchens and basements, offer the highest return on investment in the current local housing market. Understand the technical variables that drive up costs, including the importance of proper attic ventilation for preserving your roof's lifespan. Gain confidence in your contractor selection by prioritizing a 10-year craftsmanship warranty over the industry-standard 1-year coverage. Navigating Home Renovation Cost in Louisville KY: 2026 Market Overview Louisville homeowners face a unique set of variables in 2026. The local housing market remains competitive, which has shifted the focus from buying new properties to upgrading existing ones. Property owners realize that protecting their investment is non-negotiable. If you choose to renovate rather than relocate, you're making a strategic decision to build equity in an environment where inventory stays tight. However, success depends on understanding that local renovation costs aren't just about aesthetics; they're about long term resilience against our specific regional challenges. Our weather dictates the standards of the home improvement industry here. Between intense Ohio Valley humidity and unpredictable storm seasons, materials must be resilient. If you select cheap components, they'll likely fail before the decade is out. This is especially true when calculating the gutter replacement cost Louisville KY homeowners face; the price reflects the need for systems that can handle heavy rainfall without overflowing or sagging. Systems that fail during a Kentucky downpour can lead to foundation damage that costs thousands more than the initial installation. You must distinguish between cosmetic updates and structural necessities. While a fresh coat of paint or new hardware changes the look of a room, structural costs involve the integrity of your roof, siding, and drainage. Labor rates in Jefferson County trend differently than national averages because our regional architecture often requires specialized knowledge. When you hire a contractor, you aren't just paying for time. You're paying for an expert who understands how to seal a home against the damp Kentucky air. The Impact of Local Material Availability Proximity to regional suppliers affects your timeline and your budget. Sourcing from established manufacturers like Owens Corning ensures you get products engineered for the local climate. According to recent regional economic reports, material volatility remains a factor in 2026. When you choose a contractor with strong supplier relationships, you're securing a supply chain that keeps your project on schedule and avoids the delays common with smaller, unproven outfits. Budgeting for Older Louisville Homes Homes in established areas like Anchorage or Hurstbourne carry hidden complexities. These properties often hide outdated electrical systems, wood rot under old siding, or lead paint issues. If you start a project without a professional inspection, you risk mid-project budget spikes that can derail your finances. A thorough assessment acts as a protective shield, identifying structural weaknesses before the first hammer swings. Professional inspections prevent surprises and ensure your renovation remains a sound financial investment rather than a bottomless pit of repairs. Exterior Protection: Costs for Roofing, Siding, and Gutters Your home's exterior serves as its primary defense against the elements. If this protective envelope fails, the resulting water damage can compromise your entire structure. When evaluating the cost-to-value ratio of your renovation, you must prioritize durability over the lowest possible bid. Professional Roofing services in Louisville provide more than just a new look; they offer a safeguard for your property value. Doing your due diligence on your contractor's credentials is the most effective way of avoiding home improvement scams that often target unsuspecting homeowners after major storms. Roofing Performance and SureNail Technology If you choose Owens Corning shingles, you're gaining access to SureNail Technology. This features a tough, woven engineered reinforcing fabric in the nailing zone, which provides incredible gripping power. This is essential in the Ohio Valley, where high winds can easily strip away inferior shingles. These systems also carry a Class A fire resistance rating, the highest possible grade. This rating is based on the UL 790 standard, which measures a roof's ability to resist fire spread from external sources. Investing in high-performance roofing can often lead to lower home insurance premiums because you've significantly reduced the risk of catastrophic failure. Siding Options: From Vinyl to LP SmartSide Siding material choice is perhaps the largest variable in your exterior budget. If you choose traditional vinyl siding, you're selecting a versatile, low-maintenance option that performs well for many homeowners. However, when you choose LP SmartSide, you're upgrading to an engineered wood product designed to withstand hail and impact better than vinyl. To ensure this material performs as intended, you should work with an LP SmartSide Master Lead. This designation means the installer has undergone specialized training to handle the product's specific requirements. Professional Siding installation in Louisville ensures that your home remains sealed against the high humidity levels typical of our region. Gutter Systems and Foundation Protection A high-quality roof is useless if your drainage system fails. When calculating the gutter replacement cost Louisville KY homeowners should expect, it's vital to view it as foundation insurance. Seamless gutters are the industry standard because they eliminate the joints where leaks typically begin. If you want to prevent debris buildup and clogs, you should consider Shurflo gutter guards. These guards keep leaves out while allowing water to flow freely, protecting your basement from expensive flooding issues. You can explore our comprehensive Gutter services and guards to find a solution that fits your home's specific architecture. If you're ready to secure your home's exterior for the next decade, speak with a Louisville expert today . Transforming Your Interior: Kitchen, Bathroom, and Basement Estimates Interior remodeling represents a strategic shift in how you allocate your home's equity. Unlike exterior projects that focus on the protective envelope, interior work is heavily defined by a high labor-to-material ratio. When you remodel a kitchen or bathroom, you're paying for specialized trades like master plumbers and electricians who must work within the constraints of your existing structure. If you choose a design-build approach, you gain a single point of accountability that streamlines these trades and prevents the scheduling conflicts that often drive up costs with independent contractors. You must also account for construction material price trends , as the cost of cabinetry and stone surfaces can fluctuate based on regional supply chains. Homeowners often ask how interior budgets compare to exterior maintenance. While you might be focused on the gutter replacement cost Louisville KY companies quote to stop a basement leak, the actual cost to finish that basement into a living suite is a separate, more labor-intensive investment. Protecting your new interior always begins outside. If you ignore the gutter replacement cost Louisville KY experts recommend for proper drainage, you risk water seepage that can destroy new basement drywall and premium flooring before you even enjoy the space. Kitchen and Bathroom ROI in Kentucky The "Big Three" of interior work—kitchens, bathrooms, and basements—offer the most significant impact on your daily life and property value. In the Louisville market, Kitchen remodeling Louisville projects that prioritize functional layouts and durable quartz surfaces see the highest returns. For 2026, we see a move toward "aging-in-place" features. If you incorporate walk-in showers and wider doorways now, you're securing the home's long-term utility. You can find more details on these specific aesthetic and functional shifts in our guide to Modern Bathroom Remodeling Louisville . Basement Finishing: Maximizing Square Footage In neighborhoods like Crestwood , finishing a basement is the most efficient way to add square footage without changing the home's footprint. However, Louisville's geography requires strict moisture control. You cannot simply hang drywall and hope for the best. A professional Basement remodeling Louisville project must include vapor barriers and specialized flooring that can withstand the Ohio Valley's humidity. When you select materials designed for sub-grade environments, you're preventing the mold and rot issues that plague DIY attempts. High-quality basement finishing turns a dark storage area into a resilient living space that lasts for decades. Factors That Drive Renovation Costs Up in Louisville What if the most expensive part of your renovation is the mistake you didn't see coming? In the Louisville market, technical oversights often drive costs higher than material choices ever will. If you ignore the balance of your Net Free Ventilating Area (NFVA), you're essentially baking your shingles from the inside out. Improper ventilation traps heat and moisture in your attic, which leads to premature roof failure and increased energy bills. While you might be focused on the gutter replacement cost Louisville KY contractors provide, don't overlook how these hidden technical factors impact your long term investment. If your ventilation isn't balanced to meet local building codes, even the most expensive roofing materials won't last their intended lifespan. Material quality also plays a decisive role in your total expenditure. When you choose Class 4 impact resistant shingles, your upfront cost is higher than standard shingles. However, this investment acts as a protective shield against the hail storms common in the Ohio Valley. Many insurance providers offer premium discounts for homes with Class 4 ratings because the risk of a claim is significantly lower. If you opt for the cheapest materials now, you'll likely pay the difference through higher insurance premiums and more frequent repairs later. Structural Integrity and Code Compliance Adhering to the International Residential Code (IRC) is non-negotiable for any reputable contractor. Whether you're in Jefferson County or Southern Indiana, permitting requirements ensure your home remains safe and legal. For a deck installation in Louisville , joist spacing and proper blocking are critical to preventing structural sag. If a contractor suggests skipping permits to save money, they're asking you to assume all the legal and physical risk. Following ASTM and CSA standards for roofing and siding ensures that your home can withstand the mechanical stresses of our changing seasons. The Value of Professional Installation The hidden price of "low-bid" contractors often reveals itself through a lack of insurance and non-existent warranty support. If you choose a contractor based solely on the lowest quote, you're often sacrificing the security of a 10-year craftsmanship guarantee . As an Owens Corning Preferred Contractor, we provide access to better warranties that are only available through certified professionals. This certification ensures that the manufacturer's warranty remains valid because the installation meets their strict performance standards. Our locally owned roots in Louisville mean we're here to stand behind our work long after the project is finished. Contact us for a professional renovation estimate Securing Your Investment: Why Quality Installation Outlasts a Low Quote Choosing a contractor based solely on the lowest bid is often a recipe for long term financial regret. If you accept a quote that seems too good to be true, you're likely sacrificing the expertise and insurance coverage that protect your property. When you're analyzing the gutter replacement cost Louisville KY companies present to you, look beyond the immediate price tag. A low bid often comes with a standard 1-year warranty, which leaves you vulnerable the moment that twelve-month window closes. If a leak develops in year two, you're the one paying for the repair. In contrast, a 10-Year Craftsmanship Warranty acts as a firm commitment to quality, ensuring your home remains protected through a decade of Kentucky seasons. Quality isn't a luxury. It's a requirement for home stability. When you hire a master of their trade, you're paying for a methodical approach that identifies potential failures before they happen. A "Free Estimate" should be more than a single number scribbled on a notepad. It must be a comprehensive document that outlines material specifications, labor timelines, and safety protocols. You should always verify that your contractor follows the guidelines provided by the Better Business Bureau for hiring reputable professionals. This level of transparency is the only way to ensure you aren't hit with hidden fees once the demolition begins. Protecting Your Biggest Asset Before you sign a renovation contract, you must perform your own due diligence. Your home is your most significant asset, and it deserves a partner who treats it with respect. We recommend a final checklist for every Louisville homeowner: Verify active general liability and workers' compensation insurance. Confirm the contractor has a physical, local address in the Louisville area. Check for recent Home Improvement Testimonials from your specific neighborhood. Ensure the contract includes specific brand names for all materials used. We take pride in our deep local roots, serving homeowners in Glenview , Indian Hills , and Jeffersontown . When you choose a contractor with a proven local track record, you're choosing accountability. You don't have to worry about a "storm chaser" disappearing once the check clears. Next Steps for Your Louisville Home Scheduling a professional consultation is the first step toward a successful 2026 project. We provide a detailed assessment that explains the "why" behind every recommendation. If you're ready to move forward with confidence, we're here to provide the expert guidance you need. Don't settle for a contractor who views your home as just another job site. Choose a partner who invests in your property's future as much as you do. Contact Home Run Improvement for a Free Estimate Build Your Louisville Home’s Future with Confidence Your home is more than a structure; it's the primary foundation of your family's security. As we've explored, the 2026 Louisville market favors homeowners who invest in durability over the temporary savings of a low bid. If you prioritize high-performance systems like LP SmartSide or Owens Corning roofing, you're protecting your equity from the volatile Ohio Valley climate. When you evaluate the gutter replacement cost Louisville KY contractors are quoting, remember that professional installation is your primary defense against foundation failure. A cheap fix today often leads to a catastrophic expense tomorrow. Successful renovations rely on technical precision and local accountability. Choosing an LP SmartSide Master Lead and an Owens Corning Preferred Contractor ensures your project meets the highest industry standards. According to the National Association of Home Builders , quality improvements remain the most reliable way to increase property value in competitive markets. Our 10-Year Craftsmanship Warranty provides the peace of mind you deserve, shielding you from the risks of poor workmanship and ensuring your investment stands the test of time. Get Your Free Renovation Estimate Today You don't have to navigate these complex home investments alone. We're here to ensure your property remains a safe, beautiful, and valuable asset for years to come. Frequently Asked Questions What is the average home renovation cost per square foot in Louisville KY? Renovation costs in the Ohio Valley vary significantly based on whether the work is structural or cosmetic. While national averages exist, local labor rates in Jefferson County often reflect the specialized skills needed for historic home preservation. You should account for the fact that high-end interior projects generally carry a higher cost per square foot than exterior maintenance. For current market trends, you can consult the latest real estate market reports for the Louisville area. Does a new roof increase home value in the Louisville market? A new roof is one of the most reliable ways to boost property value and buyer confidence. If you install an Owens Corning system, you're providing a prospective buyer with a transferable warranty and proven wind resistance. In a competitive market like Indian Hills, a certified roof installation can be the difference between a quick sale and a failed inspection. It also lowers long term maintenance costs by preventing water intrusion and structural rot. How much does it cost to replace gutters in Louisville? Your total gutter replacement cost Louisville KY will depend on the linear footage of your roofline and the complexity of your home's architecture. Seamless aluminum systems are the standard for local protection because they minimize leak points. If you add Shurflo gutter guards, your upfront investment increases, but you'll save significantly on professional cleaning fees and foundation repairs over the next decade. Every project requires a custom assessment to ensure proper drainage and downspout placement. Is LP SmartSide siding worth the investment over vinyl? LP SmartSide offers superior impact resistance compared to traditional vinyl, making it a better choice for Kentucky's storm seasons. If you want a product that resists hail damage and retains its aesthetic appeal for decades, engineered wood is the professional recommendation. When you hire an LP SmartSide Master Lead, you're ensuring the installation follows strict manufacturer protocols. This maximizes the product's lifespan and protects your manufacturer warranty against claims of improper handling. What permits are required for a basement finishing project in Jefferson County? Most basement finishing projects in Jefferson County require multiple permits to ensure code compliance. You will typically need a building permit for structural changes, along with separate permits for electrical and plumbing upgrades. If you're converting a space into a bedroom, you must also meet specific egress requirements for safety. You can find detailed application guides on the Louisville Metro Construction Review website to begin your planning process. How do I know if a contractor is truly an Owens Corning Preferred partner? You can verify a contractor's status by visiting the official Owens Corning contractor locator tool. Truly preferred partners undergo rigorous screening for financial stability, professional licensing, and a history of quality work. If a contractor holds this status, they can offer extended warranties that include SureNail technology performance. This certification acts as a protective shield for the homeowner, guaranteeing that the roofing system is installed to precise manufacturer specifications. What is included in a 10-year craftsmanship warranty? Our 10-year craftsmanship warranty covers any issues resulting from the physical installation of your roofing, siding, or gutters. While many contractors only offer a standard 1-year guarantee, our extended coverage ensures we remain accountable for the long term performance of your home. If a leak or structural failure occurs due to workmanship within ten years, we take full responsibility for the correction. This commitment provides the security and peace of mind every Louisville homeowner deserves. Can I finance my home renovation in Louisville? Home Run Improvement does not provide in-house financing for our renovation projects. We recommend that homeowners explore external options such as Home Equity Lines of Credit (HELOC) or traditional home improvement loans through local financial institutions. Many homeowners in Crestwood and Jeffersontown find that comparing personal loan rates allows them to secure the best terms for their specific budget. Securing funding before the project begins ensures a smooth and uninterrupted timeline.
A deck is one of the smartest investments a Louisville homeowner can make, and one of the easiest to get wrong. Pick the right contractor and you end up with a structurally sound outdoor space that adds real resale value and years of daily enjoyment. Pick the wrong one and you could be dealing with sagging boards, permit violations, or a builder who disappears the moment the check clears. This guide cuts through the noise so you know exactly what to look for, what questions to ask, and what a fair deck cost in Louisville KY actually looks like in 2026. According to the 2025 Cost vs. Value Report , a wood deck addition recoups approximately 60.1% of its cost, while a composite deck addition returns approximately 83.8% through added home value. That means the deck you build today is working for you long after the last board is fastened. The question is making sure the right crew is doing the fastening. Key Takeaways Verify insurance and bonding before anything else: Working with a licensed contractor gives you opportunities for legal recourse if their work is unsatisfactory, and you should ask for a surety bond and get a copy before signing any contracts. In Kentucky, the state does not require a general builder's license, so this step is entirely on you. Deck cost in Louisville KY ranges widely by material: A deck in Louisville KY costs $25-$40 per square foot for pressure-treated pine, $35-$55 per square foot for cedar, and $45-$75 per square foot for Trex composite, installed, with a typical 12x16 deck running $4,800-$14,400 depending on material. Use these ranges as a benchmark when reviewing bids. Most decks in Louisville require a permit: Any deck attached to the house, or a freestanding deck over 200 square feet, requires a permit and site plan in Louisville. Any contractor who tells you otherwise is a red flag. Composite delivers superior long-term value in Kentucky's climate: Composite decking resists moisture and is less prone to rot, while wood can absorb water and may decay if not properly sealed and maintained, particularly in wet or humid climates. Louisville averages 46 inches of rain annually, making this distinction critical. Get at least three itemized bids: Some contractors make their bids appear lower by leaving out crucial parts of the process such as job site clean-up, landscaping, grading, or caulking, and they might use lower quality materials, trim detail, and railing. Make sure you're comparing apples to apples before going for a lower bid. Quick-Start Prioritization Framework Start here if you're: New to the process: Confirm your permit requirements first using the Louisville Metro Construction Review guide , then collect at least three bids. Focused on value and low maintenance: Prioritize composite deck builders who carry manufacturer certifications for brands like TimberTech or Trex. Working with a tight timeline: Book contractors in fall or winter. The fall and winter months are best for building or replacing a deck, as deck contractors are busiest in the spring and summer months, so fitting into your ideal builder's schedule during these seasons may not be possible. Understanding Deck Cost in Louisville KY What Does a Deck Cost in 2026? The most common question Louisville homeowners ask is: what does a deck cost? The honest answer is that the number depends on four variables: material choice, deck size, design complexity, and who you hire. The cost to build a wooden deck in Louisville, KY typically ranges from $1,737 to $3,475, including both materials and professional labor, for smaller projects. However, these figures represent entry-level builds. For a mid-sized attached deck, the numbers climb considerably. A deck in Louisville KY costs $25-$40 per square foot for pressure-treated pine, $35-$55 per square foot for cedar, and $45-$75 per square foot for Trex composite, installed. If your quotes are falling well below these floors, ask the contractor specifically what is and isn't included. Pro Tip: Ask every contractor to provide a line-item written estimate that separates labor, materials, permit fees, and cleanup. Vague lump-sum bids are the most common source of "surprise" charges once work begins. Hidden Cost Factors to Watch For Factors affecting the final price include project scope, material quality, local Louisville labor rates, site accessibility, and any necessary permits or inspections required by local building codes, and additional expenses may include site preparation, debris removal, and any structural modifications needed. If your yard is sloped, access is limited, or the existing structure needs to be demolished first, build these costs into your planning from day one. For specialty builds, the price premium is significant. Pool decks in Louisville average $11,150-$11,923, varying from $10,763 to $12,309 based on project specifics. That's a meaningful jump from a standard attached deck, so be sure you're getting quotes from contractors who specialize in the build type you actually need. How to Vet Deck Builders in Louisville KY Check Licensing, Insurance, and Bonding This is the non-negotiable starting point. One notable aspect of Kentucky's system is that the state does not require general contractors or home builders to hold a state license, meaning the person building your deck does not need a state-issued builder's license. That makes your due diligence even more important. Instead of relying on state licensing as a filter, you need to go deeper. The most crucial question you can ask is whether your deck builder is insured. Make sure you hire a contractor who carries general liability insurance for the sake of everyone involved, and get insurance proof from your contractor to confirm it covers everyone who will be working in your backyard. Workers' compensation coverage matters too, if someone is injured on your property without it, you could be liable. Evaluate Experience and Portfolio Understanding a local deck contractor's level of experience and expertise in deck building is essential, ask for references and check their portfolio to see a range of completed projects. In my experience, a contractor who hesitates to share past project photos or skips over local references is one worth passing on. Any builder worth hiring in Louisville will have completed projects in neighborhoods like St. Matthews, Anchorage, Jeffersontown, or the South End that you can actually go see. These are all standard questions that any legitimate company will be happy to answer. If you find yourself talking to a company that is hesitant to answer any of these, it may be a red flag that they have something to hide. Trust that instinct. Ask About Crew Structure and Subcontractors This one catches homeowners off guard. Many deck builders use subcontractors for framing, electrical, or concrete work, so ask who is physically on your property each day and get the answer in writing. Employee-based companies offer capacity, backup crews, and structured warranty support, while owner-operated builders offer direct access to the decision maker on site. Neither model is inherently better, but you need to know which you're hiring so your expectations match reality. Pro Tip: Ask specifically: "Will you or a crew member you directly manage be on-site every day?" If the answer is vague, follow up with "Who do I call if I have a concern mid-project?" A builder who can't answer both questions clearly isn't ready for your project. Louisville Permits and Local Building Requirements What Triggers a Permit in Louisville? If you're building or modifying a deck, the Louisville Metro Construction Review guide outlines the design standards, permit requirements, and inspection steps needed to ensure your project meets Louisville Metro's building codes. The basic rule is straightforward: there is a very limited deck exemption for residential decks under 200 square feet, not attached, less than 30 inches above grade, and not serving a required exit door. Everything else needs a permit. For the overwhelming majority of decks Louisville homeowners actually want to build, that means going through the permitting process. From a zoning perspective, decks must not encroach into any required property setbacks, and for more information homeowners should consult the Land Development Code available through Louisville Planning and Design Services. Why Your Contractor Should Handle Permitting I've found that the contractor who confidently says "we handle permits" is almost always more experienced than one who puts that task on the homeowner. Confirm they handle permitting before signing anything, and verify it's included in the bid. If a contractor suggests skipping the permit to save time or money, walk away. An unpermitted deck can create serious headaches when you sell, or worse, require demolition. In addition to meeting the Kentucky Building Code, projects in Louisville Metro may be subject to other local regulations. If your property is in a Preservation District or Overlay Zone, you'll need approval for any exterior changes before you can get a building permit. This applies to parts of the Highlands, Cherokee Triangle, and other historic Louisville neighborhoods. Wood vs. Composite: Choosing the Right Deck Material The True Cost Comparison The upfront sticker price for wood looks better. The 10-year total cost often tells a different story. Wood deck owners spend between $450 to $850 annually on maintenance, primarily on staining, sealing, and repairs, while composite deck maintenance costs only $5 to $15 per year, consisting mainly of occasional cleaning. Over a decade, that gap adds up to thousands of dollars, money you should factor into your material decision, not just the initial bid. The 25-year total cost of a wood deck is often higher once you add staining ($550-$1,250 every 2 years), sealing, board replacements, and the time invested. In Louisville's climate specifically, this matters. Louisville averages 46 inches of rain annually, snow accumulation through winter, real freeze-thaw cycling from November through March, and summer humidity exceeding 75%. Those conditions accelerate wood deterioration faster than in drier climates. Wood Pros: Lower upfront cost Natural grain appearance Easier to cut, modify, and repair individual boards Familiar to most contractors Wood Cons: Requires staining and sealing every 1-3 years Susceptible to moisture, rot, and insect damage in Louisville's humid climate Shorter overall lifespan than composite Annual maintenance costs of $450-$850 Composite Pros: Minimal ongoing maintenance Resists moisture, rot, and insects Long warranties (25-50 years on many brands) Higher resale ROI in many markets Composite Cons: Higher upfront cost per square foot Can retain more heat in full sun Harder to match colors for repairs Fewer DIY-friendly options What Deck Builders in Louisville KY Recommend In my experience speaking with Louisville contractors, the majority of experienced builders lean toward composite for attached decks in the Louisville metro, particularly products like TimberTech and Trex, because the warranty coverage is transferable and the material simply holds up better through Kentucky's freeze-thaw cycle. Home Run Improvement is one Louisville-area contractor that specializes in TimberTech composite builds, offering a 10-year workmanship warranty alongside the manufacturer's coverage. Pro Tip: When a contractor names specific composite brands rather than just saying "composite," that's a positive signal. Before choosing a deck contractor you should know the specific type of decking and railing they will use, and you should pass on any contractors who only use vague terms like "composite" or "vinyl" instead of naming specific brands, because not all composite and vinyl decking are created equal, and you want to hire a contractor who knows what brands are industry leaders and won't skimp on durability to save money. Red Flags to Watch for When Hiring Deck Builders Structural Details That Separate Good Builders from Risky Ones Most homeowners focus on surface aesthetics, the decking boards, railing style, and stair design. Experienced deck builders focus on what's underneath. Every build should start with proper footing depth below Kentucky's frost line at 18-24 inches and a correctly attached ledger board, because these are the two structural details that separate a safe, lasting deck from one that shifts, sags, or pulls away from the house over time. Pressure-treated wood should be chosen for all framing, and any posts that come into contact with the ground should have an added level of protection. Ask your prospective contractor about their framing process directly. A builder who can explain footing depth, ledger attachment, and beam sizing without hesitation knows their trade. Pricing and Contract Red Flags Be cautious of any contractor who: Asks for a large upfront payment (more than 30-35% deposit before work begins) Cannot produce proof of general liability insurance on the spot Provides only a verbal estimate with no written scope of work Refuses to pull permits or suggests you don't need one for an attached deck Cannot name specific material brands they plan to use Getting price quotes from at least three companies is the best way to know what it takes to get a personal project completed, and having options allows people to pick a contractor that they know will do a great job. Considering that most deck jobs cost hundreds of dollars in supplies alone, it's best to choose a company that guarantees its work. This home inspector walkthrough shows exactly the kind of structural and code violations that result from hiring an unqualified deck builder. Frequently Asked Questions How much does a deck cost in Louisville KY? A deck in Louisville KY costs $25-$40 per square foot for pressure-treated pine, $35-$55 per square foot for cedar, and $45-$75 per square foot for Trex composite, installed, and a typical 12x16 deck runs $4,800-$14,400 depending on material. More complex designs with stairs, railings, built-in seating, or multi-level structures will push toward the higher end of that range. Do I need a permit for a deck in Louisville KY? Almost certainly yes, for any deck of meaningful size. Any deck attached to the house, or a freestanding deck over 200 square feet, requires a permit and site plan in Louisville. Your contractor should handle this as part of the project. For official guidance, consult the Louisville Metro Government's deck page directly. Is composite or wood better for Louisville's climate? Composite decking resists moisture and is less prone to rot, while wood can absorb water and may decay if not properly sealed and maintained, particularly in wet or humid climates. Given Louisville's high annual rainfall and freeze-thaw cycles, composite tends to outperform wood on longevity with far less maintenance, though wood remains a solid budget-friendly option if you're prepared for ongoing upkeep. What return on investment can I expect from a new deck? According to the 2025 Cost vs. Value Report , a wood deck addition recoups approximately 60.1% of its cost, while a composite deck addition returns approximately 83.8% through added home value. Beyond resale, you get daily use of the space in the meantime, so the lifestyle value compounds the financial return. What is the most important question to ask a deck contractor? Choosing a deck contractor is less about comparing bid totals and more about understanding who is accountable when something goes sideways. The single most revealing question is: "Who specifically will be on my property each day, and are they your direct employees or subcontractors?" How a contractor answers that tells you a great deal about their operation and your accountability if something goes wrong. The Bottom Line Choosing among deck builders in Louisville KY comes down to three things: verifying that the contractor is properly insured and bonded, confirming they handle permits without passing that task to you, and getting at least three line-item bids that spell out exactly what's included. The best deck builders in Louisville work transparently, name specific materials, and have a portfolio of local projects you can actually visit. If you're ready to start comparing options, Home Run Improvement offers free estimates and specializes in custom composite and wood deck builds across Louisville neighborhoods, from St. Matthews to Jeffersontown and the South End. Sources 2025 Cost vs. Value Report, Deck Addition , Remodeling Magazine. Wood and composite deck ROI benchmarks. https://blog.callcustombuilt.com/what-roi-deck-build Guide to Deck Project , Louisville Metro Government / Office of Construction Review. Permit requirements and design standards. Louisville Metro Construction Review guide Louisville Decks Page , LouisvilleKY.gov. Local building code and zoning rules for decks. Louisville Metro Government's deck page Site Plan Requirements in Louisville KY , SitePlanCreator.com. Permit thresholds for decks and accessory structures. https://www.siteplancreator.com/site-plans/louisville-ky Kentucky Building Permit Guide (2026) , PermitsGuide.com. Statewide deck permit thresholds and licensing rules. https://permitsguide.com/kentucky Questions to Ask Your Deck Contractor , Decks.com. Vetting checklist for licensing, bonding, and insurance. https://www.decks.com/resource-index/decking/questions-to-ask-your-deck-contractor/ How to Choose a Deck Contractor , AnotherAmazingDeck.com. Crew structure analysis and contractor vetting process. https://anotheramazingdeck.com/how-to-choose-a-deck-contractor/ Questions to Ask Your Potential Deck Contractor , Decks R Us. Material specification guidance and scheduling advice. https://www.decksrusllc.com/blog/questions-to-ask-your-potential-deck-contractor/ 10 Questions to Ask Before Hiring a Deck Contractor , DesignBuildersMD.com. Bid comparison and scope of work best practices. https://www.designbuildersmd.com/blog/questions-for-decking-contractors Composite vs Wood Deck Cost , MyModernRenovations.com. Annual maintenance cost comparison over 10 years. https://www.mymodernrenovations.com/company/blog/composite-vs-wood-deck-cost Composite vs Wood Decking (2026) , CompositeDeckDirect.com. 25-year total cost-of-ownership analysis. https://compositedeckdirect.com/blogs/composite/composite-vs-wood-decking Comparing Composite vs Wood Decking , Lowes.com. Climate and maintenance considerations by material. Composite decking resists moisture Deck Builders Louisville KY , Home Run Improvement. Local deck builder specializing in TimberTech composite with 10-year warranty. https://www.homerunimprovement.com/services/decking-louisville Cost to Build a Wooden Deck in Louisville KY , Contractor+. Entry-level wood deck cost ranges with labor included. https://contractorplus.app/resources/construction-costs/build-a-wooden-deck/louisville-ky Important Questions to Ask Your Deck Builder , Decksouth.com. Insurance verification and process transparency guidance. https://decksouth.com/5-important-questions-to-ask-your-deck-builder/