By Pat McIntyre
•
October 15, 2026
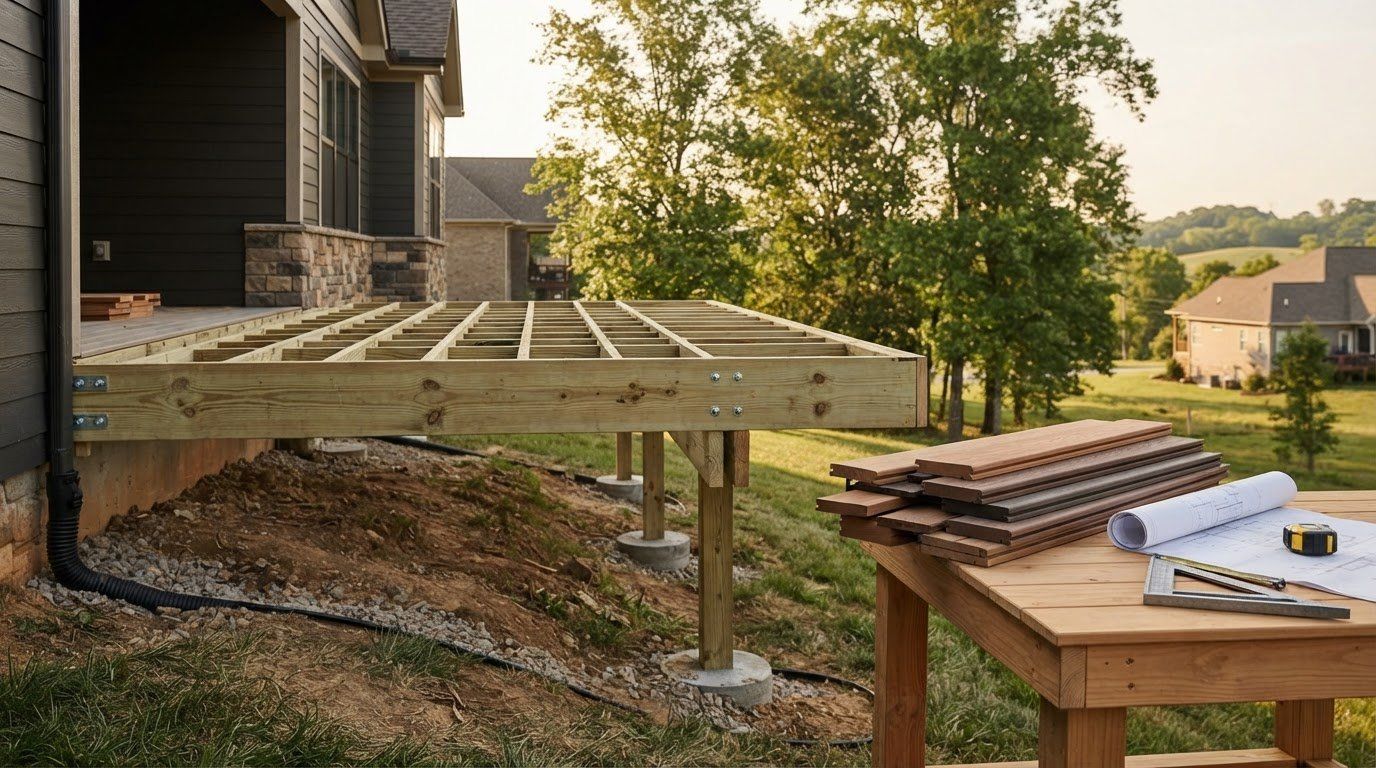
What if the most expensive deck mistake is hidden before the first board goes down? A weak ledger connection, footings planned without considering site conditions, or framing that doesn’t match the decking can create safety risks and costly rework. The common deck building mistakes to avoid often start in the planning stage, long before the finished surface is visible. It’s understandable to focus first on a deck’s size, appearance, and materials. But structural details, product-specific installation instructions, and local requirements matter just as much. Making those decisions early can help protect your home and your investment. This checklist explains which planning, framing, material, and safety issues deserve attention before construction begins. It also covers where project-specific professional judgment matters, including confirming current requirements with your local building department and reviewing applicable guidance from the International Code Council . For homeowners in Louisville, KY, Southern IN, Anchorage, KY, Crestwood, KY, Glenview, KY, Hurstbourne, KY, Indian Hills, KY, Jeffersontown, KY, Prospect, KY, Clarksville, IN, Bardstown, KY, and Mt Washington, KY, careful planning and experienced local workmanship can make the difference between a deck that simply looks finished and one built with stability in mind. Home Run Improvement provides residential decking services to help homeowners plan and build their projects. Key Takeaways Review the plans before construction so the layout, access, and project requirements are clear before work begins. Learn how to spot common deck building mistakes to avoid, and why visible surface issues may point to problems beneath the boards. Compare wood and composite decking based on care expectations and product-specific installation instructions. Use a stage-by-stage checklist to review framing, stairs, guardrails, and finish quality against approved plans and current local requirements. Consider professional planning when the site is complex, structural details are uncertain, or material instructions need careful interpretation. Common Deck Building Mistakes to Avoid Before Construction Begins Many serious deck problems begin as preventable planning oversights, not mistakes made after the boards are installed. A layout that ignores drainage or a plan that doesn’t reflect the site can lead to awkward access, water issues, or expensive changes once construction is underway. Use this early-stage checklist to review key decisions before framing and decking begin. The right details depend on the property, the deck’s design, and the instructions for the selected materials. A general overview of deck structures, uses, and materials is available in the deck (building) Wikipedia article , but it can’t replace project-specific planning. Homeowners in the area can also review Home Run Improvement’s residential decking services in Louisville as they consider project requirements and options. Skipping site assessment, measurements, and a workable layout A deck plan should fit the ground and the way people move through the home. If the yard slopes, water may collect near the house or flow toward the planned deck area. If the layout overlooks a door’s swing, a frequently used path, or an existing step, the finished space may feel cramped or difficult to access. Before settling on a design, record the available dimensions and intended uses. Note door locations, paths, changes in grade, and where water travels during rain. Think through practical details, too: where people will enter the deck, how they’ll move between the house and yard, and whether the layout leaves clear access to areas that need maintenance. These observations give a designer or contractor useful information before the framing plan is finalized. Don’t treat drainage as an afterthought. Consider how the deck’s placement relates to the home and surrounding ground, and flag areas where water already pools or runs. A visual site review can identify questions to resolve before construction, though it isn’t a substitute for professional judgment about grading, structure, or site-specific conditions. Starting without checking current local requirements Permit and building requirements can depend on the property’s location and project details. Before work starts, verify what applies to your specific address with the relevant building department. For Louisville properties, begin with the Louisville Metro Construction Review resources. In Southern Indiana, consult the official building or planning department serving the property’s city or county. Don’t rely on an old project, a neighbor’s experience, or a general online checklist as proof that the same requirements apply to your deck. Ask the responsible authority for current information about permits, plan review, and applicable building requirements. Keep that guidance with your project documents so the design and construction can be planned around it. Confirming requirements early is a practical step, not red tape to handle after materials arrive. Structural Deck Mistakes That Can Weaken the Frame A finished deck surface can look clean and solid while hiding problems in the frame beneath it. The boards don’t strengthen a weak connection or correct supports that weren’t planned for the structure. That’s why common deck building mistakes to avoid include errors in the ledger, posts, beams, footings, and joist layout, even when they aren’t obvious from above. Look for clues, but don’t treat them as a diagnosis. A deck that feels bouncy, has uneven boards, or shows movement may need closer inspection. Those symptoms alone can’t identify the cause. Structural dimensions and connections must follow the approved plans, applicable requirements, and the chosen decking’s installation instructions. Sound framing depends on coordinated supports, connections, and product-specific spacing. Weak ledger connections, beams, posts, and footings The ledger connects the deck to the house, so it must attach to suitable house framing, not simply to siding or another exterior finish. The connection and its protection from water need to be planned together. If the attachment is uncertain, don’t assume that adding visible fasteners will solve the problem. Follow the load path from the ledger and beams through the posts to stable support points. Beam-to-post connections should match the approved design, and footings should support the structure as planned. If you see shifting, separation, sagging, or signs of decay, treat them as reasons to seek a qualified assessment, not proof of one specific defect. The North American Deck and Railing Association (NADRA) guidelines offer additional safety and education resources for homeowners. Incorrect joist spacing, alignment, and blocking Joist spacing isn’t a one-size-fits-all measurement. It depends on the decking product, installation pattern, and manufacturer’s instructions. If framing is laid out for a different product or pattern, boards may not have the support the installation requires. Review the selected product’s current instructions before framing is complete, and keep the guidance with the project documents. For a product-specific example, TimberTech’s published guidance calls for blocking at intervals of 4 to 6 feet in relevant applications. That’s TimberTech guidance, not a universal rule for every deck. Follow the instructions for the actual decking system and approved plans. See TimberTech installation guides for product-specific details. Check that joists run in the intended direction, remain aligned, and provide consistent support where boards meet or the layout changes. TimberTech’s guidance also specifies joist spacing based on the product: spacing should not exceed 16 inches on center, while TT and Advanced PVC Max boards can allow up to 24 inches on center. Closer spacing of 12 inches or less can create a more rigid feel. These details are product-specific, so follow the instructions for the decking you select. If the existing frame or house attachment is uncertain, get professional judgment before covering it with decking. A careful framing review is easier while connections are still visible. Homeowners planning a Louisville-area deck can learn more about Home Run Improvement’s decking services . Decking, Fastener, and Water-Management Mistakes to Catch The right deck surface is the one that fits your priorities and can be installed correctly on the planned frame. Wood and composite decking differ in appearance, care expectations, and installation instructions. Wood may need periodic cleaning and protective finishes, depending on the product and exposure. Composite has its own care requirements and isn’t maintenance-free by default. Compare the upkeep you’re comfortable with alongside the look and feel you want. Don’t select boards by appearance alone. Different products and board profiles can require different framing details, spacing, fastening methods, and edge clearances. If you choose the decking after the frame is built, the structure may not match the installation requirements. Review those instructions while planning, then make sure the framing and materials are coordinated. Homeowners considering a Louisville-area project can include Home Run Improvement’s residential decking services in their material planning. Choosing decking without considering installation requirements Compare the expected upkeep, appearance, and installation guidance for each option before settling on a material. Check instructions for the specific product, not just general advice about wood or composite. Products within the same broad category can have different requirements. Follow the selected decking manufacturer’s instructions for fasteners, spacing, and installation. When the plan and product guidance don’t align, resolve the mismatch before boards are installed. Using the wrong fasteners or overlooking flashing Fasteners need to suit both the decking material and the application. An incompatible or incorrectly installed fastener can affect how boards sit, hold, or appear over time. Some systems call for concealed fasteners, while others specify a particular face-fastening approach. Don’t substitute based on appearance or convenience. Follow the product’s instructions for fastener type, placement, and installation. Water management matters where the deck meets the house. Properly planned flashing helps direct water away from the connection and the building materials behind it. If flashing is missing, damaged, or installed in a way that traps water, moisture can reach areas that should remain protected. A neat surface won’t correct a poor water-management detail underneath. Before covering the frame, pause if you see questionable connections, staining, soft or deteriorated wood, or signs that water may be getting behind the structure. These observations don’t identify the cause on their own, but they warrant assessment before work proceeds. Don’t conceal a concern beneath new decking. Resolving it while the relevant area is accessible can help prevent avoidable rework and protect the finished installation. A Practical Deck-Building Checklist for Safety and Finish Quality A review at each project stage helps catch mismatches before they’re hidden by the next layer of work. Use this checklist to compare the plans, installed work, and product instructions. It can help you spot common deck building mistakes to avoid, but it doesn’t replace a professional assessment or the authority’s review of requirements for your property. Review the plan before materials and framing are committed Before construction starts, make sure the written plan reflects how you intend to use the deck and how it fits the house and yard. Check access, drainage, structural details, selected materials, and applicable local requirements. Resolve unanswered questions before ordering materials or beginning framing. Confirm the layout. Compare the dimensions and planned use with house access, door locations, paths, grade, and water movement around the site. Make sure stairs and routes to the yard are accounted for, not added as an afterthought. Match the materials to the plans. Check that the specified decking and framing details work together. Keep the selected product’s installation instructions with the project documents so spacing, fastening, and other requirements can be reviewed as work proceeds. Verify current local requirements. Confirm which permits and building requirements apply to the specific property with the responsible local authority. Louisville homeowners can consult the official Louisville Metro Construction Review information. For Southern Indiana properties, use the official building or planning resources for the city or county where the home is located. Requirements can vary by jurisdiction, so don’t rely on a different property’s project as a guide. Inspect framing, stairs, railings, and finishing details During construction, review each stage while the work is still visible. Use the approved plans and product instructions as the reference, rather than relying only on how the deck looks from above. If a detail doesn’t appear to match, pause and have it addressed before the next stage covers it. Review the frame. Compare framing alignment, connections, joist spacing, and blocking with the plans and applicable product instructions. Look for changes from the documented design that haven’t been resolved. Check stairs, guardrails, and access. Assess their placement and construction against the approved plans and current requirements for the property. Confirm that doors, stairs, and routes across the deck remain usable and unobstructed. Look over the finish. Before considering the project complete, check for incomplete flashing, exposed or unsuitable fasteners, loose-looking boards, and signs of water-management problems. These observations don’t diagnose a cause, but they’re reasons to request a closer review before accepting the finished work. A steady, documented review makes it easier to raise concerns at the right time. Home Run Improvement provides residential decking services in Louisville and its wider service area. Home Run Improvement residential decking services Avoid Deck-Building Mistakes With Professional Project Planning A homeowner checklist can reveal questions that need attention, but it can’t replace project-specific judgment. Planning support is especially useful when the framing is uncertain, the deck’s connection to the house needs review, the site has challenging slopes or drainage, or the chosen material’s installation instructions are unclear. Addressing those details before construction advances can help prevent avoidable changes later. When a deck project benefits from experienced oversight Structural uncertainty deserves careful attention. If the existing frame is difficult to assess, the house attachment raises questions, or the design includes multiple levels, unusual angles, or tight access, a professional can help connect site conditions with the structural plan and selected materials. That means looking at how the whole project fits together, not treating each decision in isolation. Experienced planning also helps surface conflicts early. For example, a layout may look workable on paper but require adjustments for the property’s grade, water movement, door access, or product-specific framing instructions. A qualified deck professional can help review those conditions and plan construction details against the project documents and applicable requirements. Good planning reduces uncertainty, but it doesn’t eliminate normal upkeep or prevent every future issue. Plan a Louisville-area deck project with a clear next step For homeowners in Louisville and Home Run Improvement’s wider service area, professional deck-building services provide a practical path from early planning to construction. A project discussion can bring the intended layout, material choice, site conditions, and structural questions into one plan. Home Run Improvement offers free estimates for residential decking projects. Home Run Improvement’s workmanship is backed by a 10-year warranty. Review the warranty terms to understand the stated coverage and its applicability to your project. Before work begins, gather any existing plans, note your intended uses for the deck, and record questions about the site or materials. Clear information helps make project planning more focused. If a structural detail remains uncertain, resolve it before it disappears beneath the finished surface. Residential decking and project planning Make Your Deck Plan the Strongest Starting Point A durable deck begins with decisions that fit your home, your plans, and the way you want to use the space. If a detail feels uncertain, resolve it before construction moves forward. That small pause can help prevent a rushed choice from becoming a correction later. Use the common deck building mistakes to avoid as a prompt to prepare for a project conversation: note what matters most to you, gather any existing plans, and identify questions about the site or materials. A clear starting point helps turn ideas into a practical plan and gives you more confidence in the decisions ahead. Louisville-area deck planning information With thoughtful preparation and the right guidance, you can move ahead with greater clarity and build a deck designed to serve your home well. Frequently Asked Questions Do I need a permit to build a deck in Louisville, Kentucky? A permit may be required, depending on your property and project details, so verify before construction begins. Check current guidance with Louisville Metro Construction Review, the official local resource. If your home is outside Louisville Metro, consult the authority for that address. Assuming a neighbor’s deck followed the same process can lead to problems. Checking requirements early is one of the common deck building mistakes to avoid. Can I attach a deck ledger board over siding? No, siding isn’t a structural attachment point for a deck ledger. The ledger needs to connect to suitable house framing, with the exterior finish and water-management details handled appropriately. Simply driving fasteners through siding can leave the ledger separated from the framing or create a path for water. If you can’t tell what’s behind the siding, have the attachment assessed before building around it. How far apart should deck joists be? There isn’t one spacing that suits every deck. The decking product, board profile, and installation pattern determine the required support, so use the instructions for the exact material selected. For instance, diagonal layouts may need different framing support than boards installed perpendicular to joists. TimberTech provides product-specific joist-spacing guidance. Don’t apply one manufacturer’s directions to another product. What happens if a deck is built without proper flashing? Water can get behind the ledger or into the house-side framing, where it may contribute to moisture damage and deterioration that isn’t visible from the deck surface. Flashing helps direct water away from that connection, but it can’t correct framing that’s already damaged. If you notice staining, soft wood, or signs of moisture near the house attachment, have the area assessed before covering it or adding new decking. Can new decking be installed over an existing deck frame? Sometimes, but only after the frame is assessed for its condition and compatibility with the new boards. Look beyond the visible surface: check for movement, deterioration, misalignment, and framing that doesn’t match the new product’s instructions. A frame that supported one type of decking may not suit another product or layout. If the structure or house connection is uncertain, get a qualified review before covering it. When are guardrails required on a deck? Requirements depend on the locally adopted building rules and the deck’s height. The research guidance for residential decks identifies guardrails for decks more than 30 inches above ground, with a minimum height of 36 inches, but local requirements may differ. Check the rules that apply to your property and compare the completed railings with approved plans. Include stairs and transitions in that review, since safety details apply beyond the deck’s edge. Is composite decking installed the same way as wood decking? No. Composite and wood decking can require different framing, spacing, fasteners, and installation methods. A composite board may use a specific fastening system or have support requirements that differ from the lumber boards in a typical wood design. Follow the instructions for the chosen product and board profile, including details for edges and joints. Matching the frame and fasteners to the material helps prevent fit and finish problems. Planning a deck in Louisville, Southern Indiana, or a nearby community? Request a free estimate from Home Run Improvement for your residential decking project .