By Pat McIntyre
•
September 15, 2026
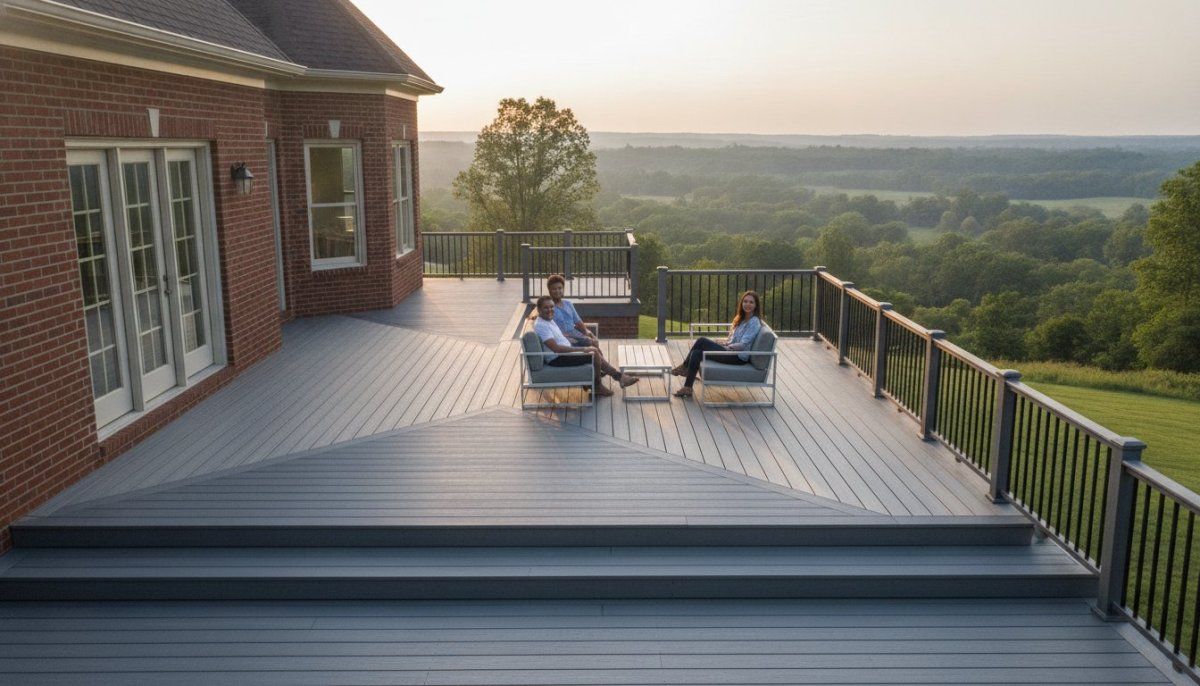
For a Louisville homeowner, a new deck is more than just a home improvement project; it’s an investment in your lifestyle. It’s the future site of family barbecues, quiet morning coffees, and relaxing evenings under the Kentucky sky. But before the first board is laid, a critical decision must be made: will you choose the timeless appeal of a natural wood deck or the modern resilience of composite decking? This choice often comes down to one primary factor: cost. However, a simple price tag comparison doesn’t tell the whole story. The true composite decking vs. wood cost in Louisville is a calculation that extends far beyond the initial quote. It involves understanding upfront material and labor expenses, the long-term financial commitment of maintenance, and the overall return on your investment over the life of the deck. At Home Run Improvement, we believe an informed homeowner makes the best decision for their property. We’ve spent years building and installing high-quality decks across Louisville and Southern Indiana, and we’ve seen firsthand how material choices impact a family’s budget and free time. This comprehensive guide is designed to break down the real costs, both immediate and hidden, to help you choose the perfect decking material for your home. The Upfront Investment: A Head-to-Head Cost Analysis When you receive a quote for a new deck, the total price is a combination of materials, labor, and foundational work. Let’s dissect these initial costs to understand where wood and composite decking stand in the Louisville market. Wood Decking Material Costs: The Traditional Options Natural wood offers a classic aesthetic that many homeowners love. The upfront cost varies significantly based on the type of wood you select. Pressure-Treated (PT) Pine: This is the most common and budget-friendly decking material. It’s pine lumber that has been chemically treated to resist rot, decay, and insects. While it has the lowest initial cost, it also requires the most diligent maintenance to preserve its integrity and appearance. Cedar and Redwood: These softwoods are a step up in both price and natural durability. They contain natural oils (tannins) that make them more resistant to rot and insects than untreated pine. They offer a beautiful, rich color but will still require regular sealing to prevent them from weathering to a silver-gray. Exotic Hardwoods (Ipe, Tigerwood): At the premium end of the wood spectrum, exotic hardwoods like Ipe are incredibly dense, durable, and naturally resistant to almost everything. Their exceptional longevity and stunning appearance come with the highest price tag for natural wood materials. TimberTech Composite Decking Costs: The Modern Standard Composite decking, led by industry innovators like TimberTech, represents a significant evolution in outdoor living materials. It is an engineered product made from a blend of wood fibers and recycled plastics, capped with a durable polymer shell for protection. It’s important to note that "composite" isn't a single product. TimberTech offers a range of product lines, allowing homeowners to balance their budget with performance and aesthetic goals: TimberTech EDGE™: This line offers an accessible entry point into high-performance composite decking, providing superior durability compared to wood at a more competitive price point. TimberTech PRO™: The "better" category features enhanced wood grain textures and color blending, backed by a 30-year warranty, offering a fantastic balance of beauty and performance. TimberTech AZEK™: This premium line is not a composite but a 100% polymer (PVC) decking. It offers the highest level of performance, stain resistance, and scratch resistance, often backed by a 50-year or lifetime warranty. Generally, even entry-level TimberTech decking will have a higher upfront material cost than pressure-treated pine and cedar. However, its price is often competitive with premium exotic hardwoods. Labor and Installation: The Cost of Craftsmanship Whether you choose wood or composite, the quality of the installation is paramount. Labor costs in the Louisville area depend on the deck's size, complexity (e.g., multiple levels, stairs, built-in benches), and the contractor's experience. While it may be tempting to cut costs with a less experienced installer, this often leads to expensive problems down the road. A professional installation by a team like Home Run Improvement ensures that the deck is not only beautiful but also structurally sound and compliant with local building codes. For composite decking, expert installation is even more critical. These materials have specific requirements for gapping and fastening to allow for thermal expansion and contraction. Improper installation can void the manufacturer's warranty, turning a premium investment into a liability. This is why our work is backed by our own 10-Year Craftsmanship Warranty , giving you peace of mind that the job is done right. The Initial Cost Verdict For the lowest upfront cost, pressure-treated wood is the clear winner. However, if you are considering premium cedar or exotic hardwoods, the initial material cost begins to approach that of high-quality composite decking like TimberTech. But as we will explore, the initial price tag is just the first chapter in the story of your deck's total cost. The Long-Term Cost of Ownership: Where the Real Value Is Revealed A deck is not a one-time purchase; it’s a long-term asset that requires care. This is where the financial gap between wood and composite decking dramatically shifts. The "Protective Expert" in us must advise you to look beyond the initial quote and consider the lifetime cost of your investment. The Ongoing Demands of a Wood Deck A wood deck is a commitment. To protect it from Louisville’s humid summers and freezing winters, you must perform regular, often costly, maintenance. Without it, wood will inevitably splinter, warp, rot, and fade. The Annual Maintenance Cycle for Wood: Thorough Cleaning: At least once a year, the deck must be cleared and scrubbed to remove dirt, mildew, and algae. This often requires a pressure washer, which can damage the wood if not used correctly. Sanding: To prepare the surface for a new coat of sealant and to smooth out any minor splinters, the deck may need to be sanded every few years. Staining and Sealing: This is the most critical step. Every 1-3 years, the deck must be re-stained and re-sealed to protect it from UV rays and moisture. Calculating the Financial and Time Cost: Materials: A 5-gallon bucket of quality deck stain and sealer can cost hundreds of dollars. Add in cleaners, brushes, rollers, and tarps, and the annual material cost can easily be $200-$500 or more, depending on your deck's size. Labor: You can either do it yourself, sacrificing several weekends of your valuable time, or hire a professional, which can cost $500-$1,500+ for each maintenance cycle. Over a 15-year period, these maintenance costs can add up to thousands, or even tens of thousands, of dollars. This ongoing expense completely changes the composite decking vs wood cost Louisville equation. The "Set It and Forget It" Advantage of TimberTech This is where composite decking truly shines. TimberTech was engineered to eliminate the costly and time-consuming maintenance associated with wood. The durable polymer cap that protects the board resists fading, staining, moisture, and mildew. Maintenance for TimberTech is simple: An occasional cleaning with soap and water or a gentle deck cleaner is all that’s needed to keep it looking new. There is no sanding. No staining. No sealing. Ever. When you compare the long-term costs, the higher initial investment in TimberTech is often recouped in just a few years. The money you save on stains, sealers, and labor—not to mention the weekends you get back—makes it the more economical choice over the life of the deck. Beyond Cost: A Deeper Comparison of Performance and Livability While cost is a major driver, the best deck for your home also depends on durability, aesthetics, and safety. Here’s how the two materials stack up in the areas that impact your daily enjoyment. Durability and Lifespan in the Ohio Valley Climate Louisville's weather can be tough on outdoor structures. The high humidity, seasonal rainfall, and temperature swings are a constant threat to traditional wood. Wood: Even with perfect maintenance, a pressure-treated pine deck typically lasts 10-15 years before major repairs or replacement are needed. Cedar may last 20-25 years. Wood is susceptible to rot, insect damage (especially termites), and warping as it absorbs and releases moisture. TimberTech: Built to withstand the elements, TimberTech decking is exceptionally durable. It resists moisture absorption, meaning it won't rot, warp, or crack like wood. As detailed in their technical guides, TimberTech Advanced PVC decking has a service temperature range of –70°F to 200°F, making it stable in both deep freezes and summer heat. This resilience is why TimberTech backs its products with industry-leading warranties, often ranging from 25 years to a lifetime. Aesthetics and Design Freedom Your deck should be a beautiful extension of your home. Both materials offer distinct visual appeals. Wood: Offers an authentic, natural beauty that is undeniable. It can be stained in a variety of colors to match your home. However, maintaining that color requires constant work. Left untreated, all wood will eventually fade to a weathered gray. TimberTech: Modern manufacturing allows TimberTech to offer a vast array of colors and realistic wood grain patterns that mimic the look of high-end hardwoods without the upkeep. The color is consistent and protected by UV inhibitors to resist fading. Furthermore, systems like TimberTech's CONCEALoc® and Cortex® hidden fasteners create a smooth, fastener-free surface that is impossible to achieve with traditional face-screwed wood boards. Safety and Comfort for Your Family A deck is a place for family, which makes safety a top priority. Wood: The biggest safety concern with wood is splintering. As the wood ages and weathers, it can create painful splinters, making it less friendly for bare feet, children, and pets. Wood can also become very slippery when wet or when algae and mildew are present. TimberTech: Because it’s a composite material with a protective cap, TimberTech will never splinter. It is designed for better slip resistance than wood, providing more secure footing in wet conditions. Environmental Considerations For environmentally-conscious homeowners, the choice is more nuanced than it first appears. Wood: As a natural resource, wood is renewable. To ensure responsible sourcing, you can look for lumber certified by the Forest Stewardship Council (FSC) . However, the pressure-treating process involves chemicals, and the stains and sealers required for maintenance often contain volatile organic compounds (VOCs). TimberTech: As a brand of The AZEK Company, TimberTech has a strong focus on sustainability. Their decking is made from a high percentage of recycled materials, including plastic bags, milk jugs, and reclaimed wood fibers, diverting hundreds of millions of pounds of waste from landfills each year. You can learn more about their recycling initiatives on the AZEK website . This commitment to using recycled content makes it a highly sustainable choice. The Foundation of a Great Deck: Why Professional Installation is Non-Negotiable Regardless of which surface material you choose, it will be supported by a substructure, which is almost always built from pressure-treated wood. The performance and longevity of your entire deck—wood or composite—depend entirely on the quality of this hidden foundation. Building a Resilient Substructure A poorly constructed frame will undermine even the most expensive decking materials. At Home Run Improvement, we build every deck substructure to exceed standards, ensuring it can provide decades of reliable support. We follow manufacturer best practices, such as those outlined by TimberTech, which are critical for performance: Proper Joist Spacing: We ensure joists never exceed 16 inches on center to provide a solid, rigid feel underfoot and prevent board sagging. Essential Blocking: We install blocking between joists every 4-6 feet to prevent them from twisting and to strengthen the overall frame. Joist Protection: We strongly recommend using products like TimberTech Pro™ Tac Joist Tape . This self-adhering tape is applied to the tops of joists and beams, creating a waterproof barrier that protects the structural lumber from moisture penetration—the primary cause of rot. This small addition can significantly extend the life of your deck's foundation. This meticulous approach to the substructure is a hallmark of a true expert TimberTech deck builder and ensures your investment is protected from the ground up. The Final Verdict: What’s the Right Choice for Your Louisville Home? So, when evaluating the composite decking vs. wood cost in Louisville , what is the final answer? Choose a Wood Deck if: Your primary concern is the lowest possible upfront cost. You genuinely enjoy the process of annual maintenance projects and have the time and budget for them. You are committed to the authentic look and feel of natural wood and accept the upkeep it requires. Choose a TimberTech Composite Deck if: You prioritize long-term value and a lower total cost of ownership over the deck's life. You want to spend your free time enjoying your deck, not maintaining it. You value superior durability, fade and stain resistance, and splinter-free safety for your family. You desire a premium, polished aesthetic with a wide range of design options. For the vast majority of Louisville homeowners we work with, the long-term benefits, minimal maintenance, and enduring beauty of TimberTech composite decking make it the clear winning investment. The initial cost is higher, but the peace of mind and decades of worry-free enjoyment provide a return that far exceeds the price difference. Ready to explore the possibilities for your own backyard oasis? The team at Home Run Improvement is here to help. We can provide a detailed, no-obligation estimate that breaks down the costs for different material options and helps you design the deck of your dreams. Contact us today to schedule your free consultation and take the first step toward transforming your outdoor living space.